# How to Photograph Delicate Jewelry: Tips and Tricks
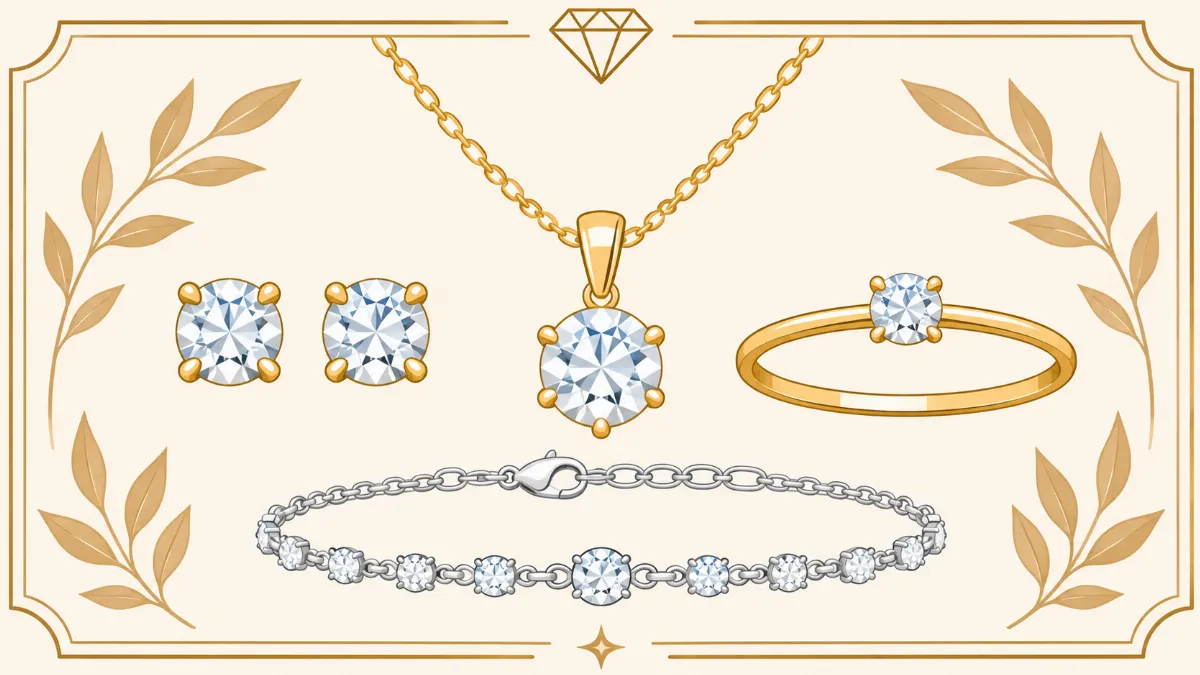
Delicate jewelry has a beauty that comes from its small details. Thin gold chains, minimalist rings, tiny diamond studs, fine bracelets, and lightweight pendants may look simple, but photographing them can be surprisingly difficult.
Unlike larger jewelry pieces, delicate accessories can easily disappear against the background. Thin chains may look blurry, small gemstones may lose their definition, and polished metal surfaces may reflect unwanted colors or dark objects.
Even a slight movement of the camera or jewelry can affect the final photograph.
For jewelry brands and online sellers, these problems matter because customers need clear images to examine the products they are considering purchasing.
A delicate necklace may contain tiny chain links, a small clasp, and a miniature pendant. If these details are not visible, customers may struggle to evaluate the design.
Learning **how to photograph delicate jewelry** involves careful product preparation, suitable lighting, stable camera settings, thoughtful styling, and accurate photo editing.
You do not always need a large photography studio to achieve good results. A clean surface, a suitable camera, a tripod, and controlled lighting can provide a useful starting point.
In this guide, we will discuss practical tips for photographing delicate rings, necklaces, earrings, and bracelets. You will also learn how to manage reflections, choose backgrounds, improve close-up sharpness, and prepare professional jewelry images for online stores.
1. Why Delicate Jewelry Is Difficult to Photograph
Delicate jewelry presents several challenges that are less noticeable when photographing larger products.
Small jewelry pieces contain fine structures that may be difficult for a camera to reproduce clearly.
Thin Chains Can Disappear
Fine gold and silver chains may blend into white or light-colored backgrounds.
This is especially common when the metal and background have similar brightness.
Careful lighting and suitable background contrast help maintain visible chain edges.
Small Gemstones Require Accurate Focus
Tiny gemstones may contain details that are difficult to see without close-up photography.
When the camera focuses on the wrong area, important features may appear blurry.
Lightweight Jewelry Moves Easily
Thin chains and dangling earrings can move when touched or exposed to airflow.
Even small movements may affect close-up photographs.
Reflective Surfaces Create Distractions
Polished metals reflect nearby equipment, backgrounds, and lighting sources.
These reflections can make delicate jewelry appear darker or less defined.
Small Details Require Careful Editing
Retouching fine jewelry requires precision.
An overly large editing brush can accidentally remove chain links, thin prongs, or decorative patterns.
2. Prepare Delicate Jewelry Before the Photoshoot
Product preparation can reduce the amount of editing required after photography.
Delicate jewelry should be handled carefully because thin components may bend or become tangled.
Clean the Jewelry Gently
Use a suitable soft cloth or cleaning method recommended for the material.
Avoid abrasive products that may scratch polished metal or damage delicate finishes.
Pearls, glued gemstones, and plated jewelry may require special care.
Remove Loose Dust
Use a clean, soft brush or another material-safe method to remove loose particles.
Avoid touching delicate gemstone settings unnecessarily.
Untangle Fine Chains
Inspect necklaces and bracelets before placing them on the photography surface.
Straighten twisted sections carefully.
Do not pull forcefully on thin links.
Check Clasps and Settings
Make sure clasps are positioned correctly and decorative elements are not accidentally hidden.
Inspect small gemstone settings before photographing.
Prepare a Clean Workspace
Use a clean surface and keep unnecessary equipment away from the product.
This reduces the chance of introducing dust or damaging delicate components.
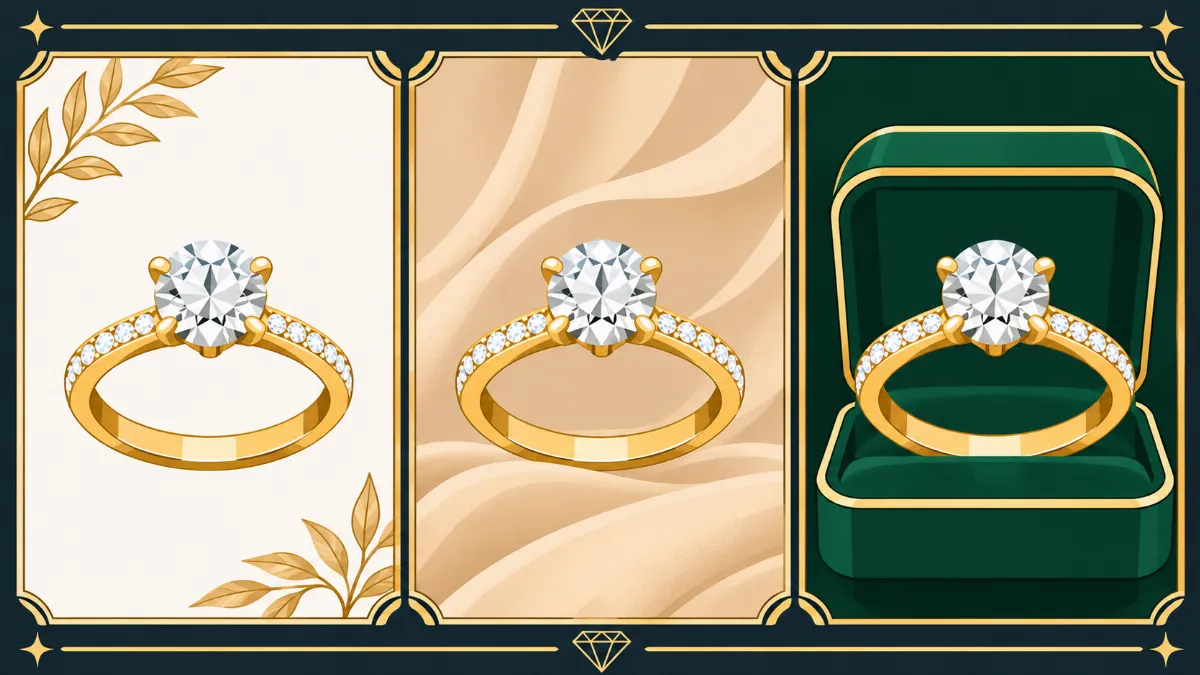
3. Choose the Best Background for Delicate Jewelry
The background should provide enough contrast to make fine jewelry details visible.
A clean background also helps customers focus on the product.
White Backgrounds
White backgrounds are common in e-commerce photography.
They work well for many gold jewelry products.
However, thin silver chains may require careful lighting to remain visible.
Ivory and Champagne Beige
Ivory and champagne-beige backgrounds can provide a softer appearance.
They are useful for delicate gold necklaces, minimalist rings, and pearl jewelry.
Light Gray Backgrounds
Light gray can provide useful contrast for silver jewelry without creating a dramatic appearance.
It may also help define fine metal edges.
Dark Backgrounds
Charcoal and deep navy backgrounds can create contrast with lighter jewelry.
However, reflective metal may pick up dark surroundings.
Use controlled lighting to prevent delicate chains from appearing black.
Matte Background Materials
Matte paper and subtle fabric textures can help reduce distracting reflections.
Avoid rough materials that may catch or damage fine chains.
4. Use Soft Lighting to Reveal Fine Jewelry Details
Lighting is one of the most important parts of delicate jewelry photography.
A suitable lighting setup helps reveal metal edges, gemstone settings, and small decorative features.
Start With a Large Diffused Light
A softbox or diffusion panel can produce smoother reflections on polished metal.
Position the light to make the jewelry's shape visible.
Use White Reflector Cards
White cards can reflect light onto darker areas of the jewelry.
They are useful for maintaining visible edges on thin chains and rings.
Control Dark Reflections
Black cards may help define reflective edges, but excessive dark areas can obscure delicate details.
Adjust their placement carefully.
Avoid Harsh Direct Flash
Direct flash may create strong glare and uneven highlights.
Diffused lighting usually provides greater control over reflective surfaces.
Maintain Accurate Metal Colors
Gold and silver should retain their actual appearance.
Avoid lighting conditions that introduce strong yellow, blue, or green color casts.
5. Choose the Right Camera and Lens
The best camera setup depends on the jewelry size, desired image quality, and available equipment.
Use a Camera With Manual Controls
Manual exposure and focus controls can help maintain consistent photographs.
They are particularly useful for detailed product photography.
Consider a Macro Lens
A macro lens allows close-up photography of small objects.
It can help reveal fine chain links, gemstone settings, and decorative metalwork.
Use a Tripod
A tripod reduces camera movement and helps maintain consistent framing.
It is especially useful when photographing small products at close distances.
Use a Remote Shutter or Timer
Pressing the shutter button can introduce camera movement.
A remote shutter or short timer can help avoid this problem.
Review Images at Full Size
Check photographs on a computer or enlarged camera display.
Small focusing errors may be difficult to notice on a camera screen.
6. Best Camera Settings for Delicate Jewelry Photography
Camera settings affect image sharpness, color accuracy, and overall detail.
There is no single setting that works for every jewelry product, but several starting points are useful.
Aperture
An aperture around f/8 to f/11 can be a reasonable starting point for many camera and macro lens combinations.
However, the best setting depends on the sensor, lens, magnification, and desired depth of field.
ISO
Use a low ISO when lighting conditions allow.
ISO 100 or 200 may provide clean image quality in a controlled studio.
Shutter Speed
When using a tripod and stationary jewelry, slower shutter speeds may be practical.
If the jewelry moves, use a faster shutter speed or suitable flash lighting.
White Balance
Set white balance according to the light source.
A neutral reference can help maintain accurate metal and gemstone colors.
File Format
RAW files provide flexibility for exposure and color adjustments.
Keep the original files for future editing.
7. How to Photograph Thin Gold and Silver Chains
Thin chains are among the most challenging jewelry products to photograph.
Their small links and reflective surfaces can make them difficult to separate from the background.
Arrange Chains Naturally
Lay the chain in a smooth curve or another arrangement that shows its design.
Avoid tight bends that distort the natural appearance.
Use Suitable Background Contrast
Choose a background that makes the chain visible.
A light gray surface may help silver jewelry stand out more clearly than pure white.
Position the Pendant Carefully
For pendant necklaces, make the pendant the main focal point.
Keep the chain visible without allowing it to dominate the composition.
Avoid Overlapping Links
Try to prevent chain sections from crossing unnecessarily.
Overlapping links can make the product harder to examine.
Check the Entire Chain
Before taking the final photograph, inspect the chain for twists, hidden sections, and uneven positioning.
8. How to Photograph Small Earrings
Small earrings require careful positioning because their size makes details difficult to see.
Photograph Matching Pairs
Arrange matching earrings with consistent spacing and angles.
This helps customers compare both pieces.
Show the Front Design
Use a front-facing photograph to show gemstones, decorative patterns, or metal shapes.
Include Side Views
Side views can reveal earring thickness, posts, clasps, and settings.
Use Suitable Supports
Small display stands or removable supports can help position earrings.
Avoid damaging delicate components.
Photograph Earrings on a Model
Lifestyle images can help customers understand approximate size and appearance.
Make sure hair and clothing do not hide the earrings.
9. How to Photograph Delicate Rings
Minimalist rings and thin bands may appear less defined in photographs than larger statement rings.
Position the Ring Carefully
Choose an angle that shows the band shape and gemstone setting.
Avoid hiding the back of the ring unnecessarily.
Maintain Visible Metal Edges
Use controlled lighting to separate the ring from the background.
Focus on the Gemstone
For gemstone rings, ensure the stone and setting are clearly visible.
Show the Band Thickness
Include a side photograph when the thickness is an important product feature.
Avoid Distorting the Ring
Do not stretch or reshape the ring during editing.
Maintain its original proportions.
10. Use Focus Stacking for Small Jewelry Details
Close-up photography often produces a shallow depth of field.
This means that one part of the jewelry may appear sharp while another part looks blurry.
Focus stacking can help address this limitation.
What Is Focus Stacking?
Focus stacking involves taking several photographs of the same stationary product at different focus distances.
The sharp areas are then combined into one image.
When Is It Useful?
Focus stacking can be helpful for rings, pendants, gemstones, and intricate settings.
It is particularly useful when important details extend across different distances from the camera.
How to Photograph a Focus Stack
Keep the camera, lighting, and jewelry stationary.
Take a series of photographs while gradually moving the focus point from the nearest important detail to the farthest.
Make sure adjacent photographs have overlapping sharp areas.
Combine the Photographs
Use suitable editing software to align and blend the images.
Review the result for halos, doubled edges, or other blending problems.
Preserve Product Accuracy
The final image should show the actual jewelry.
Do not use the stacking process to change its shape or invent missing details.
11. Styling Ideas for Delicate Jewelry Photography
Delicate jewelry often looks best with simple styling.
The arrangement should complement the product without overwhelming its small details.
Minimalist Flat Lay
Place a thin gold necklace on a clean ivory surface.
Arrange the chain in a smooth curve and leave sufficient empty space.
Fine Jewelry on Linen
Use subtle beige linen to create a soft lifestyle appearance.
Keep fabric folds away from important jewelry details.
Earrings on a Display Card
Use a simple display card to hold small earrings in a consistent position.
Choose a neutral color.
Delicate Bracelet on a Wrist
A lifestyle photograph can show how a bracelet appears when worn.
Use a relaxed hand position and simple clothing.
Minimalist Ring Collection
Arrange several thin rings with balanced spacing.
Keep individual designs visible and avoid excessive overlapping.
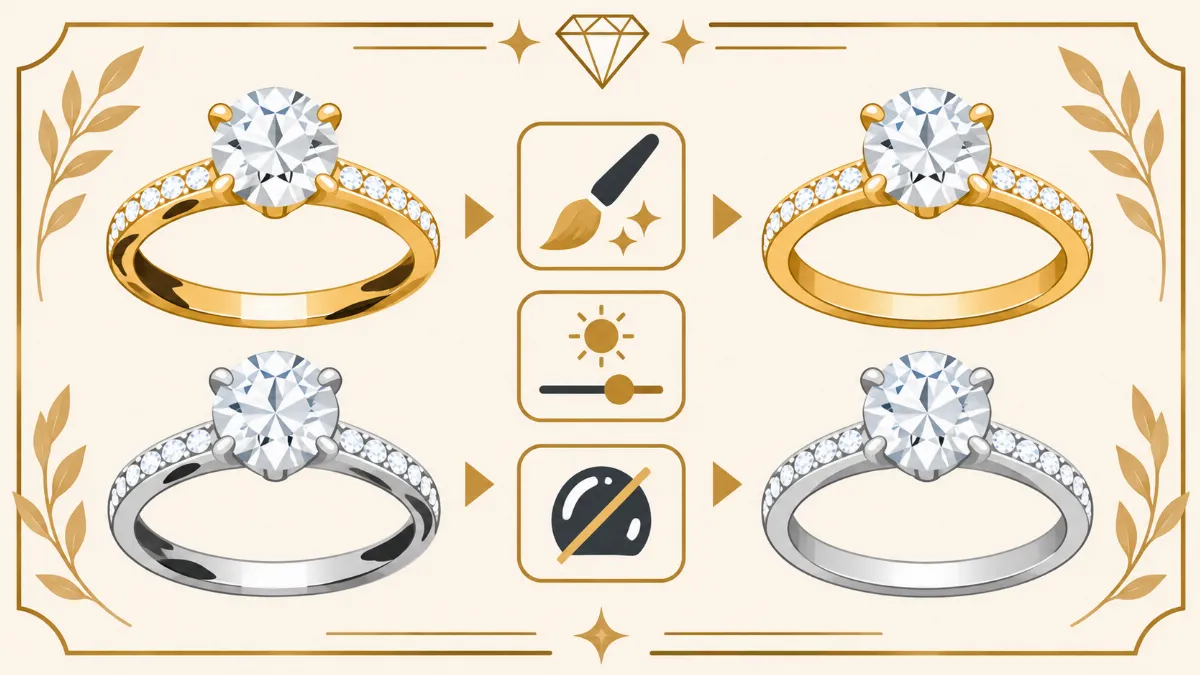
12. How to Edit Delicate Jewelry Photos Professionally
Photo editing can help correct temporary distractions and prepare delicate jewelry photographs for online stores.
However, small jewelry structures require careful retouching.
Remove Dust and Fingerprints
Use localized editing tools to remove temporary marks.
Avoid removing genuine design features.
Correct Metal Colors
Maintain accurate gold, silver, rose gold, and platinum tones.
Avoid excessive saturation or unwanted color changes.
Reduce Distracting Reflections
Polished metal may contain black reflections or harsh glare.
Correct these areas carefully while maintaining natural highlights.
Sharpen Fine Edges
Apply selective sharpening to thin chains, ring edges, prongs, and gemstone settings.
Avoid aggressive sharpening that creates false details.
Clean Backgrounds
Remove unwanted background marks and prepare consistent product images.
Use precise selections around thin chains and small components.
Preserve the Original Design
Do not change chain links, gemstone size, prong placement, or product proportions.
The edited photograph should remain faithful to the original jewelry.
13. Common Mistakes in Delicate Jewelry Photography
Several common mistakes can reduce the clarity of delicate jewelry photographs.
Using Backgrounds With Poor Contrast
Thin jewelry may disappear when its brightness is too similar to the background.
Choose suitable colors and lighting.
Photographing Too Far Away
Small products may occupy only a tiny part of the frame.
Use suitable framing and close-up photography.
Ignoring Camera Movement
Even slight movement can affect sharpness during macro photography.
Use stable equipment.
Overcrowding the Composition
Too many props can distract from small jewelry details.
Keep styling simple.
Applying Excessive Sharpening
Strong sharpening can create unnatural edges and noise.
Use careful local adjustments.
Removing Important Details During Editing
Thin chains and small prongs can be damaged by inaccurate masking or retouching.
Inspect the final image carefully.
14. How to Prepare Delicate Jewelry Photos for E-Commerce
Online jewelry stores need product photographs that are clear, accurate, and consistent.
Use Consistent Backgrounds
Choose a standard background style for related products.
Maintain Similar Product Scale
Use consistent framing so customers can compare items.
However, do not resize products in a way that misrepresents their proportions.
Include Multiple Angles
Provide front, side, and detail photographs when useful.
Show Jewelry Size
Lifestyle photographs or accurate scale references can help customers evaluate delicate jewelry.
Export Suitable Image Formats
JPEG, WebP, and AVIF may be suitable for online product photographs, depending on platform support.
Write Descriptive Alt Text
Use concise descriptions of the actual product.
For example, "Delicate yellow-gold chain necklace with small round pendant on ivory background."
15. Why Professional Jewelry Photo Editing Matters
Delicate jewelry photography often requires detailed editing because thin structures and reflective surfaces can be difficult to reproduce accurately.
Maintain Fine Product Details
Professional retouching can help preserve visible chain links, small prongs, and gemstone settings.
Correct Unwanted Reflections
Careful local adjustments can reduce distractions without changing the metal's natural appearance.
Prepare Consistent Product Catalogs
Editing services can help maintain consistent backgrounds, dimensions, and color balance.
Support Large Photography Projects
Jewelry businesses may need to process many product photographs.
Outsourcing editing can help manage the workload.
Preserve Product Accuracy
A professional editing process should maintain the jewelry's original design, proportions, metal color, and gemstone characteristics.
At **Photo Editing Company**, jewelry photo editing services support photographers, retailers, and e-commerce businesses.
Services include background removal, reflection cleanup, color correction, selective sharpening, and detailed jewelry retouching.
16. Frequently Asked Questions About Delicate Jewelry Photography
What Is the Best Way to Photograph Delicate Jewelry?
Use a clean background, controlled lighting, stable camera support, and suitable close-up focusing. Arrange the jewelry carefully and preserve accurate details during editing.
How Do You Photograph Thin Gold Chains?
Arrange the chain naturally, use a background with suitable contrast, and position lighting to maintain visible metal edges.
What Camera Lens Is Best for Small Jewelry?
A macro lens is useful for photographing small jewelry details. The best focal length depends on the camera system, working distance, and product size.
How Do You Keep Small Jewelry in Focus?
Use a tripod, careful focusing, and an appropriate aperture. Focus stacking can help when one photograph cannot keep all important details sharp.
Can I Photograph Delicate Jewelry With a Smartphone?
Yes. Use a stable phone support, soft lighting, careful focus, and a suitable close-up lens or macro mode when available.
What Background Is Best for Silver Jewelry?
White, light gray, ivory, and other neutral backgrounds can work. Choose a background that provides enough contrast to keep thin silver edges visible.
Should Delicate Jewelry Photos Be Edited?
Many photographs benefit from dust removal, reflection cleanup, color correction, and selective sharpening. Editing should preserve the original product.
Conclusion
Learning how to photograph delicate jewelry requires patience, careful preparation, and attention to small details.
Thin chains, minimalist rings, tiny earrings, and delicate bracelets can be difficult to photograph because they contain fine structures and reflective surfaces.
Begin by cleaning and arranging the jewelry carefully.
Choose a background that provides suitable contrast, use soft controlled lighting, and keep the camera stable.
For close-up photographs, consider a macro lens and focus stacking when necessary.
After the photoshoot, apply careful editing to remove temporary distractions, correct unwanted reflections, and maintain accurate metal colors.
Most importantly, preserve the jewelry's original design, gemstone characteristics, and proportions.
**Need professional photo editing for delicate jewelry?**
Photo Editing Company provides jewelry retouching, background removal, color correction, reflection cleanup, and product image preparation for jewelry photographers, retailers, and online businesses.