# How to Remove Reflections and Glare from Jewelry Photos
Jewelry photography can be challenging because of the reflective materials used in rings, necklaces, bracelets, earrings, and other accessories. Gold, silver, platinum, and gemstones react differently to lighting, often creating unwanted reflections, bright spots, and dark patches in photographs.
Even when jewelry looks clean and polished in person, the camera may record reflections from nearby objects, photography equipment, windows, and lighting panels.
These reflections can make jewelry photographs appear uneven, distracting, or difficult to edit.
For jewelry businesses, clear product images are important because customers depend on photographs to examine the metal finish, gemstone arrangement, and small design details before purchasing.
Fortunately, there are several ways to reduce unwanted reflections and glare during photography and through professional photo editing.
**The best way to remove reflections from jewelry photos is to control the lighting during photography and use selective retouching to reduce any remaining distractions.**
Techniques such as diffused lighting, reflectors, black cards, careful camera positioning, and Photoshop editing can help improve jewelry photographs without changing the original product.
However, not every reflection should be removed. Natural highlights and darker areas help define the shape, texture, and finish of polished jewelry.
The goal is to reduce distracting reflections while maintaining realistic metal surfaces and gemstone details.
In this guide, we will explain why reflections appear in jewelry photography, how to prevent excessive glare, and how to remove unwanted reflections using photo editing techniques.
Why Do Reflections and Glare Appear in Jewelry Photos?
Jewelry contains highly reflective materials that interact with surrounding light and objects.
Polished gold, silver, and platinum behave differently from matte surfaces because they reflect their environment.
For example, a polished gold ring may reflect the camera lens, studio lights, photographer, or nearby dark objects.
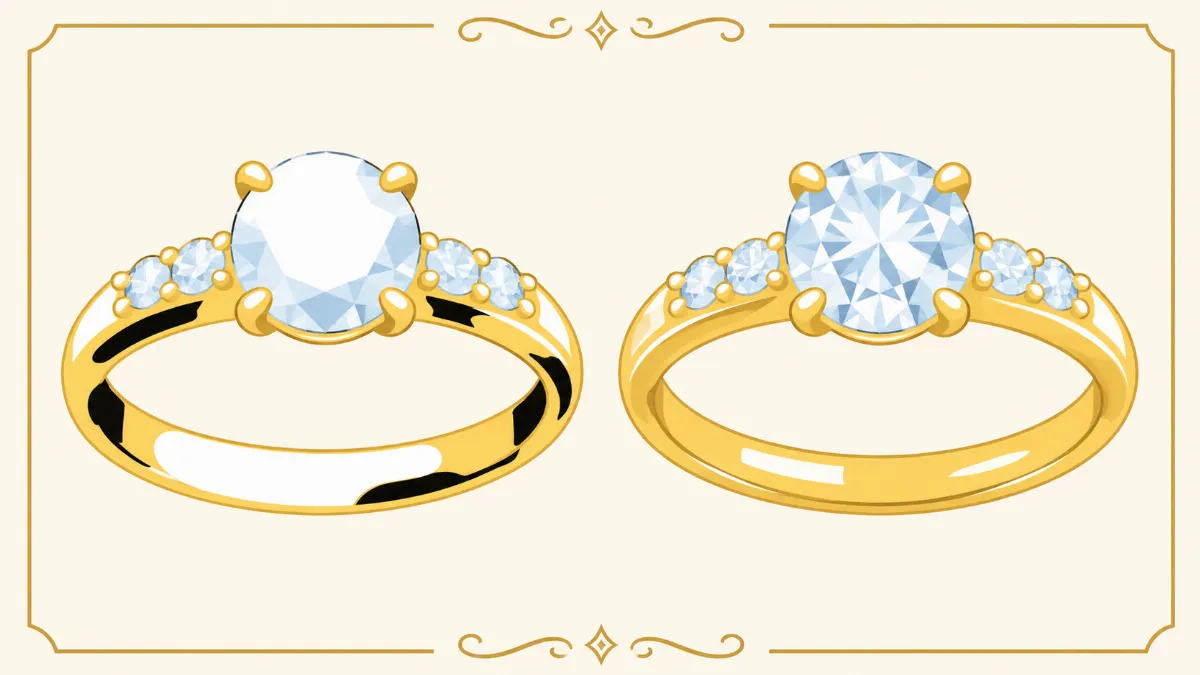
These reflections can appear as black patches, bright white areas, or unusual shapes across the metal surface.
Gemstones can also produce strong highlights because light interacts with their facets.
Some highlights help communicate the gemstone's natural appearance, while others may hide important details.
Reflections from Photography Equipment
Cameras, tripods, lighting stands, and other equipment can appear in polished jewelry surfaces.
For example, a black camera lens may create a dark reflection on a silver ring.
These reflections are especially noticeable in close-up photography.
Reflections from Surrounding Objects
Jewelry can reflect walls, furniture, clothing, and nearby objects.
A polished bracelet photographed near a dark surface may contain a strong black reflection.
A gold ring photographed near a colored wall may show an unwanted color cast.
Excessively Strong Lighting
Harsh lighting can create concentrated highlights on metal surfaces.
If the camera exposure is too high, these highlights may become completely white and lose visible detail.
This is commonly described as blown-out highlights.
Uncontrolled Gemstone Reflections
Diamonds and other faceted gemstones naturally produce bright and dark areas.
However, unsuitable lighting can create reflections that obscure the stone's existing facets.
Careful lighting helps maintain a balance between natural brilliance and visible gemstone details.
What Is the Difference Between Reflections and Glare?
Although reflections and glare are often discussed together, they describe slightly different visual problems.
**Reflections** are visible representations of surrounding light sources or objects on a surface.
For example, a black camera lens appearing on a polished gold ring is a reflection.
**Glare** refers to excessively bright light that reduces the visibility of details.
For example, a large white highlight covering part of a silver bracelet may create glare.
Both can affect jewelry photographs, but they may require different solutions.
| Problem | Common Appearance | Recommended Approach |
|---|---|---|
| Black reflections | Dark patches on polished metal | Adjust surroundings or use localized retouching |
| White glare | Excessively bright areas | Control light size, angle, and exposure |
| Color reflections | Unwanted blue, green, or orange tones | Adjust surrounding colors and white balance |
| Gemstone glare | Bright highlights hiding facets | Change lighting position and camera angle |
| Equipment reflections | Camera or light shapes visible on metal | Reposition equipment or use a shooting enclosure |
Identifying the problem helps photographers choose the most effective correction.
1. Use Diffused Lighting to Reduce Harsh Glare
One of the most effective ways to control jewelry reflections is to use diffused lighting.
Diffused lighting spreads light across a larger area, creating smoother tonal transitions on polished surfaces.
Instead of producing a small, harsh highlight, a large diffused light source can create a broader and more controlled reflection.
Use a Softbox
A softbox helps control the direction and quality of light.
For jewelry photography, a large softbox can produce smoother reflections across gold and silver surfaces.
However, the softbox itself may still appear as a reflection.
Its position and size should be adjusted carefully.
Use a Diffusion Panel
A diffusion panel can be placed between the light source and the jewelry.
This helps soften harsh highlights and create a more even lighting pattern.
Diffusion panels are particularly useful when photographing polished rings and bracelets.
Try Indirect Window Light
For simple jewelry photography, indirect daylight from a window can provide soft illumination.
Avoid placing jewelry in strong direct sunlight because this may create harsh reflections.
A white reflector can help balance darker areas.
2. Change the Camera Angle to Control Reflections
Small changes in camera position can significantly affect the appearance of reflective jewelry.
Because polished metal reflects its surroundings, changing the viewing angle changes which objects appear on its surface.
For example, a ring may show a large black camera reflection when photographed from one angle.
Moving the camera slightly may reduce the reflection without changing the lighting setup.
Experiment With Different Angles
Take several photographs while adjusting the camera position.
Compare how the reflections change across the metal.
Choose an angle that provides clear product details and controlled reflections.
Avoid Unnecessary Camera Reflections
Keep the camera and photographer as unobtrusive as possible within the jewelry's reflected environment.
In some setups, a white shooting enclosure with a small opening for the lens can help reduce equipment reflections.
Preserve Important Product Views
Do not change the camera angle so much that important jewelry details become hidden.
For e-commerce photography, customers still need clear views of the gemstone, setting, band, and other product features.
3. Use White Reflectors and Black Cards
Reflectors and black cards are useful tools for controlling jewelry reflections.
They allow photographers to influence which light and dark areas appear on polished metal.
White Reflectors
White reflectors bounce light toward the jewelry.
They can help reduce overly dark areas and create smoother reflections.
For example, a white card placed beside a gold ring may reduce a distracting dark patch caused by the surrounding environment.
Black Cards
Black cards create controlled dark reflections.
Although this may seem unusual when trying to remove black reflections, darker areas can help define the jewelry's shape.
A polished silver ring surrounded entirely by white surfaces may appear flat.
A carefully positioned black card can introduce a narrow dark reflection that defines the ring's curved surface.
Combine Reflectors Carefully
Using both white and black cards allows photographers to control contrast.
The objective is not to eliminate every reflection.
Instead, the photographer creates a balanced pattern of highlights and darker areas that communicates the jewelry's natural form.
4. Use a Light Tent for Jewelry Photography
A light tent is a photography enclosure made with translucent material.
It helps surround small products with diffused illumination.
Light tents are commonly used for photographing rings, earrings, bracelets, and other small products.
How a Light Tent Helps
A light tent reduces the visibility of uncontrolled surroundings by replacing them with more consistent reflective surfaces.
This can make metal reflections easier to manage.
It also helps create consistent lighting across multiple product photographs.
Position the Jewelry Properly
Place the jewelry inside the light tent on a suitable background.
Position the lights outside the diffusion material.
Adjust the camera opening and jewelry angle to minimize unwanted equipment reflections.
Limitations of Light Tents
Light tents do not automatically eliminate reflections.
The camera opening, lighting pattern, and enclosure material may still appear on polished surfaces.
In addition, surrounding jewelry entirely with soft white light can sometimes make gemstones appear less defined.
For diamond photography, a combination of diffused lighting and smaller directional sources may be more effective.
5. Control Exposure to Prevent Bright Glare
Incorrect exposure can make glare more difficult to correct.
When bright highlights exceed the camera sensor's recording range, the affected areas may lose detail.
This is known as highlight clipping.
Check the Brightest Areas
Review the photograph after taking it.
Pay attention to bright metal surfaces and gemstone highlights.
If these areas appear completely white, reduce exposure or adjust the lighting.
Use Exposure Compensation
Many cameras and smartphones provide exposure compensation controls.
Reducing exposure slightly can help preserve highlight detail.
However, avoid making the entire photograph excessively dark.
Shoot in RAW When Possible
RAW files generally provide greater flexibility for adjusting exposure and recovering highlight detail than heavily compressed JPEG files.
However, RAW editing cannot reliably restore details that are completely clipped.
Correct lighting and exposure during photography remain important.
6. Use a Polarizing Filter Carefully
A circular polarizing filter can reduce certain reflections from non-metallic surfaces.
However, its effectiveness is limited for polished metal jewelry.
Gold, silver, and platinum are conductive materials, and their reflections behave differently from those of many non-metallic surfaces.
A polarizing filter usually cannot remove strong metallic reflections in the same way it can reduce reflections from glass or water.
When Polarization May Help
Polarization can sometimes be useful when photographing jewelry alongside reflective non-metallic materials.
For example, it may help control reflections from certain glass display surfaces or backgrounds.
When Polarization Is Less Effective
A polarizing filter is generally not the primary solution for unwanted reflections on polished gold or silver.
Lighting control, camera positioning, and careful retouching are usually more effective.
7. Remove Jewelry Reflections Using Photoshop
Even with careful photography, some unwanted reflections may remain.
Adobe Photoshop provides tools for reducing distracting reflections while preserving the original jewelry design.
Professional jewelry retouching commonly uses localized adjustments rather than applying one correction to the entire photograph.
Step 1: Open the Original Photograph
Start with the highest-quality image available.
Keep the original file unchanged and create a separate working version.
For non-destructive editing, use duplicate layers or adjustment layers with masks.
Step 2: Identify Unwanted Reflections
Zoom in and examine the jewelry.
Identify reflections caused by equipment, surrounding objects, or uncontrolled lighting.
Distinguish these from natural reflections that define the jewelry's shape.
Step 3: Use the Healing Brush for Small Marks
The Healing Brush can help remove small dust particles, fingerprints, and minor surface imperfections.
It works by blending sampled image information with the surrounding area.
However, it should be used carefully near gemstone edges, prongs, and detailed engravings.
Step 4: Use the Clone Stamp for Controlled Cleanup
The Clone Stamp allows editors to copy image information from one area to another.
It can be useful for replacing distracting reflections with nearby metal texture.
For example, a small black patch on a gold ring may be reduced using a carefully selected sample from a similar metal area.
However, cloning from an unsuitable area can create repeated patterns or unnatural reflections.
Step 5: Apply Curves and Masks
Curves adjustment layers can modify brightness and contrast in selected areas.
For example, a dark reflection may be softened by increasing the brightness of the affected metal surface.
Layer masks help limit the adjustment to the intended area.
This is useful when the reflection is close to a gemstone or decorative element.
Step 6: Preserve Natural Metal Texture
After reducing unwanted reflections, inspect the metal surface.
Make sure the original polishing lines, subtle tonal variations, and natural reflections remain visible.
Excessive smoothing can make jewelry look artificial.
Step 7: Compare the Edited Image With the Original
Review the finished photograph at full resolution.
Check that the jewelry's shape, color, gemstone count, prong positions, and surface details remain accurate.
The final image should look cleaner without appearing reconstructed or digitally painted.
8. Remove Black Reflections From Gold and Silver Jewelry
Black reflections are among the most common problems in jewelry photography.
They often appear as dark patches along polished metal surfaces.
Black Reflections on Yellow Gold
Yellow gold can reflect dark photography equipment and surrounding objects.
When removing these reflections, editors must preserve the original warm gold color.
Simply brightening a black patch may create a gray or washed-out area.
A better approach involves carefully matching nearby gold tones and preserving the natural highlight pattern.
Black Reflections on Silver
Silver jewelry often contains stronger neutral reflections.
A large black patch may make the metal appear darker than intended.
However, removing every dark reflection can make silver look flat.
The retoucher should preserve controlled contrast and natural surface definition.
Black Reflections on Platinum
Platinum jewelry may contain dark reflections similar to silver and white gold.
Retouching should maintain the original metal appearance and avoid introducing unwanted color casts.
For all three materials, accurate masking and careful tonal adjustments are important.
9. Reduce Glare on Diamonds and Gemstones
Diamonds and gemstones require a different approach from polished metal.
Faceted gemstones naturally contain bright and dark areas that change with lighting and viewing angle.
These variations help communicate the gemstone's cut and optical characteristics.
Adjust Lighting Before Editing
If glare hides important gemstone facets, try changing the light position.
A small adjustment may reveal more detail without requiring extensive retouching.
Preserve Natural Facets
During editing, avoid replacing gemstone facets with artificial shapes.
The original cut, size, position, and internal characteristics should remain unchanged.
Use Selective Contrast Adjustments
Small contrast adjustments can improve the visibility of existing facets.
However, excessive contrast may create unnatural dark or bright areas.
Avoid Excessive Sparkle Effects
Artificial star-shaped sparkle effects may be suitable for certain promotional graphics.
However, they should be used cautiously in product photographs because they can misrepresent the actual gemstone.
10. Use Professional Jewelry Retouching for Complex Reflections
Some reflections are too complicated to correct using basic editing tools.
For example, a diamond necklace may contain numerous reflective metal components and gemstones.
Each area may require individual adjustments.
Professional jewelry retouchers use detailed masking, manual cleanup, and localized tonal corrections to improve these photographs.
They also inspect the finished images to make sure important product details remain intact.
For jewelry businesses, professional retouching can be useful when preparing product catalogs, online listings, and advertising materials.
However, retouching cannot always replace good photography.
Severely overexposed areas, missing details, and complicated reflections may be better corrected by photographing the jewelry again.
Common Mistakes When Removing Jewelry Reflections
Several editing mistakes can make jewelry photographs appear unrealistic.
One common mistake is removing every dark reflection.
Polished metal needs contrast to communicate its shape.
Without darker areas, a ring may look flat or painted.
Another mistake is excessive smoothing.
Removing all texture can eliminate natural polishing lines and surface details.
Incorrect color correction is also a problem.
For example, a gold ring may become too yellow or orange after reflection cleanup.
Some editing methods accidentally change gemstone edges or prong positions.
This can happen when cloning or healing tools are used without careful masking.
Finally, excessive sharpening can create unwanted halos around metal edges and gemstones.
Professional retouching should reduce distractions while maintaining accurate product details.
How to Remove Jewelry Reflections Using Your Phone
Smartphones can be useful for basic jewelry photography and editing.
Start by photographing the jewelry under controlled lighting.
Use indirect daylight or a diffused artificial light source.
Avoid positioning the camera where it creates a large reflection on the jewelry.
Take several photographs from slightly different angles.
Next, open the image in a mobile editing application.
Adobe Lightroom can help adjust exposure, highlights, shadows, and color balance.
Snapseed provides selective adjustments and a healing tool for small imperfections.
However, complicated reflections may be difficult to remove accurately using mobile applications.
For detailed commercial jewelry photographs, desktop editing software or professional retouching may provide better results.
Frequently Asked Questions About Jewelry Reflection Removal
Can you completely remove reflections from jewelry photos?
Some unwanted reflections can be removed or reduced through careful lighting and photo editing. However, removing every reflection is usually not desirable because polished metal needs highlights and darker areas to communicate its shape and finish.
How do you remove black reflections from a gold ring?
Black reflections can be reduced by changing the photography setup or using localized Photoshop adjustments. Tools such as Curves, masks, Healing Brush, and Clone Stamp can help, but the original gold color and metal texture should remain intact.
What lighting is best for reducing jewelry glare?
Large diffused light sources are useful for creating smoother reflections on polished metals. White reflectors, black cards, and carefully positioned directional lights can also help control the appearance of jewelry surfaces.
Can Photoshop remove glare from diamonds?
Photoshop can reduce certain distracting highlights and improve the visibility of existing gemstone details. However, completely overexposed areas may not contain enough information for accurate restoration.
Does a polarizing filter remove reflections from gold and silver?
Polarizing filters are generally less effective at removing reflections from polished metals than from many non-metallic surfaces. Lighting control and camera positioning are usually more useful for gold and silver jewelry.
Is professional jewelry photo retouching necessary?
Professional retouching is not necessary for every photograph. However, it can be useful when jewelry images contain complex reflections, detailed gemstones, or demanding commercial editing requirements.
Final Thoughts
Learning how to remove reflections and glare from jewelry photos requires a combination of photography techniques and careful editing.
The best results usually begin with controlled lighting, suitable camera angles, diffused light sources, and properly positioned reflectors.
These techniques help reduce unwanted reflections before the photograph is taken.
Photo editing can then address remaining distractions through localized corrections, masking, and careful reflection cleanup.
However, natural highlights and shadows should remain visible because they help define the jewelry's shape and metal finish.
For jewelry businesses, accurate product photographs are important for helping customers examine the jewelry before purchasing.
By combining good photography with professional retouching, businesses can prepare cleaner and more consistent images for websites, catalogs, and advertising.
**Looking for professional jewelry reflection removal services?** An experienced jewelry photo editing team can help reduce unwanted black reflections, correct distracting glare, preserve natural metal textures, and prepare product photographs for commercial use.