# How to Style and Photograph Jewelry Sets
Photographing jewelry sets requires more than placing a necklace, earrings, and bracelet on a table. Each piece must look attractive individually while working together as a complete collection. The way you arrange jewelry, choose a background, position the lighting, and frame the photograph can influence how customers see the products.
Jewelry sets often include matching pieces designed to be worn together. These may include a necklace and earrings, a bracelet and ring, or an entire collection featuring several coordinated accessories.
When photographed properly, these pieces can show their matching colors, gemstone details, and overall design. Poor styling, however, can make the arrangement look crowded, hide important details, or create distracting reflections.
For jewelry businesses, good photography is especially important because customers shopping online cannot physically examine the products. They rely on photographs to evaluate the jewelry's appearance, size, and design.
Learning **how to style and photograph jewelry sets** can help you create organized product images, present matching accessories clearly, and maintain a consistent appearance across your online store.
In this guide, we will discuss practical jewelry styling ideas, photography equipment, lighting techniques, composition tips, and editing methods that can help you produce professional-looking jewelry photographs.
1. Why Is Styling Important in Jewelry Photography?
Styling determines how jewelry appears within a photograph. It includes the arrangement of products, selection of backgrounds, placement of props, and overall composition.
A well-styled photograph helps viewers understand how different jewelry pieces complement each other.
For example, a matching diamond necklace and earrings should be arranged so customers can clearly see the relationship between their gemstone designs.
If the earrings overlap the necklace or the chain becomes tangled, the photograph may look disorganized.
Show the Complete Jewelry Collection
Jewelry sets are often sold because their pieces share a similar design.
Customers want to see how the necklace, earrings, bracelet, or ring looks as a coordinated collection.
Styling allows photographers to display these relationships clearly.
Position the jewelry so that each piece remains visible without covering important details.
Create an Organized Product Presentation
A carefully arranged jewelry set can look more professional than several accessories placed randomly on a surface.
Balanced spacing, consistent alignment, and a clear focal point help viewers examine the products.
This is particularly useful for e-commerce listings, where customers may compare several jewelry sets.
Communicate the Jewelry's Style
Different jewelry collections may require different presentation styles.
A classic diamond jewelry set may look appropriate against a neutral background, while a handcrafted gemstone collection may benefit from natural textures.
Styling helps communicate the intended appearance of the collection without changing the jewelry itself.
Support Customer Purchasing Decisions
Clear product photographs help customers compare jewelry designs and examine matching pieces.
Customers may want to know how large the earrings are compared with the necklace or how the bracelet complements the ring.
Good styling can make these relationships easier to understand.
However, photographs should still represent the products accurately.
2. Prepare Your Jewelry Before the Photoshoot
Before arranging jewelry for photography, inspect and clean every piece.
Jewelry surfaces can collect dust, fingerprints, and small particles during handling.
These imperfections become more noticeable in close-up photographs.
Clean the Jewelry Carefully
Use a cleaning method appropriate for the jewelry's metal, gemstones, and finish.
A clean microfiber cloth may be suitable for gently removing fingerprints from many polished surfaces.
However, some gemstones, coatings, pearls, and antique finishes require special care.
Avoid applying cleaning solutions without confirming that they are safe for the materials.
Check the Jewelry Components
Inspect the clasps, chains, gemstone settings, and other small details.
Make sure the jewelry is positioned correctly and that all pieces belonging to the set are present.
For earrings, check that both pieces are aligned and facing the intended direction.
For necklaces, inspect the chain to ensure it is not twisted.
Handle Jewelry With Care
Fingerprints can quickly return after cleaning.
Use clean gloves or suitable handling tools when positioning polished jewelry.
Be careful with delicate chains and gemstone settings.
A clean preparation area also helps prevent dust from collecting on the products.
Organize the Pieces Before Styling
Place each jewelry set in a separate tray or designated area.
Keep matching necklaces, earrings, bracelets, and rings together.
This helps prevent confusion when photographing several collections during one session.
It also makes the photography process more efficient.
3. Choose the Right Background for Jewelry Sets
The background influences how clearly the jewelry stands out.
A suitable background should complement the jewelry without competing for attention.
Different backgrounds work better for different photography purposes.
White Backgrounds for E-Commerce
White backgrounds are commonly used for online product listings.
They provide a clean appearance and allow customers to focus on the jewelry.
White backgrounds can also make it easier to maintain consistency across a product catalog.
However, lighting should be controlled carefully when photographing silver or platinum jewelry against white surfaces.
Without sufficient edge definition, the metal may blend into the background.
Neutral Backgrounds for Luxury Jewelry
Ivory, beige, light gray, and champagne-colored backgrounds can create a refined presentation.
These colors often complement gold jewelry and diamond collections.
Neutral backgrounds are useful for website banners, promotional photographs, and product collections.
Choose tones that maintain sufficient contrast with the jewelry.
Dark Backgrounds for Dramatic Photography
Black, charcoal, and deep navy backgrounds can work well for certain jewelry designs.
They may help light-colored gemstones and polished metals stand out.
However, dark backgrounds require careful lighting because reflective jewelry may pick up unwanted dark areas.
Use controlled highlights to maintain visible metal edges and gemstone details.
Textured Backgrounds for Lifestyle Photography
Fabric, paper, stone, and other materials can add visual interest to jewelry photographs.
For example, a gold necklace and matching earrings may be arranged on a soft fabric surface.
A handcrafted jewelry collection may work well with natural linen or matte paper.
Keep textures subtle so they do not distract from the products.
4. How to Arrange Matching Jewelry Sets
Arrangement is one of the most important parts of styling jewelry sets.
Each piece should be visible, properly aligned, and positioned in a way that makes the collection easy to examine.
Start With the Main Jewelry Piece
Identify the primary item in the set.
For a necklace and earrings collection, the necklace may serve as the main focal point.
Place it near the center of the composition.
Arrange the matching earrings around it while maintaining balanced spacing.
This creates a clear visual relationship between the pieces.
Use Symmetrical Arrangements
Symmetry is useful for jewelry sets with matching components.
For example, place a necklace in the center with one earring on each side.
Make sure the earrings have similar angles and distances from the necklace.
This arrangement works particularly well for formal jewelry collections.
Try Asymmetrical Styling
Not every jewelry photograph needs perfect symmetry.
An asymmetrical arrangement can create a more relaxed appearance.
For example, a bracelet may be positioned diagonally beside a ring, with the necklace extending across the background.
The important part is maintaining visual balance.
Avoid placing too many objects in one area.
Maintain Proper Spacing
Jewelry pieces should not overlap unless the arrangement is intentional.
Leave enough space between products so their shapes remain recognizable.
Thin chains and small earrings can become difficult to see when placed too close together.
Spacing also helps create cleaner product photographs.
Keep Jewelry in Natural Positions
Avoid bending chains into unrealistic shapes or forcing bracelets into positions that could damage them.
Use suitable supports when necessary.
The arrangement should present the jewelry attractively while remaining faithful to its actual structure.
5. Best Lighting Techniques for Jewelry Set Photography
Lighting is one of the most challenging aspects of jewelry photography.
Polished metal and gemstones reflect their surroundings, which can create unwanted dark areas or harsh highlights.
The goal is to produce controlled reflections that reveal the jewelry's shape and details.
Use Soft, Diffused Lighting
Large diffused light sources can help create smoother reflections on polished metal.
Softboxes, diffusion panels, and light tents are commonly used in product photography.
Position the lighting so the jewelry receives even illumination without excessive glare.
For reflective products, the size and position of the reflected light source often matter more than simply increasing brightness.
Control Metal Reflections
Gold, silver, and platinum surfaces behave differently under lighting.
Gold jewelry benefits from lighting that preserves its natural warmth.
Silver and platinum require careful reflection control to maintain their neutral appearance.
Use white cards or reflectors to create clean highlights.
Black cards can also be useful for defining the edges of reflective metal, but they should be positioned carefully to avoid distracting dark reflections.
Avoid Direct Flash When Possible
Direct on-camera flash can produce harsh reflections and uneven lighting.
A diffused lighting setup generally provides more control.
If flash is used, modify and position it appropriately rather than directing an unmodified flash straight at the jewelry.
Pay Attention to Gemstones
Diamonds and colored gemstones require careful lighting to show their facets and natural appearance.
A combination of broad diffused illumination and carefully positioned smaller light sources may help reveal gemstone details.
Avoid excessive glare that hides the stone's internal characteristics.
The lighting should not make the gemstone appear different from the actual product.
6. Camera Settings for Photographing Jewelry Sets
Camera settings influence sharpness, exposure, depth of field, and image quality.
The best settings depend on your camera, lens, lighting setup, and the size of the jewelry.
Use a Macro Lens When Appropriate
Macro lenses are useful for photographing small jewelry details.
They allow photographers to focus closely on gemstones, engravings, and metal textures.
However, when photographing an entire jewelry set, a standard lens or a macro lens used at a greater working distance may provide more suitable framing.
Choose a lens that allows the complete arrangement to fit comfortably within the photograph.
Select an Appropriate Aperture
Aperture controls depth of field.
For jewelry sets arranged on a flat surface, an aperture around f/8 to f/11 may provide a useful starting point on many cameras.
However, the ideal aperture depends on the camera sensor, lens, magnification, and arrangement.
Very small apertures may introduce diffraction softness.
Take test photographs and inspect the results before completing the session.
Keep ISO Low
Using a low ISO setting can help reduce visible image noise.
ISO 100 or 200 is often a practical starting point under controlled studio lighting.
If additional exposure is needed, consider adjusting the lighting or shutter speed rather than increasing ISO unnecessarily.
Use a Tripod
A tripod helps maintain consistent framing and reduces camera movement.
This is particularly useful when photographing several jewelry sets using the same composition.
A remote shutter release or camera timer can further reduce movement during exposure.
Shoot in RAW Format
RAW files provide greater flexibility for adjusting exposure, white balance, and tonal information during editing.
This can be useful when working with reflective jewelry and delicate gemstone colors.
RAW processing does not replace proper lighting, but it can make careful corrections easier.
7. Best Composition Techniques for Jewelry Sets
Composition determines how the jewelry pieces are arranged within the camera frame.
A good composition guides the viewer's attention while keeping the complete collection visible.
Use a Flat Lay Composition
Flat lay photography involves photographing objects from directly above.
This technique works well for necklaces, bracelets, rings, and earrings arranged on a flat surface.
It allows photographers to display several jewelry pieces in one organized photograph.
Flat lays are useful for e-commerce collections, social media posts, and promotional graphics.
Use a Front-Facing Arrangement
A front-facing composition can work well when jewelry is displayed on stands, busts, or suitable supports.
For example, a necklace may be placed on a display bust with matching earrings arranged beside it.
This presentation helps customers understand how the jewelry hangs when worn.
Create a Clear Focal Point
Choose one piece to attract attention first.
The focal point may be a necklace pendant, a large gemstone ring, or the main decorative element of the collection.
Arrange the remaining pieces to support the main product.
Avoid allowing props or background elements to become more noticeable than the jewelry.
Leave Negative Space
Negative space is the empty area surrounding the products.
It helps prevent a composition from looking crowded.
It can also provide room for text when the photograph is used in advertisements or website banners.
However, avoid leaving so much empty space that the jewelry appears too small.
Photograph Multiple Angles
One photograph may not show every detail of a jewelry set.
Take additional images showing individual pieces, side views, clasps, and gemstone settings.
For online stores, include photographs that help customers understand the size and structure of the jewelry.
8. How to Style Different Types of Jewelry Sets
Different jewelry combinations require different styling approaches.
The arrangement should reflect the shape and relationship of the pieces.
Necklace and Earring Sets
Place the necklace in the center and arrange the earrings on either side.
Make sure the necklace chain is smooth and the pendant faces the camera.
Keep the earrings aligned and visible.
For longer necklaces, use a larger background surface to avoid crowding the composition.
Bracelet and Ring Sets
Bracelets and rings can be arranged diagonally or in a balanced side-by-side composition.
A bracelet may form a gentle curve while the ring sits nearby.
Avoid placing the ring in a position that hides the bracelet's decorative details.
Use a camera angle that shows the jewelry's shape clearly.
Complete Bridal Jewelry Sets
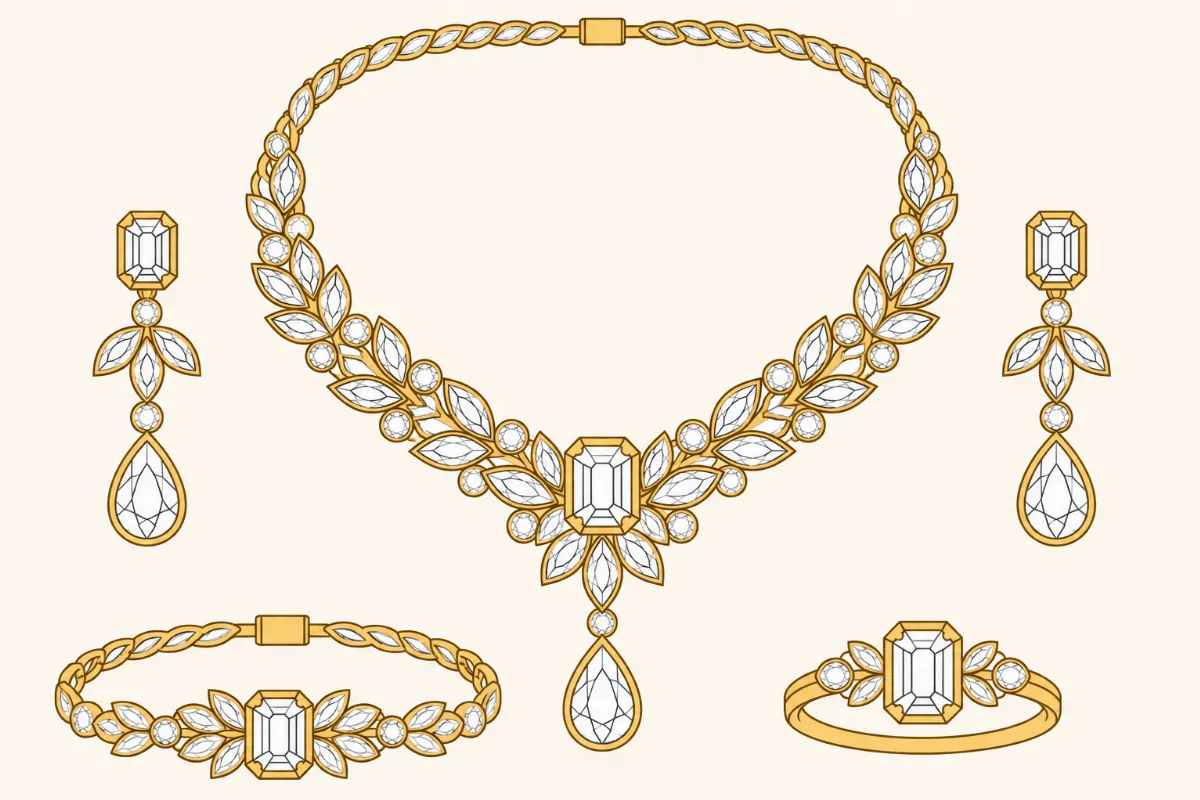
Bridal jewelry sets may include a necklace, earrings, bracelet, and ring.
These collections often benefit from a formal, balanced arrangement.
Place the main necklace near the center and organize smaller pieces around it.
Neutral backgrounds and controlled lighting can help maintain a refined appearance.
Gemstone Jewelry Collections
Colored gemstone sets require careful attention to color accuracy.
Choose backgrounds that complement the gemstones without creating strong color casts.
For example, emerald jewelry may work well against ivory or neutral gray.
Ruby jewelry can also be photographed against neutral backgrounds that allow its natural red color to remain visible.
Avoid heavily saturated backgrounds that make gemstone colors difficult to evaluate.
9. Common Jewelry Photography Mistakes to Avoid
Even expensive photography equipment cannot compensate for poor styling or uncontrolled lighting.
Understanding common mistakes can help improve the final photographs.
Overcrowding the Composition
Too many jewelry pieces or props can make the photograph difficult to understand.
Keep the arrangement simple and give each item enough space.
Using Distracting Backgrounds
Strong patterns and busy textures can compete with small jewelry details.
Choose backgrounds that support the products rather than dominate the composition.
Ignoring Reflections
Uncontrolled reflections can make polished metal appear dark or uneven.
Review the jewelry's surfaces before taking the final photograph.
Adjust reflectors and diffusion panels as needed.
Photographing Dirty Jewelry
Dust and fingerprints become more visible in close-up photographs.
Clean the jewelry before shooting and inspect it between arrangements.
Using Inconsistent Lighting
Different lighting setups can cause jewelry colors to vary between photographs.
Maintain consistent light placement and white balance when photographing matching collections.
Excessive Photo Editing
Heavy retouching can change the jewelry's appearance.
Avoid altering gemstone shapes, metal colors, engravings, or product proportions.
The final image should accurately represent the jewelry.
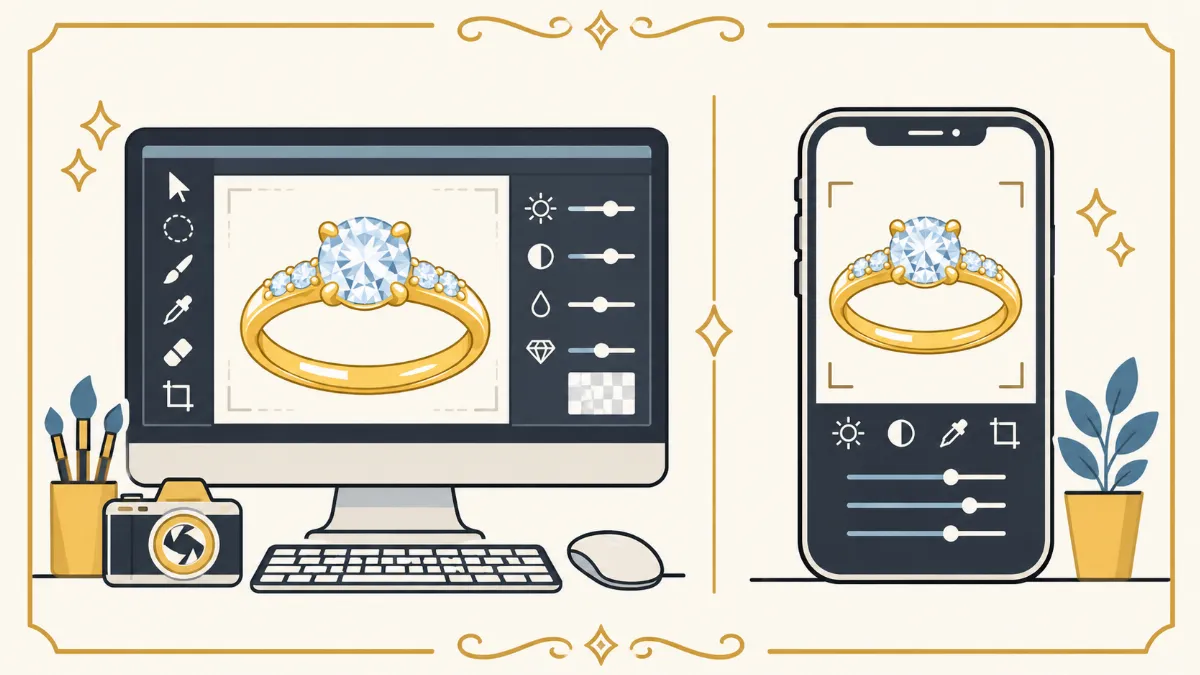
10. How to Edit Jewelry Set Photographs Professionally
Photo editing is an important stage of jewelry photography.
Even a carefully styled and photographed collection may contain dust, unwanted reflections, or minor lighting differences.
Professional editing helps correct these issues while maintaining the jewelry's original design.
Correct Exposure and White Balance
Begin by adjusting the overall exposure and white balance.
Make sure gold, silver, platinum, and gemstones retain their natural colors.
Avoid excessive saturation or contrast.
Remove Dust and Unwanted Marks
Use suitable retouching tools to remove temporary distractions.
Pay attention to metal surfaces, gemstone settings, and the background.
Preserve natural textures and legitimate product characteristics.
Refine Reflections Carefully
Reflective metal surfaces may contain distracting dark areas.
Reduce these reflections only where necessary.
Maintain realistic highlights and avoid making the jewelry look artificially smooth.
Improve Sharpness
Apply selective sharpening to visible details such as gemstone facets, metal edges, and decorative patterns.
Avoid excessive sharpening that creates halos or unnatural textures.
Severely out-of-focus details may require reshooting.
Maintain Background Consistency
For e-commerce photographs, keep backgrounds consistent across the product collection.
Check the image dimensions, cropping, and spacing.
When preparing a set of photographs, make sure the jewelry appears at a consistent visual scale where appropriate.
Export Images for Their Intended Use
Save photographs in formats suitable for websites, catalogs, or marketing materials.
JPEG and WebP are common choices for web images, while PNG may be useful when transparency is required.
Keep high-quality originals for future editing or print use.
11. Why Professional Jewelry Photography and Editing Matter for E-Commerce
Online jewelry businesses depend on photographs to present their products.
Customers use these images to compare designs, examine gemstone details, and decide which products interest them.
Professional styling, photography, and editing can support this process.
Present Matching Jewelry Clearly
Jewelry sets are designed to be worn together.
A carefully arranged photograph helps customers see how the pieces complement one another.
This is particularly useful for bridal collections, gift sets, and matching gemstone jewelry.
Support Customer Confidence
Accurate product photographs help customers evaluate jewelry before purchasing.
Clear images can show important details such as clasps, gemstone settings, and metal finishes.
Avoid editing techniques that misrepresent the product's actual appearance.
Maintain a Consistent Brand Style
Consistent backgrounds, lighting, and compositions help create an organized product catalog.
This can make a jewelry store's website easier to browse.
A recognizable photography style can also support the business's overall visual identity.
Save Time on Large Jewelry Collections
Photographing and editing hundreds of jewelry products can require considerable time.
A structured photography setup and consistent editing workflow can reduce repetitive work.
Professional editing services may also help businesses manage larger image collections.
12. Should You Hire a Professional Jewelry Photo Editing Service?
Editing jewelry photographs can be time-consuming, especially when the images contain complex reflections, detailed gemstones, or complicated backgrounds.
Basic exposure and color adjustments may be manageable using Lightroom or other editing applications.
However, detailed jewelry retouching often requires more precise tools and experience.
Professional editors can assist with:
- Background removal and cleanup
- Dust and fingerprint removal
- Metal reflection adjustments
- Gemstone detail refinement
- Color correction
- Image sharpening
- Consistent resizing and cropping
At **Photo Editing Company**, jewelry photo editing services help photographers, jewelry stores, and e-commerce businesses prepare product images for online use.
The editing process should preserve the original jewelry design, gemstone placement, metal color, and natural surface characteristics.
Outsourcing may be useful for businesses that need consistent results across large collections or want to spend more time on photography and product management.
Before hiring an editing provider, review sample work, turnaround times, revision policies, and the provider's approach to maintaining product accuracy.
13. Frequently Asked Questions About Jewelry Set Photography
What Is the Best Background for Jewelry Set Photography?
White, ivory, light gray, and other neutral backgrounds are commonly used because they keep attention on the jewelry. Dark backgrounds can also work for certain luxury collections when lighting and reflections are carefully controlled.
How Do You Arrange a Necklace and Earring Set for Photography?
Place the necklace near the center and arrange the matching earrings on either side. Maintain balanced spacing and make sure the pendant, gemstones, and earring details remain visible.
What Lighting Is Best for Photographing Jewelry?
Soft, diffused lighting is useful for controlling reflections on polished metal. Reflectors and carefully positioned light sources can help define jewelry edges and reveal gemstone details.
Can You Photograph Jewelry Sets With a Smartphone?
Yes. Modern smartphones can produce useful jewelry photographs when paired with stable support, suitable lighting, and careful composition. A dedicated camera and macro lens may provide more flexibility for detailed close-up photography.
Do Jewelry Photographs Need Editing?
Many jewelry photographs benefit from exposure correction, white balance adjustments, dust removal, and minor reflection cleanup. Editing should improve the image without changing the product's original appearance.
Should Jewelry Sets Be Photographed Together or Separately?
Both approaches are useful. A group photograph shows how the jewelry pieces work together, while individual photographs allow customers to examine each product more closely.
How Can I Make Jewelry Set Photos Look Professional?
Clean the jewelry, choose a suitable background, arrange the pieces carefully, use controlled lighting, and maintain consistent camera settings. Finish with accurate photo editing and quality checks.
Conclusion
Learning how to style and photograph jewelry sets can help photographers and jewelry businesses create clear, organized, and attractive product images.
Start by preparing the jewelry, selecting a suitable background, and arranging matching pieces in a balanced composition.
Use controlled lighting to manage reflections and choose camera settings that keep important details sharp.
Photograph the complete set from multiple angles and include individual images when necessary.
After the photoshoot, apply careful editing to correct dust, lighting differences, and distracting reflections while preserving the jewelry's original appearance.
For online jewelry stores, consistent photography can make product collections easier to browse and help customers evaluate matching designs.
**Need professional editing for your jewelry photographs?**
Photo Editing Company offers jewelry retouching, background removal, color correction, reflection cleanup, and product photo editing services to help prepare jewelry images for websites, catalogs, and marketing materials.