
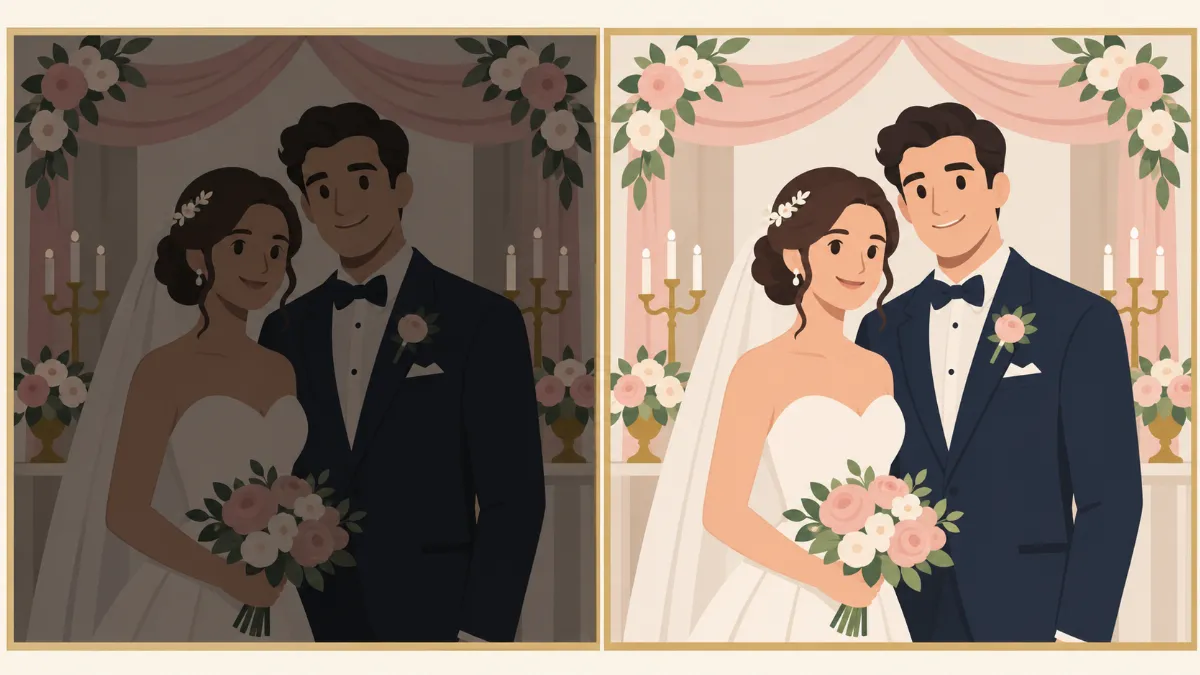
# How to Edit Wedding Photos When They Turn Out Dark
Wedding photographs are meant to preserve some of life's most meaningful moments. From the bride walking down the aisle to the couple's first dance, every picture tells a story. But what happens when you open your wedding photographs and discover that some of them are too dark?
Dark wedding photos are a common problem, especially during indoor ceremonies, evening receptions, and events with limited lighting. A photographer may have taken a beautiful picture of the couple, but their faces appear too dark, the wedding dress lacks visible details, or the background is difficult to see.
Fortunately, many dark wedding photographs can be improved using photo editing software.
With the right adjustments, you can brighten important areas, recover available shadow details, correct color problems, and produce photographs that look more balanced.
However, increasing brightness alone is not always enough. Excessive adjustments can introduce noise, reduce contrast, and make skin tones appear unnatural.
In this guide, you will learn **how to edit wedding photos when they turn out dark**, why wedding photographs become underexposed, which editing tools to use, and how to improve image brightness without losing the original atmosphere.
Why Do Wedding Photos Turn Out Dark?
Before editing a dark wedding photograph, it helps to identify why the image looks underexposed.
Wedding photographers work in different environments, and lighting conditions can change throughout the event.
A ceremony inside a church may have limited natural light, while an evening reception may rely on decorative lighting, candles, and spotlights.
These conditions can make photography more difficult.
1. Low Lighting During Indoor Ceremonies
Many churches, chapels, and indoor wedding venues have limited lighting.
Photographers may need to use higher ISO settings, wider apertures, or slower shutter speeds to record enough light.
However, these adjustments have limitations.
A slower shutter speed can introduce motion blur, while higher ISO settings may increase visible noise.
If the exposure is too low, the final photograph may appear dark.
2. Backlighting From Windows
Wedding ceremonies often take place near large windows or bright entrances.
When the couple stands in front of a bright background, the camera may expose for the window instead of the subjects.
As a result, the bride and groom may appear darker than expected.
This is a common problem in wedding photography.
3. Incorrect Camera Exposure Settings
Wedding events move quickly.
Photographers may need to adjust camera settings as people move between indoor and outdoor locations.
If the exposure settings are not adjusted quickly enough, some images may be underexposed.
4. Evening Wedding Receptions
Wedding receptions often use dim lighting to create a romantic atmosphere.
Candles, decorative lights, and colored spotlights may look beautiful in person but create challenges for photography.
Photographs taken during the first dance or speeches may contain dark faces and uneven lighting.
5. Dark Clothing and Backgrounds
Black suits, dark decorations, and low-light venues can influence how a photograph appears.
In some situations, the camera's metering system may produce an exposure that does not properly balance the subjects and background.
Understanding the cause of the darkness helps you decide which editing adjustments are appropriate.
Can You Fix Wedding Photos That Are Too Dark?
Yes, many dark wedding photographs can be improved through editing.
However, the amount of detail you can recover depends on the original image.
A slightly underexposed photograph may respond well to exposure and shadow adjustments.
A severely underexposed photograph may contain significant noise or lack usable detail in darker areas.
This distinction is important.
Photo editing software cannot always restore information that was never recorded by the camera.
For example, if a person's face is completely black with no usable detail, increasing brightness may reveal noise rather than natural facial features.
On the other hand, a photograph that appears dark but contains recoverable shadow information may improve significantly.
RAW files generally provide more flexibility for correcting exposure than compressed JPEG files, although the recovery potential still depends on the camera and original exposure.
The best approach is to evaluate the image before making major adjustments.
What Software Can You Use to Brighten Wedding Photos?
Several photo editing applications provide tools for improving dark wedding photographs.
Adobe Lightroom
Adobe Lightroom is a practical choice for editing wedding photographs because it offers exposure, highlights, shadows, white balance, masking, and noise reduction controls.
It also supports workflows for adjusting large collections of images.
Adobe Photoshop
Adobe Photoshop provides detailed control over individual parts of a photograph.
It is especially useful for localized adjustments, selective brightening, retouching, and complex lighting corrections.
Capture One
Capture One offers RAW image processing, color correction, exposure adjustment, and localized editing tools.
It is used in professional photography workflows, including portrait and event photography.
GIMP
GIMP is a free, open-source image editing application.
It provides tools such as curves, levels, masks, and other adjustments that can help improve dark photographs.
Snapseed
Snapseed is a mobile editing application suitable for making basic exposure, shadow, and color adjustments.
It can be useful when editing wedding photographs directly on a smartphone.
The best software depends on the image format, amount of correction required, and your editing experience.
Step-by-Step Guide: How to Edit Dark Wedding Photos
The following workflow can help you improve dark wedding photographs while preserving natural colors, textures, and lighting.
Step 1: Start With the Original High-Quality Image
Before editing, select the highest-quality original file available.
If the photograph was taken in RAW format, use the RAW file whenever possible.
RAW files often provide greater flexibility for exposure and color correction.
Avoid repeatedly editing and saving a compressed JPEG because this can gradually reduce image quality.
Make a backup of the original photograph before beginning.
If your software supports non-destructive editing, use that feature to preserve the original image data.
This allows you to revise adjustments later without permanently changing the source file.
Step 2: Examine the Photograph Before Editing
Open the photograph and look at the entire image.
Identify which areas are too dark and which areas already have suitable brightness.
For example, imagine a wedding photograph showing the bride and groom standing inside a church.
Their faces may appear dark, while the windows behind them are bright.
In this situation, increasing the overall exposure too much could make the windows excessively bright.
Instead, you may need to brighten the subjects separately.
Consider the following questions:
- Are the faces too dark?
- Is the background supposed to remain dim?
- Are there bright lights or windows?
- Does the wedding dress still contain visible details?
- Are the skin tones natural?
- Is there noticeable noise?
Answering these questions will help you choose the right editing tools.
Step 3: Increase Exposure Gradually
Exposure adjustment is often the first correction used for an underexposed photograph.
Increasing exposure makes the image brighter.
However, the adjustment affects the overall photograph, including bright areas.
Start with a small increase and review the result.
For example, if the photograph is moderately underexposed, you might begin with a small positive adjustment and increase it as needed.
There is no single exposure value that works for every wedding photograph.
The correct amount depends on the original lighting and image data.
Avoid increasing exposure until every dark area becomes bright.
Wedding photographs often contain intentional shadows that contribute to the atmosphere.
The goal is to make important subjects visible without destroying the lighting style.
Step 4: Adjust the Shadows
The shadows slider is useful when wedding subjects appear dark but the background contains bright areas.
Increasing shadows can make darker details more visible without brightening the entire photograph as strongly as an exposure adjustment.
For example, consider an image of a bride and groom standing near a bright window.
Raising the shadows may improve visibility in their clothing and faces.
However, excessive shadow recovery can make the photograph appear flat.
It can also reveal noise in darker regions.
Use enough shadow adjustment to improve subject visibility while preserving natural depth.
Step 5: Reduce Highlights When Necessary
Bright windows, reflective decorations, and white wedding dresses can contain strong highlights.
When you increase exposure or shadows, some bright areas may become more noticeable.
The highlights slider can help manage the brighter portions of the image.
For example, reducing highlights may reveal available texture in a white wedding dress.
It may also help control bright window areas.
However, highlight recovery has limits.
If the original photograph contains completely clipped highlights, the missing detail may not be recoverable.
Avoid making highlights unnaturally gray just to force more detail into the image.
White fabrics should still look white.
Step 6: Adjust Whites and Blacks
Whites and blacks controls help refine the tonal range.
The whites slider influences the brighter tones, while the blacks slider affects the darkest tones.
After increasing exposure and shadows, the photograph may lose some contrast.
Careful adjustments to whites and blacks can restore a more balanced appearance.
For example, you may slightly lower the black point to maintain depth in a dark wedding reception photograph.
However, avoid crushing shadows until clothing details or facial features disappear.
The goal is to maintain a natural balance between light and dark areas.
Step 7: Correct White Balance
Dark wedding photographs often contain unusual lighting colors.
Churches may use warm yellow lighting, while receptions may include orange, blue, purple, or green decorative lights.
These conditions can affect skin tones.
For example, a photograph taken under warm indoor lighting may make faces appear excessively yellow.
White balance adjustment can help correct unwanted color casts.
Use temperature and tint controls carefully.
However, not every warm color should be removed.
Candlelight and warm reception lighting often contribute to the original atmosphere.
The goal is to make the couple's skin tones believable while preserving the intended mood.
Step 8: Brighten Faces Using Selective Masks
Sometimes, the entire photograph does not need to become brighter.
Only the bride and groom may need additional light.
This is where selective masking becomes useful.
Many professional editing applications allow you to select a person, face, or specific region.
Once selected, you can adjust exposure, shadows, and other settings only within that area.
For example, imagine a wedding photograph showing the couple during their first dance.
The background is dark, and decorative lights provide a romantic atmosphere.
If you brighten the entire photograph, the background may become distracting.
Instead, use a soft mask to brighten the couple while preserving the darker surroundings.
Make sure the transition between edited and unedited areas is smooth.
Avoid creating visible bright halos around the subjects.
Step 9: Reduce Noise in Dark Areas
Noise is a common issue when brightening underexposed photographs.
It may appear as random grain, colored speckles, or rough textures.
Dark areas often contain more visible noise after exposure correction.
Many editing applications include luminance and color noise reduction controls.
Luminance noise reduction reduces visible brightness grain.
Color noise reduction helps reduce unwanted colored speckles.
Apply these settings gradually.
Too much noise reduction can remove natural skin texture, hair details, and fabric patterns.
For wedding portraits, maintaining realistic skin and clothing textures is important.
If your software provides selective noise reduction, consider applying it more strongly to noisy background areas and more carefully to faces.
Step 10: Restore Natural Contrast
After brightening shadows, the image may look washed out.
This happens because lifting dark tones can reduce the visual separation between light and dark areas.
You can restore contrast using the contrast slider or a tone curve.
A gentle curve adjustment may improve depth without making the photograph excessively harsh.
For example, a wedding reception photograph may benefit from slightly deeper background shadows while keeping the couple visible.
Avoid increasing contrast so much that the original darkness returns.
The goal is to improve clarity while maintaining a natural lighting balance.
Step 11: Adjust Skin Tones Carefully
Skin tones are especially important in wedding photography.
A photograph may have improved brightness but still look unnatural because of incorrect color adjustments.
Warm reception lighting may make skin appear orange.
Cool indoor lighting may create blue or gray tones.
Use white balance, local adjustments, and color controls to correct unwanted color casts.
Avoid excessive saturation.
Also, do not make every person's skin tone identical.
Different people naturally have different skin colors, and these differences should remain accurate.
A good wedding edit preserves individuality while correcting unwanted lighting effects.
Step 12: Preserve the Details of the Wedding Dress
White wedding dresses can be difficult to edit because they contain subtle textures and highlights.
When brightening a dark image, the dress may become excessively white and lose visible fabric details.
Check areas such as lace, embroidery, folds, and decorative elements.
Use highlight adjustments and local masking to preserve available texture.
Avoid making the dress gray or dull.
The fabric should look natural while retaining appropriate detail.
If parts of the dress were severely overexposed in the original photograph, some information may not be recoverable.
Step 13: Sharpen Important Details
After correcting exposure and noise, the photograph may benefit from careful sharpening.
Focus on important areas such as eyes, hair, clothing edges, and decorative details.
Avoid sharpening the entire image excessively.
Strong sharpening can make noise more noticeable, especially in dark backgrounds.
If your software offers sharpening masks, use them to limit the effect to meaningful edges.
Remember that sharpening improves the appearance of recorded details.
It cannot reliably restore severe motion blur or completely missed focus.
Step 14: Compare the Before-and-After Versions
Once your adjustments are complete, compare the edited photograph with the original.
Look for meaningful improvements.
Check if the couple's faces are clearer and if the exposure looks more balanced.
Also examine the background.
Has the editing removed the original atmosphere?
Are the skin tones still realistic?
Does the wedding dress retain natural details?
Sometimes, an image becomes too bright because the editor focuses entirely on correcting darkness.
Comparing the two versions can help identify unnecessary adjustments.
Step 15: Export the Edited Wedding Photograph
When you are satisfied with the result, prepare the final file.
For ordinary online sharing, JPEG with an appropriate embedded color profile is commonly suitable.
sRGB is a practical choice for general web and social media photographs.
For printing, follow the requirements of the print provider.
If additional editing may be needed later, preserve the RAW file or an editable project version.
Avoid reducing the image resolution unnecessarily.
Check the final export for color changes, unwanted noise, and compression problems before delivery.
How to Edit Dark Wedding Photos in Lightroom
Adobe Lightroom provides several useful controls for correcting underexposed wedding photographs.
A simple workflow involves opening the image, examining the histogram, and adjusting exposure gradually.
Next, increase shadows as needed and manage highlights in bright areas.
Adjust white balance to improve skin tones.
If only the couple needs additional brightness, use Lightroom's masking tools to make local exposure corrections.
Afterward, apply noise reduction and sharpening carefully.
You can also use the tone curve to restore natural contrast.
When editing a collection, synchronize appropriate settings across photographs taken under similar conditions.
However, review each photograph individually because lighting conditions may differ throughout a wedding.
How to Brighten Wedding Photos in Photoshop
Photoshop is useful when a photograph requires detailed local corrections.
Start by opening the original image and preserving an editable copy.
Use adjustment layers such as Curves or Levels to control brightness and contrast.
If the subjects are too dark, create a mask that limits the adjustment to the bride and groom.
Use soft transitions to prevent visible editing boundaries.
You can also apply selective color adjustments to correct skin tones.
For images with visible noise, use suitable noise reduction tools before final sharpening.
Photoshop is particularly helpful when a dark wedding photograph contains complicated lighting that requires different corrections in separate areas.
How to Edit Dark Wedding Photos on Your Phone
You do not always need desktop software to improve a dark wedding photograph.
Many mobile editing applications provide exposure, shadow, highlight, and color adjustments.
Start by opening the highest-quality version of the image.
Increase exposure slightly.
Adjust shadows to improve visibility in darker areas.
Reduce highlights if bright sections contain recoverable detail.
Correct white balance if the photograph appears too yellow or blue.
Apply light noise reduction if the application supports it.
Finally, compare the edited result with the original.
Mobile editing works well for simple corrections.
However, detailed retouching or severely underexposed photographs may be easier to handle using desktop software.
How to Edit Dark Wedding Photos Without Making Them Look Artificial
One of the biggest challenges in wedding editing is maintaining the original atmosphere.
A romantic candlelit reception is supposed to look different from an outdoor ceremony in daylight.
If every dark area is brightened excessively, the photograph may lose its intended mood.
Professional editors often preserve some natural darkness while making important subjects easier to see.
For example, a couple dancing beneath warm decorative lighting does not need to look as if they were photographed under bright studio lights.
Small selective adjustments may produce a more believable result than aggressive global exposure corrections.
Pay attention to skin texture, fabric details, natural shadows, and existing lighting direction.
The best result usually balances improved visibility with the atmosphere of the original photograph.
Common Mistakes When Editing Dark Wedding Photos
Beginners often make several mistakes when trying to fix underexposed images.
Increasing Exposure Too Much
Raising exposure excessively can make bright areas lose detail and remove the photograph's original lighting mood.
Use local adjustments when only certain areas need correction.
Removing All Shadows
Shadows provide depth and atmosphere.
Removing every shadow can make an evening reception photograph appear flat.
Applying Excessive Noise Reduction
Strong noise reduction can make skin look unnaturally smooth and remove details from hair and clothing.
Use controlled settings and inspect the result closely.
Ignoring White Balance
Brightening a photograph does not automatically correct its colors.
Check skin tones and unwanted color casts separately.
Overusing Sharpening
Sharpening an underexposed image too strongly can make existing noise and compression artifacts more visible.
Editing Every Photo With Identical Settings
Wedding lighting changes throughout the day.
A preset that works for one photograph may not be suitable for another.
Review important photographs individually.
How to Maintain Consistent Lighting Across Wedding Photos
Wedding albums often contain photographs taken in different locations and lighting conditions.
The ceremony may take place during daylight, while the reception may occur at night.
Although these environments naturally look different, related photographs should still have a consistent editing style.
Start by organizing images into groups based on lighting conditions.
For example, you can separate indoor ceremony photographs, outdoor portraits, and evening reception images.
Edit one representative photograph from each group.
Once you achieve a suitable result, apply similar settings to other photographs from that group.
Then review each image for differences in exposure and color.
Avoid forcing every wedding photograph to have exactly the same brightness.
A night reception should still look like an evening event.
Consistency means maintaining balanced colors, natural skin tones, and a recognizable visual style while respecting the original lighting.
Can AI Fix Dark Wedding Photos?
AI-assisted photo editing tools can help improve some underexposed wedding photographs.
They may automatically identify people, adjust exposure, reduce noise, or suggest color corrections.
These tools can be useful when processing large collections of images.
However, automatic adjustments do not always recognize the intended atmosphere.
For example, an AI tool may brighten an entire candlelit scene even when the background should remain dark.
Generative enhancement may also alter facial details, clothing textures, or other important information.
For meaningful wedding photographs, review AI-generated results carefully.
The couple's facial features, expressions, wedding attire, and surroundings should remain faithful to the original.
AI can assist with editing, but careful visual review remains important.
When Is a Dark Wedding Photo Too Difficult to Fix?
Some dark wedding photographs cannot be fully restored.
This usually happens when the original image contains very little usable information.
For example, a severely underexposed JPEG may show extensive noise after brightening.
A photograph with significant motion blur may also lack sharp details.
If the image contains completely lost shadow information, editing software cannot accurately recover what the camera did not record.
In some cases, advanced restoration tools can create a more visually acceptable image.
However, generated details may not accurately represent the original moment.
For important wedding photographs, preserve the original file and avoid replacing real facial or environmental details with invented information.
Sometimes, a slightly dark but authentic photograph is better than an aggressively edited version that no longer looks natural.
Why Professional Wedding Photo Editing Can Be Helpful
Wedding photographers often manage hundreds or thousands of photographs from a single event.
Each image may require exposure adjustments, color correction, cropping, and quality review.
Dark photographs can require additional attention because of noise, uneven lighting, and localized exposure problems.
Professional photo editing services can assist with repetitive adjustments and detailed retouching.
For example, an editing team may help correct exposure across reception photographs while maintaining consistent skin tones.
They may also perform selective retouching, background cleanup, and final quality checks.
At **Photo Editing Company**, we provide editing services for wedding, portrait, event, product, jewelry, and other types of photography.
Our services include color correction, exposure adjustments, retouching, and background cleanup.
We work with photographers and businesses that need consistent editing results based on their instructions and reference images.
Learn more at Photo Editing Company.
Frequently Asked Questions
Can You Fix Wedding Photos That Are Too Dark?
Yes. Many dark wedding photographs can be improved through exposure, shadow, and color adjustments.
However, the amount of detail that can be restored depends on the original image quality.
What Is the Best Way to Brighten Dark Wedding Photos?
Start by adjusting exposure gradually.
Then use shadow controls and selective masks to improve darker subjects without unnecessarily brightening the entire photograph.
Is Lightroom Good for Editing Dark Wedding Photos?
Yes. Lightroom includes exposure, highlights, shadows, white balance, masking, and noise reduction tools that are useful for correcting underexposed wedding photographs.
How Do You Brighten Wedding Photos Without Losing Quality?
Use the highest-quality original file, preferably RAW when available.
Make small adjustments, avoid extreme shadow recovery, and apply noise reduction carefully.
Some loss of quality may still occur when the original image is severely underexposed.
Why Do My Wedding Photos Look Grainy After Brightening?
Brightening dark areas can make existing sensor noise more visible.
High ISO settings and limited light can also contribute to grain.
Noise reduction may help, but excessive smoothing can remove important details.
Can I Brighten Only the Bride and Groom?
Yes. Editing applications with masking tools allow you to brighten selected subjects while preserving the original background lighting.
This can be especially useful for dark reception photographs.
Can AI Improve Dark Wedding Photographs?
AI-assisted tools can help with exposure adjustments, masking, and noise reduction.
However, results should be reviewed carefully to avoid unwanted changes to facial features, textures, and the original atmosphere.
Should Dark Wedding Reception Photos Be Completely Bright?
Not necessarily.
Evening reception photographs often benefit from retaining darker backgrounds and warm decorative lighting.
The goal is to make important subjects visible while preserving the event's natural atmosphere.
Final Thoughts
Dark wedding photographs can be disappointing, especially when they contain meaningful moments that cannot be repeated.
Fortunately, many underexposed images can be improved through careful photo editing.
By adjusting exposure, recovering available shadow details, correcting white balance, and applying selective brightening, you can make important subjects easier to see.
Noise reduction, sharpening, and contrast adjustments can further refine the result when used carefully.
However, not every dark photograph needs to become bright.
Wedding photography often relies on natural shadows, warm lighting, and romantic atmosphere to communicate the feeling of the event.
Preserving those characteristics is just as important as correcting technical problems.
For beginners, start with small adjustments and compare your results with the original photograph.
For professional photographers, maintaining consistent editing standards across the wedding collection can help produce a more organized and natural-looking album.
**The best way to edit dark wedding photos is to improve visibility while preserving the people, details, and atmosphere that make each moment meaningful.**