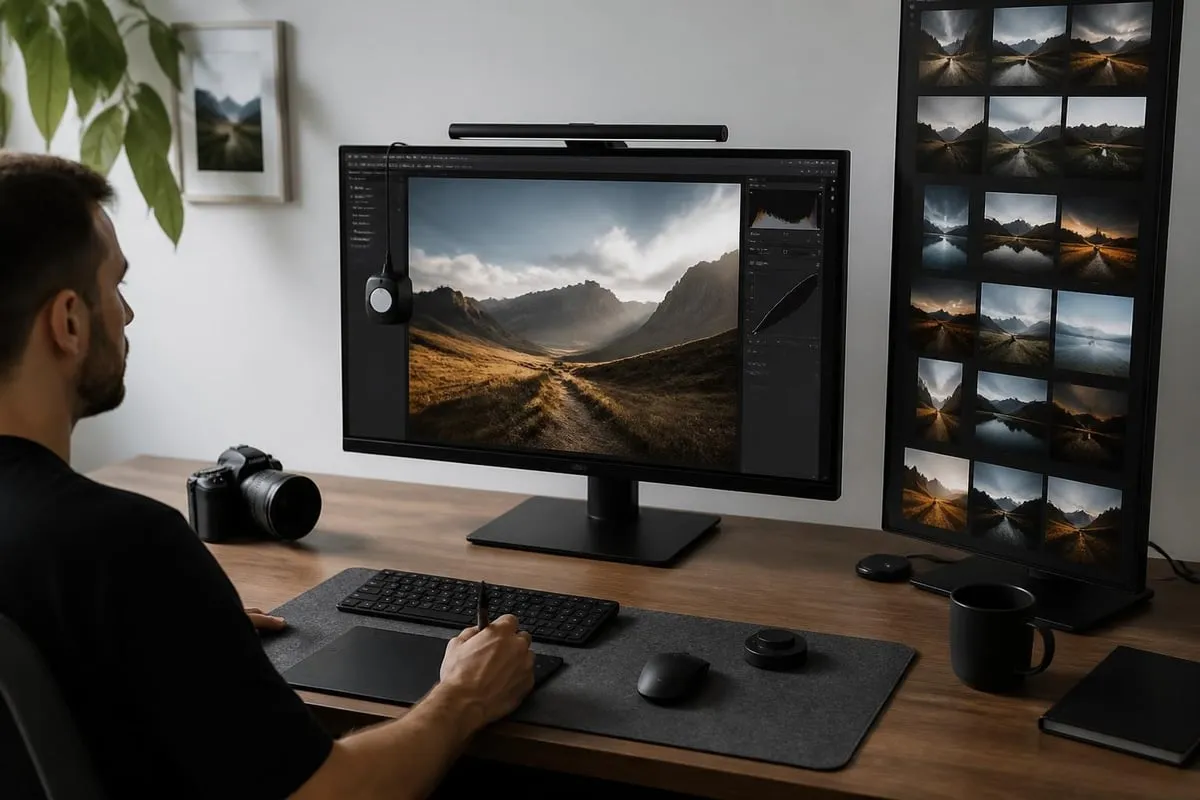
Photo Photoshop editing has evolved into an essential skill for photographers, ecommerce businesses, and creative professionals worldwide. Whether you're enhancing product images for online stores, perfecting portraits, or creating compelling visual content for social media, mastering Photoshop's comprehensive toolkit enables you to transform ordinary photographs into polished, professional-quality images. This guide explores proven techniques, workflow strategies, and industry best practices that elevate your photo editing capabilities in 2026.
Understanding the Fundamentals of Photo Editing Workflows
Professional photo Photoshop editing begins with establishing a systematic workflow that ensures consistency and efficiency. A structured approach saves time while maintaining quality standards across multiple projects. The foundation of any effective editing process starts with proper file organization and non-destructive editing principles.
Setting Up Your Editing Environment
Before diving into pixel-level adjustments, organizing your workspace creates the foundation for efficient editing sessions. Consider these essential setup steps:
- Configure custom workspace layouts tailored to specific editing tasks
- Create preset folders for frequently used actions and adjustments
- Establish consistent file naming conventions for raw and edited versions
- Set up color-managed workflows with calibrated monitors
Non-destructive editing represents the cornerstone of professional photo Photoshop editing. This approach preserves original image data while allowing unlimited revisions through adjustment layers, smart objects, and layer masks. Recent Photoshop updates have expanded non-destructive capabilities, making it easier than ever to maintain flexible editing workflows.

Building a Systematic Editing Process
A methodical editing sequence ensures you address image issues in the optimal order. Professional retouchers typically follow this progression:
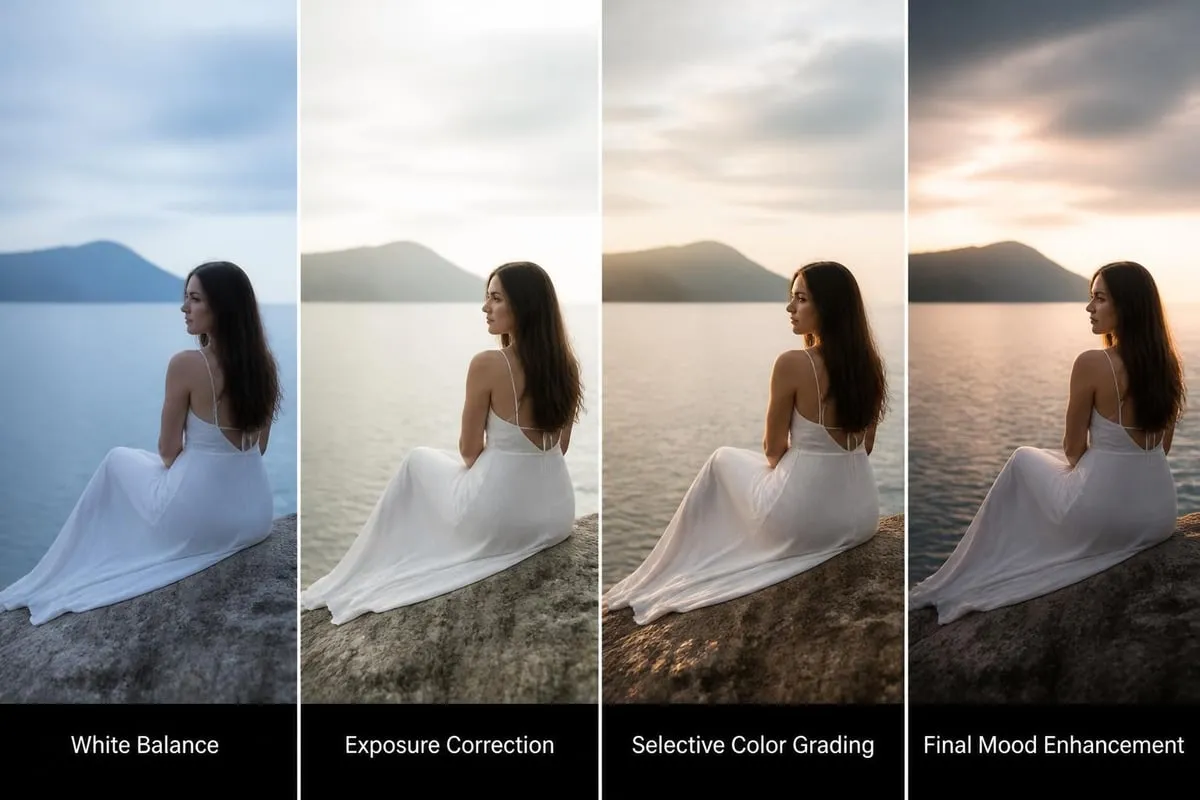
- Global adjustments: Exposure, white balance, and overall color temperature
- Tonal corrections: Shadows, highlights, and midtone refinement
- Color grading: Creative color adjustments and mood enhancement
- Local adjustments: Targeted corrections to specific image areas
- Detail enhancement: Sharpening and clarity adjustments
- Final touches: Dust removal, blemish correction, and finishing effects
This structured approach prevents common mistakes like over-editing specific areas before establishing proper global tonality. Each stage builds upon the previous one, creating a cohesive final image that maintains natural characteristics while achieving your creative vision.
Essential Techniques for Color Correction and Grading
Color management separates amateur edits from professional results in photo Photoshop editing. Understanding color theory and mastering correction tools enables precise control over image mood, accuracy, and visual impact. The difference between basic adjustments and expert color work often determines whether an image appears amateurish or publication-ready.
Mastering Color Correction Tools
Photoshop offers multiple pathways to color perfection, each suited to different scenarios and skill levels. The Curves adjustment provides the most comprehensive control, allowing independent manipulation of individual color channels and tonal ranges simultaneously.
| Tool | Best Use Case | Skill Level | Flexibility |
|---|---|---|---|
| Curves | Precise tonal and color control | Advanced | Extremely high |
| Levels | Quick tonal adjustments | Beginner | Moderate |
| Color Balance | Intuitive color shifts | Intermediate | Good |
| Hue/Saturation | Targeted color changes | Beginner | Limited |
| Selective Color | Professional color grading | Advanced | Very high |
Recent updates have introduced enhanced adjustment layers like Clarity and Dehaze, providing photographers with powerful non-destructive options for atmospheric and detail adjustments. These additions streamline workflows that previously required complex workarounds or third-party plugins.
Advanced Color Grading Strategies
Professional color grading transforms good photographs into exceptional visual stories. This process extends beyond simple correction, introducing creative color palettes that enhance emotional impact and brand consistency.
Split toning creates sophisticated looks by applying different color casts to highlights and shadows independently. This technique adds depth and dimension while maintaining natural-looking results. Fashion photographers often use warm highlights paired with cool shadows to create elegant, editorial aesthetics.
For those developing their skills, exploring comprehensive photo editing tutorials provides hands-on learning opportunities across various correction scenarios. These step-by-step guides cover everything from basic white balance correction to advanced color grading techniques used in commercial photography.
Professional Retouching and Enhancement Methods
Retouching represents one of the most demanding aspects of photo Photoshop editing, requiring technical precision and artistic judgment. The goal extends beyond simply removing imperfections-it involves enhancing images while preserving natural texture, dimension, and authenticity. Over-retouching creates artificial-looking results that undermine credibility, especially in commercial applications.
Frequency Separation Techniques
Frequency separation has become the industry standard for professional skin retouching and texture preservation. This advanced technique separates image texture from color and tone, allowing independent manipulation of each component. The method proves invaluable for portrait work, product photography, and any scenario requiring detail preservation during tonal adjustments.
The process involves splitting the image into high-frequency (detail) and low-frequency (color/tone) layers:
- High-frequency layer captures fine details, pores, and texture
- Low-frequency layer contains color transitions and tonal gradations
- Separate editing prevents texture destruction during color/tone adjustments
- Natural-looking results maintain skin texture while evening out tones
Texture preservation differentiates professional retouching from amateur work. Many beginners over-smooth images, eliminating the natural characteristics that make photographs believable and engaging. Professional retouchers know exactly how much smoothing serves the image without crossing into artificial territory.
Dodge and Burn for Dimensional Enhancement
The dodge and burn technique dates back to traditional darkroom processes, yet remains fundamental to contemporary photo Photoshop editing. This method selectively lightens (dodge) and darkens (burn) specific image areas to enhance dimension, guide viewer attention, and create visual depth.
Modern implementation uses 50% gray layers set to Overlay or Soft Light blending mode. Painting with white or black on this layer creates targeted tonal adjustments without permanently altering pixel data. This approach offers unlimited flexibility and revision capability throughout the editing process.
Applications include:
- Contouring facial features in portrait photography
- Adding depth to product photography for ecommerce applications
- Emphasizing textures and materials in jewelry and luxury goods
- Creating dramatic lighting effects in creative compositions
- Correcting uneven lighting across architectural photographs
For businesses handling high-volume product editing, ecommerce photo editing services streamline workflows by applying consistent retouching standards across entire catalogs. This consistency proves essential for maintaining professional brand presentation across online marketplaces.
Automation and Efficiency in Photo Editing Workflows
Efficiency separates profitable photo Photoshop editing operations from those struggling with turnaround times and capacity constraints. Professional studios and freelancers leverage automation tools, batch processing, and strategic shortcuts to maximize output without compromising quality standards.
Photoshop Actions for Repetitive Tasks
Actions record sequences of editing steps that can be replayed instantly on subsequent images. This automation capability proves invaluable when processing large image batches requiring identical adjustments. Product photographers shooting hundreds of items against white backgrounds benefit tremendously from action-based workflows.
Creating effective actions requires identifying truly repetitive processes in your workflow. Common candidates include:
- Background removal and replacement sequences
- Standard color correction formulas for specific lighting setups
- Watermark and border application
- File resizing and format conversion
- Signature retouching sequences for portrait work
Exploring free Photoshop actions introduces you to professional automation possibilities without financial investment. Many photographers customize these actions further, adapting them to specific requirements and personal style preferences.
Batch Processing Strategies
Batch processing extends action capabilities to process entire folders of images automatically. This powerful feature transforms hours of repetitive work into minutes of automated processing. The Image Processor script handles format conversion, resizing, and action application across unlimited images simultaneously.
| Processing Method | Images Per Hour | Setup Time | Flexibility | Quality Control |
|---|---|---|---|---|
| Manual editing | 10-20 | None | Maximum | Highest |
| Action-based | 50-100 | Moderate | Good | High |
| Batch processing | 500+ | Significant | Limited | Requires review |
| AI-assisted | 200-400 | Low | Good | Variable |
Smart batch processing requires pre-sorting images by lighting conditions, subject type, and required adjustments. Processing mixed image types together produces inconsistent results that require extensive manual correction, negating automation benefits.
Emerging AI Tools and Their Applications
Artificial intelligence has revolutionized certain aspects of photo Photoshop editing, particularly in time-consuming tasks like background removal, object selection, and basic retouching. Adobe's Sensei AI powers features like Select Subject, Content-Aware Fill, and Neural Filters, dramatically reducing manual labor for specific operations.
Research into advanced AI editing techniques continues pushing boundaries of what's possible through automated assistance. However, professional results still require human judgment, artistic vision, and technical expertise that AI cannot replicate. The most effective workflows combine AI efficiency with human creativity and quality control.
For specialized work like jewelry photography, precise control over reflections, metals, and gemstones still demands manual expertise. Services focused on jewelry photo editing demonstrate how technical knowledge specific to materials and lighting creates results that automated tools cannot achieve independently.
Advanced Compositing and Creative Editing Techniques
Beyond correction and enhancement, photo Photoshop editing enables creative composition and artistic manipulation that transcends traditional photography limitations. These advanced techniques require mastering selection tools, layer blending modes, and perspective matching to create believable composite images.
Mastering Selection and Masking
Precise selections form the foundation of professional compositing work. Modern Photoshop provides multiple selection methods, each optimized for different scenarios and edge characteristics. Understanding when to use each tool separates efficient professionals from those struggling with mediocre results.
Select and Mask workspace offers comprehensive edge refinement capabilities essential for hair, fur, and complex organic edges. This specialized environment includes:
- Edge detection algorithms that find difficult boundaries automatically
- Brush refinement tools for manual edge correction
- Output options including layer masks, new layers, and selections
- Preview modes showing selections against various backgrounds
Channel-based selections excel when isolating objects with high contrast against backgrounds. This technique leverages natural luminosity differences, creating precise masks with minimal manual effort. Product photographers frequently use channel selections for glassware, chrome, and highly reflective objects.
Blending Modes and Layer Techniques
Understanding layer blending modes unlocks creative possibilities that extend far beyond basic opacity adjustments. These mathematical compositing methods determine how pixels on different layers interact, creating effects ranging from subtle to dramatic.
The Multiply blending mode darkens images by multiplying base colors with blend colors, making it ideal for adding shadows, creating darker backgrounds, and compositing dramatic skies. Conversely, Screen mode lightens images, perfect for adding light effects, brightening shadows, and creating luminous highlights.
Professional compositors develop intuition about which blending modes work for specific scenarios:
- Overlay: Combines Multiply and Screen, increasing contrast
- Soft Light: Subtle contrast enhancement, natural-looking adjustments
- Color: Changes hue while preserving luminosity, ideal for tinting
- Luminosity: Preserves color while changing brightness values
- Difference: Creates abstract effects, useful for alignment checking
Contemporary research into AI-guided image editing explores how machine learning can assist with complex compositing tasks, though current implementations still require significant human oversight for professional results.
Specialized Editing for Different Photography Genres
Different photography disciplines demand specialized photo Photoshop editing approaches tailored to their unique requirements and quality standards. Product photography emphasizes accuracy and consistency, while portrait work prioritizes flattering enhancement and emotional connection. Understanding genre-specific needs ensures editing decisions support the photograph's intended purpose.
Product Photography Editing Standards
Ecommerce product photography demands pixel-perfect precision, consistent lighting, and accurate color representation. Customers make purchasing decisions based on these images, making editing quality directly impact conversion rates and return rates. Professional product editing typically includes:
- Perfect white or custom background replacement
- Symmetrical alignment and perspective correction
- Shadow creation for dimensional realism
- Color correction matching actual product appearance
- Dust, scratch, and imperfection removal
Clipping paths provide the foundation for background removal in product photography. This vector-based selection method creates perfectly smooth edges ideal for hard-edged products like electronics, furniture, and packaged goods. More complex products with translucent elements or fine details require sophisticated masking techniques beyond basic path tools.
Consistency across product catalogs proves equally important as individual image quality. All images should maintain identical white balance, exposure levels, and presentation styles to create cohesive brand experiences across online stores and marketplaces.
Portrait and Beauty Retouching Workflows
Portrait editing balances enhancement with authenticity, requiring judgment about how much retouching serves the subject versus creating unrealistic expectations. Professional beauty retouching follows systematic workflows addressing skin, eyes, hair, and overall toning in specific sequences.
The typical beauty retouching progression includes:
- Blemish removal: Temporary imperfections like acne, scratches, and minor marks
- Skin evening: Frequency separation to unify skin tone while preserving texture
- Feature enhancement: Brightening eyes, whitening teeth, defining lips
- Hair refinement: Controlling flyaways, adding fullness and shine
- Body contouring: Subtle dodge and burn for dimensional enhancement
- Final polishing: Overall color grading and finishing touches
Exploring professional photography editing guides provides insights into advanced techniques used by commercial retouchers working with fashion, beauty, and advertising clients. These resources demonstrate how layering multiple subtle adjustments creates polished results that maintain natural appearance.
Optimizing Files for Different Output Destinations
Photo Photoshop editing workflows must consider final output requirements from the project's inception. Images destined for large-format printing require different preparation than web graphics or social media content. Understanding technical specifications prevents quality loss and ensures images perform optimally in their intended environments.
Preparing Images for Web and Social Media
Web-optimized images balance visual quality against file size constraints, loading speed requirements, and device compatibility. Social media platforms apply additional compression during upload, making pre-optimization essential for maintaining acceptable quality after platform processing.
| Platform | Recommended Dimensions | Format | Color Space | Max File Size |
|---|---|---|---|---|
| Instagram Feed | 1080 x 1080 px | JPG | sRGB | 8 MB |
| Facebook Cover | 820 x 312 px | JPG | sRGB | 100 KB |
| LinkedIn Post | 1200 x 627 px | PNG/JPG | sRGB | 5 MB |
| Twitter Header | 1500 x 500 px | JPG | sRGB | 5 MB |
| Pinterest Pin | 1000 x 1500 px | JPG | sRGB | 20 MB |
sRGB color space remains standard for all web and digital screen applications. Converting images from wider gamut spaces like Adobe RGB or ProPhoto RGB to sRGB prevents unexpected color shifts when browsers and applications interpret color data. This conversion should occur as the final step before export.
Sharpening for screen display differs significantly from print sharpening. Web images benefit from modest sharpening applied at 100% view, using amounts between 80-120% with small radius settings (0.5-1.0 pixels). Over-sharpening creates visible halos and artifacts that become particularly noticeable on high-resolution displays.
Print Preparation and Color Management
Print-bound images require larger dimensions, different color spaces, and alternative sharpening approaches compared to digital files. Professional printers typically request images in CMYK color space at 300 pixels per inch (ppi) resolution at final output size.
The conversion from RGB to CMYK often shifts colors, particularly vibrant blues, greens, and oranges that exist within RGB gamut but fall outside CMYK's narrower range. Soft-proofing features in Photoshop preview these shifts before final conversion, allowing preemptive adjustments that maintain visual intent within CMYK limitations.
Sharpening for print occurs at higher amounts than screen sharpening because printing processes naturally soften images slightly. The specific amount depends on paper type, printing method, and viewing distance. Glossy papers require less sharpening than matte surfaces, while large-format prints viewed from distance need more aggressive sharpening than close-viewing applications.
Mastering photo Photoshop editing combines technical knowledge with artistic vision, creating images that fulfill both creative goals and commercial requirements. Whether you're enhancing product photographs for online sales, perfecting portraits for clients, or developing creative composites for marketing campaigns, systematic workflows and proven techniques ensure consistent, professional results. When your editing demands exceed available time or require specialized expertise, Photo Editing Company provides professional retouching services including background removal, color correction, and comprehensive image enhancement tailored to your specific needs.
Related reading: