# What Are the 5 Most Important Photo Editing Basics?
Have you ever taken a photograph that looked beautiful on your camera but appeared too dark, dull, or poorly framed when you opened it on your computer? Maybe the colors looked different from what you remembered, or the main subject did not stand out as much as you expected.
These are common issues that can often be improved with basic photo editing.
The good news is that you do not need to be a professional photographer or spend years learning complicated software to make your pictures look better. A few simple editing techniques can make a noticeable difference.
But with so many editing tools available, where should you start?
If you are new to photography or photo editing, the best approach is to focus on five fundamental techniques before exploring advanced retouching.
**The five most important photo editing basics are cropping and composition, exposure adjustment, white balance and color correction, contrast and tonal balance, and sharpening and detail control.**
These techniques help address many common photography problems. They also provide a strong starting point for learning advanced editing skills later.
Whether you are editing family photographs, wedding pictures, social media content, or product images for an online store, these fundamentals can help you produce cleaner and more consistent results.
In this guide, we will explain each technique, why it matters, how to use it, and which mistakes beginners should avoid.
What Is Basic Photo Editing?
Basic photo editing is the process of making simple adjustments to improve a digital photograph.
It usually focuses on correcting common problems such as uneven brightness, inaccurate colors, poor framing, and excessive softness.
Unlike advanced photo manipulation, basic editing does not necessarily involve removing major objects, combining different photographs, or making complicated changes to the original image.
For example, imagine taking a photograph of a necklace for an online jewelry store.
The original image may have too much empty space, slightly dark lighting, and a warm color cast.
Using basic photo editing tools, you can crop the photograph, adjust its exposure, and correct its white balance.
These changes can help present the necklace more clearly without altering its actual design.
Basic photo editing is useful because many photographs do not require extensive retouching.
Sometimes, a few careful adjustments are enough.
Why Should Beginners Learn the Five Basic Photo Editing Techniques?
Learning the fundamentals helps you make better decisions when editing photographs.
Instead of randomly changing sliders, you begin to recognize which settings address specific problems.
For example, if a photo looks too dark, you can evaluate its exposure.
If the colors appear yellow or blue, you can examine white balance.
If the subject looks poorly positioned, you can consider cropping.
These skills are useful for several reasons.
You Can Improve Everyday Photographs
Personal photos, travel pictures, and family portraits often need minor corrections.
Basic editing allows you to improve these images without complicated techniques.
You Can Prepare Better Social Media Content
Consistent brightness, appropriate cropping, and balanced colors can make your photographs look more organized across social media platforms.
You Can Improve Product Presentation
Online sellers often need clear photographs with accurate colors and consistent dimensions.
Basic editing can help address these requirements.
You Can Build More Advanced Editing Skills
Cropping, exposure adjustment, color correction, contrast, and sharpening are used in many professional workflows.
Learning these fundamentals makes more complicated techniques easier to approach.
1. Cropping and Composition
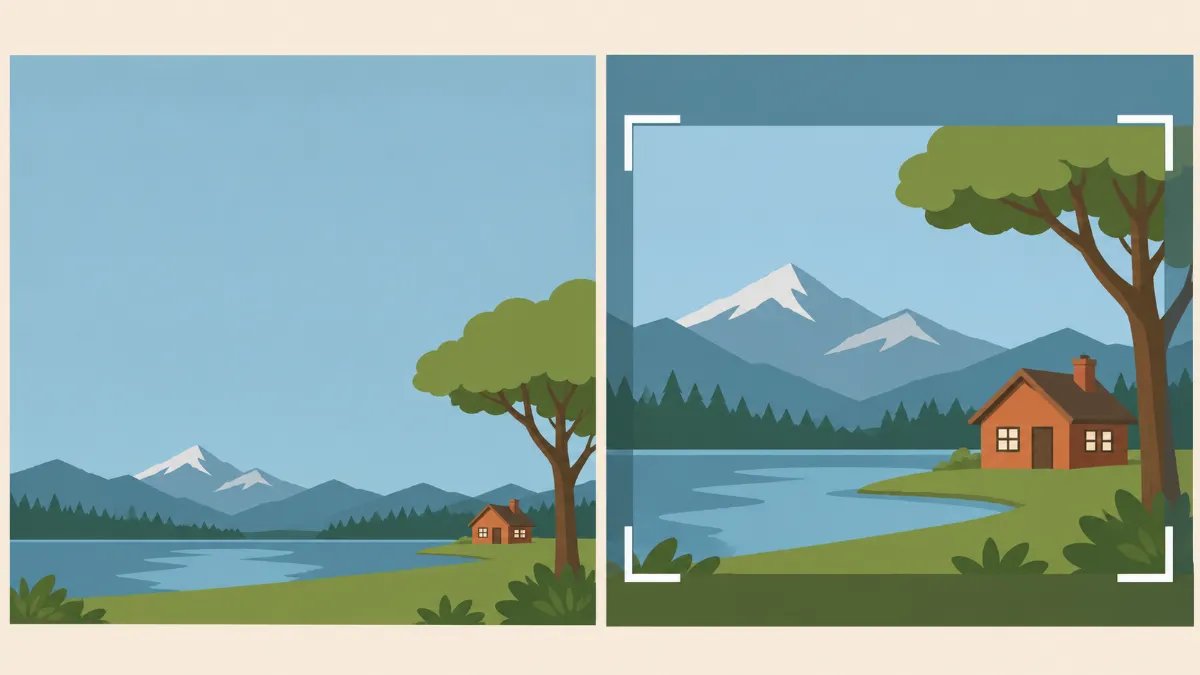
Cropping is one of the simplest and most useful photo editing techniques.
It involves removing unwanted areas around the photograph to improve framing or focus attention on the main subject.
Composition refers to how visual elements are arranged within an image.
Together, cropping and composition influence what viewers notice first.
Why Is Cropping Important?
Sometimes, a photograph contains too much empty space or distracting objects near the edges.
Cropping can reduce these distractions and create a more balanced appearance.
For example, imagine photographing a pair of shoes for an online store.
If the shoes occupy only a small part of the image, customers may have difficulty seeing the details.
Cropping some empty space can make the product more prominent.
However, cropping too tightly can make the image feel crowded or remove important information.
How to Crop a Photo
Open your photograph in an editing application and select the crop tool.
Examine the position of the main subject.
Adjust the crop boundaries while preserving important details.
If the photograph is tilted, use the straightening control when available.
Review the result before applying the crop.
Common Cropping Ratios
Different platforms use different image proportions.
A square ratio of 1:1 is common for certain product listings and social media posts.
A 4:5 ratio is useful for many vertical photographs.
A 16:9 ratio is often used for wide website banners and landscape displays.
A 9:16 ratio is commonly used for vertical videos and full-screen social content.
Always check the requirements of the platform where the image will be published.
Common Cropping Mistakes
One mistake is cutting off important parts of the subject.
For example, cropping a jewelry photograph too closely may remove part of a bracelet or necklace.
Another mistake is changing the framing when the client specifically requires the original composition.
For commercial photography, follow the approved image dimensions and positioning instructions.
**Beginner tip:** Use cropping to improve composition, not simply to make the subject larger.
2. Exposure and Brightness Adjustment
Exposure controls how light or dark a photograph appears.
It is one of the first settings photographers and editors examine when correcting an image.
A photograph with insufficient exposure may appear too dark, making important details difficult to see.
An overly bright photograph may lose detail in lighter areas.
Why Does Exposure Matter?
Appropriate exposure helps viewers see the subject clearly.
For example, a portrait taken indoors may show a person's face darker than expected.
A product photograph may contain shadows that hide important details.
Adjusting exposure can improve visibility.
However, the goal is not to make every photograph equally bright.
A nighttime photograph should still maintain the atmosphere of the original scene.
How to Adjust Exposure
Open your photograph and locate the exposure or brightness control.
If the photo is too dark, gradually increase exposure.
If it is too bright, reduce the setting.
Check the subject as well as the background.
Avoid making large adjustments without reviewing the result.
Understanding Highlights and Shadows
Highlights are the brighter areas of a photograph.
Shadows are the darker areas.
Many editing applications allow you to adjust these separately.
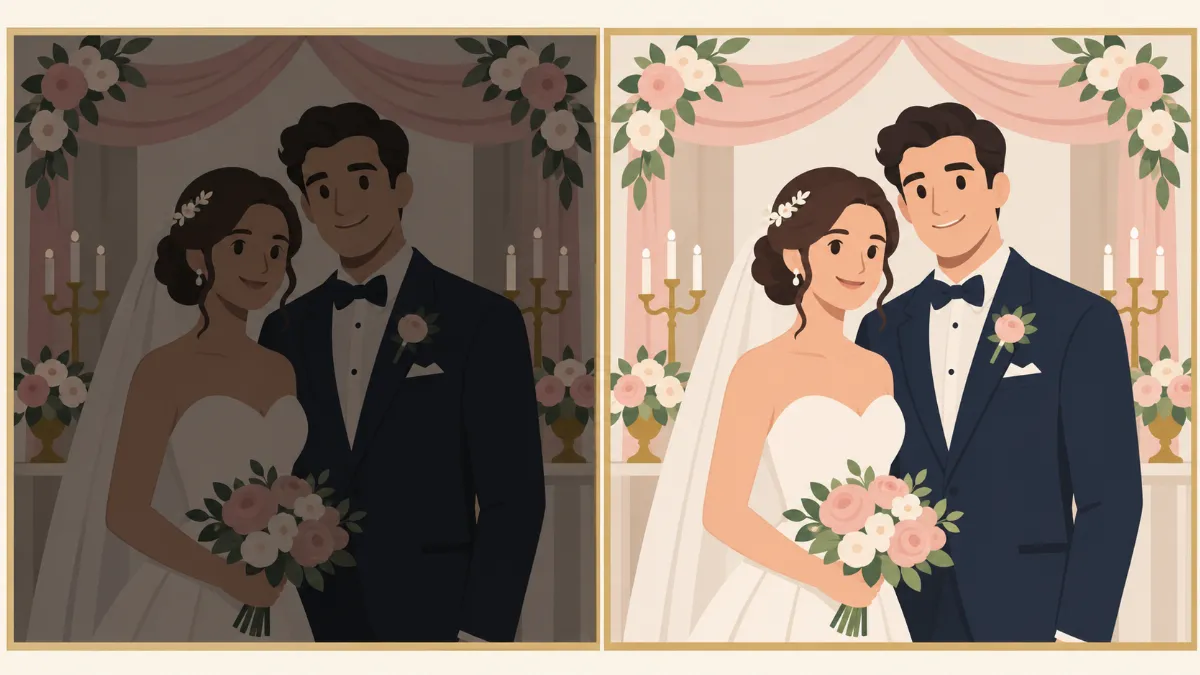
For example, a wedding photograph may contain bright windows and dark faces.
Increasing overall exposure could make the windows too bright.
Instead, adjusting shadows or using a selective mask may improve the subjects without changing the entire image.
What Is a Histogram?
A histogram is a graph that shows how brightness values are distributed throughout a photograph.
The left side generally represents darker tones, while the right side represents brighter tones.
A histogram can help identify possible underexposure or overexposure.
However, it should not be treated as a rule that every photograph must have an evenly distributed graph.
A dark evening scene may naturally contain more shadow information.
Common Exposure Mistakes
Beginners sometimes brighten photographs excessively.
This can make images look flat and remove their natural atmosphere.
Another mistake is attempting to recover details from completely black or white areas that contain little or no usable information.
Photo editing can improve recorded image data, but it cannot always recover details that were never recorded.
**Beginner tip:** Start with small exposure changes and use highlights and shadows to refine the result.
3. White Balance and Color Correction
Color correction is another important photo editing basic.
It helps make colors appear more accurate and consistent.
White balance is a key part of this process.
Different lighting conditions can affect the colors recorded by a camera.
For example, photographs taken under warm indoor lighting may appear yellow.
Pictures taken under cooler lighting may have a bluish appearance.
Why Is White Balance Important?
White balance helps correct unwanted color casts.
A white shirt should generally appear neutral rather than strongly yellow or blue.
Skin tones should remain natural.
Product colors should accurately represent the items being photographed.
This is especially important for e-commerce businesses.
A customer purchasing a green dress expects the actual product color to resemble the online photograph.
How to Adjust White Balance
Most photo editing applications provide temperature and tint settings.
Temperature controls the warm and cool appearance of the image.
Moving toward warmer settings generally adds yellow-orange tones.
Moving toward cooler settings generally adds blue tones.
Tint adjusts the balance between green and magenta.
Some applications also include a white balance picker that allows you to select a neutral reference area.
This can be useful when the photograph contains a reliable gray or white reference.
What Is Color Correction?
Color correction involves adjusting colors to make the image appear accurate and balanced.
You may use saturation, vibrance, hue, or individual color controls.
For example, a photograph may have accurate overall exposure but contain overly saturated green grass.
A selective color adjustment can reduce that green intensity without changing every other color.
Color Correction for Product Photography
Product photography requires careful color accuracy.
For jewelry, yellow gold should retain its actual warmth.
Silver should not become unnaturally blue or dark.
Gemstones should maintain their original colors.
For clothing, fabric colors should remain consistent across photographs.
This is why professional editors often compare images with approved product references.
Common Color Correction Mistakes
One mistake is increasing saturation too much.
Overly saturated photographs can make skin look orange and products appear inaccurate.
Another mistake is changing the white balance without considering the original lighting.
For example, warm candlelight may be part of the intended atmosphere of a wedding photograph.
Removing all warmth could make the image feel unnatural.
**Beginner tip:** Correct unwanted color casts while preserving the natural appearance of the scene.
4. Contrast and Tonal Balance
Contrast refers to the difference between the light and dark areas of a photograph.
Tonal balance describes how highlights, midtones, and shadows work together.
These adjustments influence the clarity and overall appearance of an image.
Why Is Contrast Important?
A photograph with very low contrast may appear flat or washed out.
An image with excessive contrast may contain overly dark shadows and harsh highlights.
Balanced contrast helps separate visual elements while preserving important details.
For example, a landscape photograph may benefit from moderate contrast adjustments to make mountains and trees more distinct.
A portrait may require gentler contrast to maintain soft skin transitions.
How to Adjust Contrast
Locate the contrast slider in your editing software.
Increase it slightly if the image looks flat.
Reduce it if the photograph appears too harsh.
Check the darker and brighter areas carefully.
A small adjustment may be enough.
Understanding the Tone Curve
Many editing applications include a tone curve.
This tool allows you to adjust brightness relationships more precisely.
The curve commonly represents shadows, midtones, and highlights.
For example, a gentle S-shaped curve can increase contrast by slightly darkening lower tones and brightening upper tones.
However, strong curve adjustments may remove important detail.
Beginners should start with small changes.
How Contrast Affects Portraits
Portraits often benefit from controlled contrast.
Too much contrast can emphasize skin imperfections and create harsh facial shadows.
Too little contrast may make facial features appear flat.
The ideal setting depends on the original lighting and desired style.
How Contrast Affects Product Photos
For product photography, contrast helps define textures and edges.
A leather bag may need enough contrast to show material details.
A polished ring may need controlled highlights and shadows to communicate its metal finish.
However, excessive contrast can make silver jewelry appear too dark or cause reflective surfaces to lose detail.
Common Contrast Mistakes
A frequent beginner mistake is adding strong contrast to every photograph.
Different subjects require different tonal treatments.
Another mistake is lifting all shadows until the photograph loses depth.
Natural shadows help communicate shape and lighting direction.
**Beginner tip:** Use contrast to improve clarity while preserving realistic highlights and shadows.
5. Sharpening and Detail Control
Sharpening is the process of increasing the apparent definition of edges and fine details.
It can make photographs look clearer when applied correctly.
However, sharpening should be used carefully.
Why Is Sharpening Important?
Photographs sometimes look slightly soft because of camera processing, lens characteristics, or image resizing.
Appropriate sharpening can help improve their appearance.
For example, sharpening may make the texture of a garment more visible.
It may also improve the appearance of gemstone edges or architectural details.
How to Sharpen a Photograph
Locate the sharpening tool in your editing application.
Start with a low adjustment.
Increase it gradually while observing the important details.
Whenever possible, inspect the image at approximately 100% zoom.
This helps you identify unwanted artifacts that may not be visible when the image is displayed at a smaller size.
What Happens When You Oversharpen?
Excessive sharpening can create bright or dark outlines around objects.
These outlines are often called sharpening halos.
Too much sharpening can also make skin textures appear rough or increase visible image noise.
For example, a portrait with excessive sharpening may show unnatural facial details.
A jewelry photograph may develop harsh edges that make polished metal look artificial.
Sharpening vs. Fixing Blurry Photos
Sharpening is not the same as restoring a severely blurred photograph.
If the camera failed to record important details because of incorrect focus or motion blur, ordinary sharpening cannot fully recover that information.
Some modern software may estimate or generate missing details, but these results should be reviewed carefully.
Selective Sharpening
Professional editors often sharpen only important areas.
For example, they may apply additional sharpening to a person's eyes while leaving the background soft.
For jewelry, important areas may include prongs, gemstone facets, and metal edges.
Selective sharpening can improve clarity without creating unnecessary artifacts across the entire image.
**Beginner tip:** Apply sharpening near the end of your editing workflow and review the final result at the intended output size.
How to Use All Five Photo Editing Basics Together
Now that you understand the five fundamental techniques, the next step is to combine them into one workflow.
Imagine you have taken a product photograph of a yellow-gold diamond ring.
The original photograph has slightly dark lighting, too much empty space, and an unwanted warm color cast.
You can approach the editing process in the following order.
First: Review the Photograph
Examine the original image.
Identify its main problems.
Check the lighting, composition, colors, and important details.
Second: Crop the Image
Adjust the framing according to the required dimensions.
Make sure the ring remains properly positioned and its original proportions are preserved.
Third: Correct Exposure
Adjust exposure to improve visibility.
Use highlights and shadows as needed to maintain the appearance of reflective metal and gemstones.
Fourth: Correct White Balance
Remove unwanted color casts while preserving the natural yellow-gold appearance.
Avoid changing the metal to an inaccurate color.
Fifth: Adjust Contrast
Refine the relationship between highlights and shadows.
Maintain realistic reflections and visible gemstone details.
Sixth: Apply Careful Sharpening
Sharpen important ring edges and facets when necessary.
Avoid excessive sharpening that creates artificial outlines.
Finally: Review the Result
Compare the edited photograph with the original.
Check that the jewelry design, color, and proportions remain unchanged.
This workflow combines the five editing basics into a repeatable process.
Common Beginner Photo Editing Mistakes
Learning photo editing involves experimentation, but several mistakes are worth avoiding.
Using Too Many Adjustments
Beginners may feel that every editing slider needs to be changed.
However, unnecessary adjustments can reduce image quality.
Focus only on the problems you identify.
Applying Strong Filters
Filters can create interesting effects, but excessive filtering may produce unrealistic colors.
Learn manual corrections before depending entirely on presets.
Ignoring the Original Photograph
Always compare your edited image with the original.
This helps you recognize when colors, contrast, or textures have changed too much.
Forgetting About Image Resolution
Cropping heavily can reduce the number of pixels available in the final image.
Start with high-quality source files and check the required output dimensions.
Overediting Product Details
Product photographs should represent the actual item.
Avoid changing jewelry designs, garment shapes, colors, and important physical characteristics.
Not Saving an Original Copy
Keep the original image so you can restore or revise your work.
Non-destructive editing tools are especially useful for this purpose.
Best Photo Editing Software for Learning the Basics
You do not need expensive software to practice fundamental editing techniques.
Several applications offer suitable tools.
Adobe Lightroom
Lightroom provides controls for exposure, color correction, cropping, contrast, and sharpening.
It is useful for photographers who want to edit and organize collections of images.
Adobe Photoshop
Photoshop offers basic adjustment tools as well as more advanced features such as layers, masks, and detailed retouching.
It can be useful if you plan to expand into professional editing.
GIMP
GIMP is a free, open-source application with tools for image adjustment and manipulation.
It supports cropping, color correction, sharpening, layers, and selections.
Canva
Canva provides accessible editing tools for basic image adjustments and social media content preparation.
Some advanced features require paid access.
Snapseed
Snapseed is a mobile photo editing application that supports cropping, exposure adjustments, color corrections, and selective editing.
It is useful for practicing on a smartphone.
Choose the software that feels comfortable and provides the tools you need.
The principles of basic photo editing remain similar across many applications.
How Long Does It Take to Learn Basic Photo Editing?
Learning the five basics does not require years of experience.
Many beginners can become familiar with cropping, exposure adjustments, and white balance after several practice sessions.
However, producing consistent results takes more time.
You need to develop an eye for identifying problems and deciding which changes are necessary.
A simple four-week practice plan can help.
**Week 1:** Practice cropping and correcting exposure.
**Week 2:** Learn white balance and basic color correction.
**Week 3:** Experiment with contrast and tonal adjustments.
**Week 4:** Practice sharpening and complete full image edits using all five techniques.
This schedule is only a suggested starting point.
You can adjust it according to your available time.
The most important habit is regular practice with different types of photographs.
Can AI Help With Basic Photo Editing?
AI-assisted editing tools can help with several basic adjustments.
Some programs automatically correct exposure, identify subjects, improve colors, or apply sharpening.
These features can be useful for quick editing.
However, automatic adjustments are not always accurate.
For example, AI may brighten a photograph too much or apply excessive saturation.
It may also change product details when generative editing features are used.
Learning manual photo editing basics helps you evaluate these results.
Instead of accepting every automatic correction, you can identify which changes are useful and which should be reduced.
AI can be a helpful editing assistant, but knowing the fundamentals remains valuable.
When Should You Hire a Professional Photo Editor?
Basic photo editing techniques are useful for personal photographs, social media content, and simple product adjustments.
However, some projects require additional skills or more editing time.
For example, advanced jewelry retouching may involve manually cleaning reflections, correcting detailed metal surfaces, and preserving gemstone structures.
Professional clothing editing may require ghost mannequin work, precise background removal, and consistent garment colors.
Wedding photographers may need hundreds of photographs color-corrected and reviewed.
Real estate photographs may require detailed exposure balancing and perspective correction.
For these projects, professional photo editing services can provide additional support.
At **Photo Editing Company**, we provide editing services for jewelry, apparel, products, portraits, weddings, real estate, and other photography categories.
Our services include background removal, clipping paths, color correction, retouching, and image preparation.
We work with clients who need accurate, consistent, and natural-looking results.
You can learn more about our services at Photo Editing Company.
Frequently Asked Questions
What Are the Five Basic Photo Editing Techniques?
The five most important photo editing basics are cropping and composition, exposure adjustment, white balance and color correction, contrast and tonal balance, and sharpening and detail control.
Together, these techniques address many common photography problems.
Which Photo Editing Skill Should I Learn First?
Cropping and exposure adjustment are good starting points.
They are easy to understand and can make a noticeable difference in many photographs.
Can Beginners Learn Photo Editing Without Photoshop?
Yes. You can practice basic editing with applications such as GIMP, Lightroom, Canva, or Snapseed.
Photoshop is not required to learn fundamental image adjustments.
Is Photo Editing Difficult for Beginners?
Basic photo editing is generally approachable with regular practice.
More advanced tasks such as detailed masking, compositing, and professional retouching require additional skills.
What Is the Difference Between Brightness and Exposure?
Both controls influence how light or dark an image appears.
However, their exact behavior depends on the software.
Exposure adjustments often simulate changes in image exposure, while brightness controls may affect tonal values differently.
Should I Adjust Color Before Sharpening?
In many workflows, it is practical to correct exposure and colors before applying final output sharpening.
This allows you to evaluate image detail after the main corrections are complete.
Can Photo Editing Fix Every Photography Mistake?
No. Editing can correct many problems, but severely blurred images, completely missing details, and extreme exposure errors may not be fully recoverable.
Getting a good original photograph remains important.
Do Professional Photo Editors Use These Basic Techniques?
Yes. Professional editors regularly use cropping, exposure correction, color adjustment, tonal control, and sharpening.
They may also apply advanced masking, retouching, and color management techniques depending on the project.
Final Thoughts
Learning photo editing becomes much easier when you start with the fundamentals.
Instead of trying every feature in your software, focus on five important techniques: cropping, exposure adjustment, white balance and color correction, contrast and tonal balance, and sharpening.
Each technique solves a different problem.
Cropping improves composition.
Exposure adjustment helps balance brightness.
White balance and color correction improve color accuracy.
Contrast controls the relationship between light and dark areas.
Sharpening improves the appearance of important details.
When used together, these techniques can help you create cleaner, more balanced, and more natural-looking photographs.
Remember that good photo editing is not about making the most adjustments.
It is about recognizing what needs improvement and preserving what already looks correct.
For beginners, practice with a few photographs and compare your results.
For businesses, these fundamentals also provide a useful foundation for maintaining consistent product images.
**Start with the five basics, make careful adjustments, and allow your editing skills to improve through regular practice.**