")
How to Use a Reflector in Photography for Better Results
Good lighting can make or break a photograph. This is why learning some practical reflector photography tips can help you take better control of your lighting. Reflectors are simple tools that bounce and shape light, making a big difference in your final image. If you’re taking portraits or shooting outdoors, learning how to use a reflector in photography for better results can be a real game-changer. It’s one of the simplest tools, but also one of the most powerful when used right. You don’t need fancy gear or years of experience to start seeing better results.
Even if you’re just using natural light, a reflector can help you control shadows and bring more focus to your subject. It can brighten faces, highlight details, and even help balance the exposure. This guide will walk you through easy, practical steps to get the most out of using a reflector. With a bit of practice, your photos will start looking brighter, clearer, and more professional. Let’s explore how a simple change can bring powerful improvements to your photography.
Understand the Purpose of a Reflector
A reflector is used to bounce light onto a subject. It helps fill in shadows and brighten areas that would otherwise appear too dark. This improves the overall lighting without using artificial sources. Reflectors are especially helpful in natural light settings.
They are affordable and easy to carry, making them a must-have for all photographers. By learning how to use a reflector correctly, you can make your photos look more polished and professional.
Know the Different Reflector Surfaces
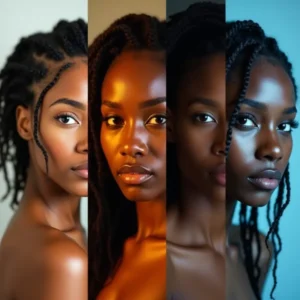 Reflectors come in a variety of colors. Each surface changes the light in a different way:
- White: Soft, natural fill light
- Silver: Bright, crisp light for contrast
- Gold: Warm tones, good for skin and sunsets
- Black: Absorbs light to deepen shadows
- Translucent: Diffuses light to soften harsh sunlight
Using the right surface is important for the mood and look of your photo. Try different types in different lighting conditions to learn how each one works.
How to Pick the Best Reflector for Your Photo Setup
 Not all reflectors are the same, and each color serves a different purpose. White gives soft, neutral light, while silver adds more brightness and contrast. Gold gives a warm glow, which works great during sunset or for warmer skin tones. You’ll also find 5-in-1 reflectors that combine different surfaces in one tool.
Choose your reflector based on your subject, light source, and the mood you want. If you’re just starting out, go with a medium-sized 5-in-1 reflector for flexibility. It’s light, easy to carry, and works in most shooting conditions.
Tips:
- Use white for soft, natural lighting
- Use silver for strong, bright highlights
- Use gold for warm, sunny looks
- Try black to block light or reduce shine
- Start with 5-in-1 reflectors for variety
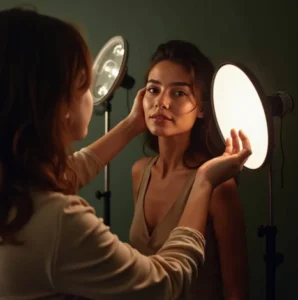
Reflector Photography Tips for Pro-Level Light Positioning
 Knowing how to place your reflector is key. The angle and distance from your subject control how the light hits their face or the object. Hold the reflector opposite the main light source; this could be the sun, a window, or even a soft box. You can reflect light onto the subject’s face to remove harsh shadows.
Practice moving the reflector around, high, low, or at side angles to see what works best. Try different positions and distances until you find the most flattering light.
Tips:
- Place opposite the light source
- Angle for soft light under the chin or eyes
- Keep it steady or use a stand
- Adjust distance for stronger or softer light
- Use a friend or clip to help hold it
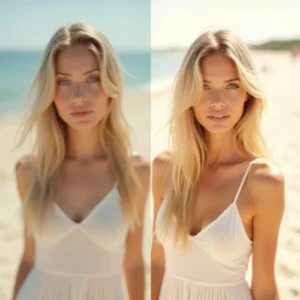
Use Reflectors for Natural Outdoor Light
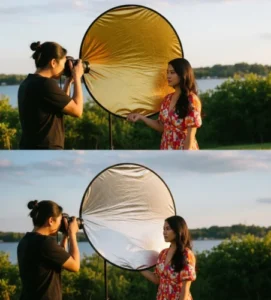
 Shooting outdoors gives you beautiful natural light, but it can also create harsh shadows. A reflector helps soften those shadows and keeps the light even. Especially during midday sun, placing a reflector below your subject’s face can help remove unflattering shadows.
You can also use reflectors during golden hour to bounce warm light for that soft, dreamy effect. It’s a quick fix that can make your outdoor portraits look more balanced and professional.
Tips:
- Use white or silver during bright sunlight
- Hold low to fill in shadows under the face
- Use gold reflectors at sunrise or sunset
- Move with the sun for best angles
- Avoid direct sunlight when possible
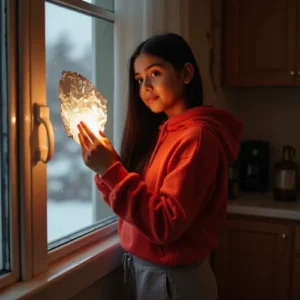
Indoor Reflector Photography Tips That Work
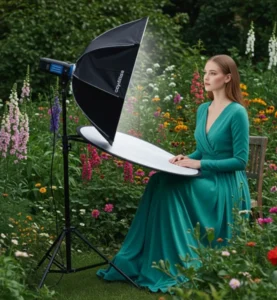
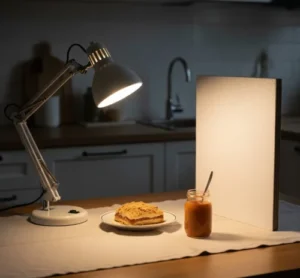 Reflectors aren’t just for outdoor shoots; they’re just as useful indoors. If you’re working with window light or a lamp, place the reflector on the opposite side to brighten the shadows. This makes your indoor shots look more natural and evenly lit.
You can also use smaller reflectors for product shots or flat lays. They help bring out colors and textures that might get lost in shadows. Even in small spaces, reflectors can make a big difference.
Tips:
- Use near windows to balance indoor lighting
- Position it near your subject’s darker side
- Combine with lamps or LEDs for extra light
- Use foam boards as DIY reflectors
- Keep reflector clean to avoid color casts
Why Distance and Angle Matter in Reflector Photography Tips
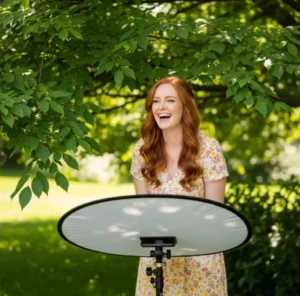
 The distance and angle of your reflector are key to getting the right lighting effect in your photos. When the reflector is placed close to your subject, it produces a brighter and more intense light. This is helpful when you’re working in low-light situations or want to highlight certain features of your subject. However, placing the reflector too close can cause harsh lighting or make the subject uncomfortable.
On the other hand, moving the reflector farther away softens the light. This can create a more natural and even look, especially useful for portraits or lifestyle shots. The angle of the reflector also affects how the light falls. A slight tilt can move the light from the chest to the face or from the background to the foreground. Even small changes in position can lead to noticeable improvements in lighting quality, so take your time to experiment and adjust.
Avoid Reflecting Direct Sunlight Too Harshly
 While sunlight is a strong and free source of light, it can be difficult to control. When using a silver reflector under direct sunlight, the light can become too bright, leading to overexposed areas in your image. This may cause your subject to squint or result in detail getting washed out, especially on lighter skin tones or reflective surfaces.
To manage this, it’s best to use white or translucent reflectors when working in strong sun. White reflectors provide a softer bounce, which makes the lighting feel more natural and less aggressive. Translucent reflectors can also act as diffusers when placed between the sun and the subject. This method reduces the intensity of the light and spreads it evenly, resulting in more balanced exposure across the frame.
Reflector Photography Tips for Creating Dramatic Shadows
Black reflectors, also known as flags or negative fill reflectors, are not used to reflect light but to control it. They work by absorbing light and creating deeper shadows, which can add mood or drama to your photo. This is especially useful in portrait photography when you want to create contrast or define facial features.
By placing a black reflector on one side of your subject, you can reduce the light on that side, making the image look more dynamic. This technique is great for artistic portraits, editorial photos, or any scene where you want to add a touch of mystery. It helps draw the viewer’s attention to the well-lit areas while enhancing depth and shape in the composition.
Using DIY Tools at Home for Reflector Photography Tips
 If you’re just starting out or working on a budget, you don’t need to buy professional reflectors right away. Many common household items can be used as DIY reflectors with excellent results. These alternatives are affordable, easy to find, and work surprisingly well for small projects and practice.
Here are some simple DIY reflector ideas:
- A white foam board provides soft light, is inexpensive, and is very easy to use for beginners.
- Aluminum foil on cardboard creates a bright reflection and is helpful in dark or low-light areas.
- A white bedsheet or curtain gives soft light and works well for larger setups or indoor shoots.
- A car windshield cover is useful outdoors, as it reflects sunlight effectively.
- Plain white paper can be used for small, close-up shots to brighten specific areas.
- A mirror gives strong, focused light and is ideal for adding sharp highlights in a photo.
These DIY reflectors may not be as durable or adjustable as professional ones, but they are great for experimenting and improving your skills. As you practice more and grow confident in using light, you can always upgrade to dedicated photography tools later.
Conclusion
Reflectors are simple tools that bring major improvements to your photography. If you are a beginner or experienced photographer, learning how to use a reflector in photography for better results helps control light, reduce shadows, and make your subjects stand out. Reflectors are affordable, easy to carry, and can be used with any camera setup.
By practicing with different types, angles, and settings, you’ll learn how to create the perfect lighting in any situation. You don’t need to spend a lot of money to get great results, just some time and effort. So, take out your reflector, go shoot in different lighting, and see the difference it makes. Share your experiences or tips in the comments; we’d love to hear how reflectors have improved your shots.
Read Next: 6 Simple Steps to Improve Jewelry Shoots


_converted")