10 Techniques to Avoid Reflections in Studio Photography
Reflections can be a common challenge in studio photography, especially when working with shiny surfaces like glass, metal, or polished products. These unwanted glares can distract from the subject and make your photos look less professional. Fortunately, there are several effective techniques to avoid reflections with the right ways.
In this guide, you’ll find practical tips to control lighting, angles, and surfaces to achieve cleaner and clearer results. By applying these methods, you can create sharp and well-balanced images that look polished and professional.
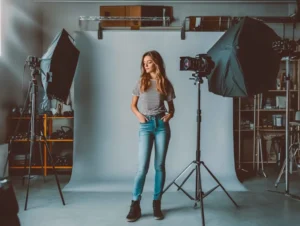
Perfect Your Lighting Setup
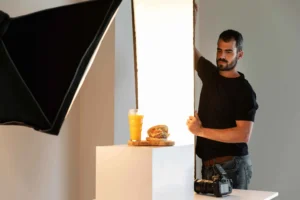
 Lighting plays a big role in controlling reflections. Start by using controlled light sources instead of depending on natural lighting, which can be unpredictable. Studio lights with adjustable settings allow you to manage brightness and direction more effectively. Experiment with different light positions to reduce glare on shiny surfaces and improve visibility in your shots.
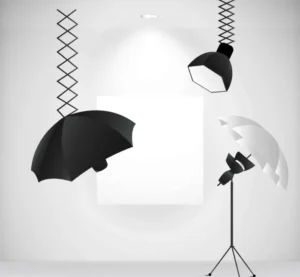
Using modifiers like softboxes or umbrellas is one of the most effective techniques to avoid reflections. These tools diffuse light, spreading it evenly to reduce glare on glass, metal, or other reflective surfaces. By softening the light, you create a more controlled environment that minimizes unwanted shine. Adjusting the height or angle of your lights further improves results by preventing light from bouncing back into the shot.
Lastly, avoid pointing your light source directly at reflective objects. Instead, try bouncing the light off walls or ceilings to create a softer glow. This indirect method reduces strong reflections while still providing enough brightness for clear and detailed images.
Position Your Lights Wisely
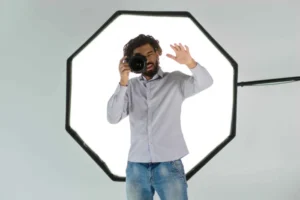
 The placement of your lights can make a huge difference in reducing reflections. Start by positioning your light sources at a slight angle instead of pointing them straight at your subject. This helps reduce the risk of light bouncing directly back into the camera lens.
One of the most practical techniques to avoid reflections is experimenting with different angles to find the best position that minimizes glare. Adjusting the distance and height of your lights can also change how they interact with reflective surfaces, creating softer highlights and reducing harsh reflections.
Using multiple light sources can also improve control. A well-balanced setup with key lights, fill lights, and backlights can minimize harsh reflections while adding depth and dimension to your photos. Experiment with various combinations until you find a setup that reduces unwanted glare without compromising image quality.
Use Polarizing Filters
Polarizing filters are excellent tools for controlling reflections in studio photography. These filters are designed to reduce glare from reflective surfaces like glass, water, or metal. By attaching a polarizing filter to your camera lens, you can adjust the filter’s angle to minimize reflections while maintaining color and detail.
 To get the best results, rotate the polarizing filter while looking through your camera’s viewfinder or screen. You’ll notice reflections fading or changing as you turn the filter, giving you more control over the final image. This simple yet effective tool is especially helpful when photographing products with glossy finishes or shiny packaging.
In addition to reducing reflections, polarizing filters can improve color saturation and contrast. This makes them a valuable addition to your photography gear, especially when working with reflective materials in a controlled studio environment.
Control Your Angles
 Adjusting your shooting angle is another effective way to reduce reflections. Changing the camera’s position can alter how light interacts with reflective surfaces. Try shooting from slightly above or below the subject rather than straight on to reduce glare.
Experiment with different angles until you find one that minimizes unwanted reflections. Sometimes, even small adjustments can make a big difference. Tilting the camera just a few degrees or shifting your subject slightly can reduce light bounce and improve clarity in your images.
Using a tripod is an effective technique to avoid reflections, as it helps maintain consistent angles while allowing small adjustments. Taking the time to position your camera correctly results in clearer, more detailed photos with minimal glare.
Try a Matte Finish
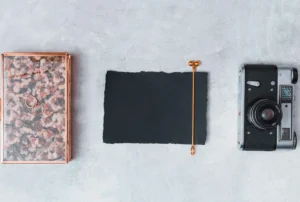 Glossy or reflective surfaces often cause glare, so one useful technique to avoid reflections is applying a matte spray or coating. This creates a non-shiny layer that softens reflections without changing the appearance of your subject.
 Soften the Light with Diffusers
 Diffusers are important techniques to avoid reflections, as they spread light evenly and reduce harsh glare. Placing a diffuser between your light source and subject creates softer, more controlled lighting, making it especially useful for product photography or close-up shots with reflective surfaces.
Diffusers come in various forms, including softboxes, umbrellas, and translucent panels. Each option softens the light differently, so experimenting with different types can help you find what works best for your studio setup. Using a diffuser can make reflective surfaces appear less shiny and more balanced.
In addition to diffusers, you can also place tracing paper, white cloth, or frosted glass in front of your lights for a similar effect. These alternatives are budget-friendly yet effective in reducing glare and improving overall lighting quality.
Use Black Cards to Block Glare
 Black cards, also known as flags, are useful tools for blocking unwanted reflections. By placing black cards near reflective surfaces, you can prevent stray light from bouncing back into your camera lens. This technique is especially helpful when photographing glass, metal, or other shiny objects. To use black cards effectively, position them in areas where light tends to reflect the most. Adjust their placement until the glare is reduced without affecting the main light on your subject. You can use foam boards, black paper, or specialized photography flags as black cards.
For smaller subjects, smaller black cards can be positioned closer to the object to control reflections more precisely. Combining black cards with diffusers or adjusted lighting angles can provide even better results in challenging studio setups.
Adjust Your Subject’s Position
 Sometimes, moving your subject slightly can reduce reflections. Shifting the object just a few inches to the left or right can change how light reflects off its surface. This small adjustment can significantly improve the clarity of your shots.
Rotating the subject can also help. Turning a reflective object at an angle that minimizes glare can reduce bright spots while still maintaining the overall look of your composition. This is particularly useful for items with curved or uneven surfaces.
For complex setups, experimenting with both the subject’s position and the light direction can help you achieve the best results. Taking your time to adjust these elements will give you more control over reflections in your studio photography.
Clean Surfaces for Clarity
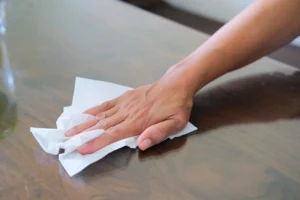 Dust, fingerprints, and smudges can worsen reflections, making them more noticeable in photos. Before shooting, clean your subject’s surface thoroughly using a microfiber cloth or cleaning solution designed for the material. Smudges on the lens can cause light to scatter, adding unwanted glare to your images. Regular cleaning makes sure that the result is clearer and more professional-looking results.
For glass and glossy objects, using anti-static cleaning sprays can reduce dust buildup and improve overall clarity. Taking these extra steps can make a significant difference in minimizing reflections.
Test for Perfection
 Achieving reflection-free photos often involves practicing techniques to avoid reflections. After setting up your lights and subject, take test shots to observe how reflections behave. Reviewing these images helps you spot areas needing adjustment. Focus on reflective surfaces, shadows, and unexpected glare to make precise changes and improve your results.
Don’t be afraid to tweak your lighting, angles, or subject’s position as needed. Even small changes can make a big difference. For example, slightly tilting a reflective object or shifting your light source a few inches can drastically reduce unwanted glare. You may also find that adjusting the intensity of your lights or adding diffusers helps create softer, more balanced lighting. Experimenting different combinations will give you a better understanding of how light interacts with various surfaces.
Taking time to review and adjust your setup before your final shoot can save time in post-processing. By testing and refining your approach, you’ll be able to achieve cleaner, sharper results. Checking your camera settings, such as exposure and white balance, during this process can also improve the overall quality of your photos. The more you practice testing and tweaking, the faster you’ll develop a routine that helps you achieve the best possible outcome.
Conclusion