
6 Simple Steps to Improve Jewelry Shoots
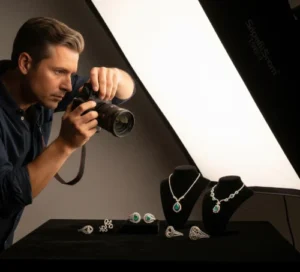
Taking great photos of your jewelry doesn’t have to be complicated. In fact, with just a few simple steps, you can turn your product shots from average to eye-catching. Good jewelry photos can help you stand out online, attract more buyers, and give your brand a more professional look. If you’re using a camera or just your phone, a little effort can go a long way. The key is to focus on the details and create a setup that makes your jewelry look its best.
This guide will walk you through six easy steps that can improve your jewelry shoots right away. From choosing the right background to adding soft lighting and doing light edits, these tips are made for beginners and small business owners. You don’t need fancy gear, just some basic tools, clean pieces, and a bit of creativity. These steps are simple to follow and can help bring out the real beauty of your work. Ready to upgrade your photos? Let’s get started.
Pick the Right Background
 Choosing the right background plays a big part in how your jewelry looks in photos. A background that’s too busy can take the attention away from the piece, while a plain but clean one helps the jewelry shine. Most of the time, neutral tones like white, gray, beige, or soft pastels work well because they don’t compete with the product. Think of the background as the stage, and your jewelry is the star, it should help highlight, not distract. If you want to add some personality, try soft textures like fabric or wood, but make sure they match the style of the jewelry.
Here are some easy background ideas you can try:
- White or light gray paper, clean and simple, great for classic product shots
- Marble or wooden surface, adds a touch of elegance or natural feel
- Soft fabric like velvet or linen, gives a cozy and classy look
- Acrylic sheet or mirror, helps create modern and creative reflections
- Outdoor backgrounds, only if the light is soft and the scene is calm
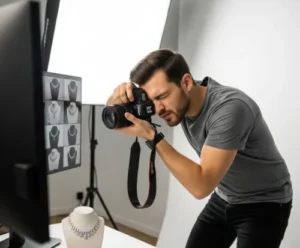
Use Soft and Even Lighting
 Good lighting is key to taking clear and attractive jewelry photos. If the light is too strong, it can create harsh shadows and clear spots that hide the details of your pieces. On the other hand, soft and even lighting helps show the true colors, shine, and texture of your jewelry without distractions. Natural light from a window can work well, especially in the morning or late afternoon when the sunlight is gentle. If you’re shooting indoors, using a lightbox or softbox can help spread the light evenly around the jewelry.
To get the best lighting for your shoots, try these tips:
- Use diffused light, place a white cloth or paper over light sources to soften the brightness
- Avoid direct sunlight, it can cause reflections and unwanted shadows
- Use two lights, placing lights on both sides can reduce shadows and make details clearer
- Try a light tent or softbox, these tools are made to spread light evenly
- Adjust the angle of the light, move your light source to see what gives the best result
Keep Your Jewelry Clean and Shiny
 Even the most beautiful jewelry can look dull in photos if it isn’t clean. Dust, fingerprints, and smudges are often hard to see with the eye but become very noticeable once photographed. Shiny surfaces like gemstones and metal reflect light, which means any small mark or dirt will show up clearly. That’s why cleaning your jewelry before every shoot is one of the simplest ways to make your photos look more polished. A clean piece not only looks better but also gives your brand a more professional and trustworthy image.
Here are some basic tips to keep your jewelry photo-ready:
- Wipe with a soft microfiber cloth – this removes dust and smudges without scratching
- Use a jewelry cleaning solution – follow product instructions for safe cleaning
- Avoid using your fingers – wear cotton gloves to prevent leaving prints
- Inspect under clear light before shooting – catch any spots you missed
- Store in a clean place – keep your pieces in a box or pouch until it’s time to shoot
Try Different Angles for Better Shots
 Taking photos from only one angle can make your jewelry look flat or lifeless. By trying different angles, you give your customers a better view of the design, shape, and details. Some pieces look better when shot from above, while others shine more when taken from the side or at a slight tilt. Angles can also help show texture, shine, or how the piece looks when worn. Exploring multiple views can make your photos more interesting and helpful to buyers who want to see more than just the front.
Here are some angle ideas you can try:
- Top-down view – great for flat items like earrings or pendants
- Side angle – works well for rings and shows height and shape
- 45-degree tilt – adds depth and brings outshine and texture
- Close-up or macro shots – perfect for showing small details and fine work
- Worn or modeled shots – shows size and fit when worn by a person or on a stand
Add Simple Props to Support the Look
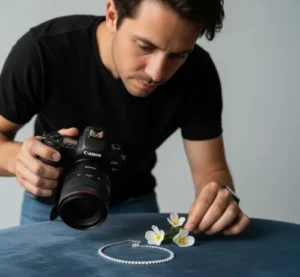 Props can help tell a story in your jewelry photos and make them more appealing. But they should never steal the attention from the main piece. Simple props add style, texture, or color to the photo without making it feel too busy. When used right, props can also help set a mood, either it’s elegant, casual, modern, or vintage. The key is to choose props that match the jewelry’s style and the message you want to send.
Here are some easy prop ideas you can try:
- Rings on soft fabric or boxes – adds a clean, cozy feel
- Earrings hanging on branches or cards – shows shape and makes them stand out
- Necklaces laid on stones or wood – creates a natural or earthy mood
- Jewelry next to flowers or leaves – adds a touch of softness or color
- Use stands or holders – helps display items like how they’d look when worn
Edit Just Enough for a Polished Look
Editing is a helpful step that can bring out the best in your jewelry photos, but it’s important not to overdo it. The goal is to make the image look clean and professional while keeping the piece true to how it looks in real life. Over-editing can make colors look fake or remove the natural shine and texture of the jewelry. Small edits like fixing the lighting, cleaning up the background, and adjusting sharpness can go a long way. Think of editing as a finishing touch, not a total makeover.
Here are some smart editing tips to follow:
- Fix brightness and contrast – to make the jewelry pop without changing its look
- Clean the background – remove dust, lines, or any unwanted spots
- Sharpen the image slightly – helps show fine details more clearly
- Adjust color balance – keep metal tones and gemstone colors looking real
- Use editing tools gently – avoid filters that change the jewelry’s true appearance
Conclusion
Improving your jewelry photos doesn’t require fancy tools, just a few simple steps and a bit of creativity. By focusing on the background, lighting, cleanliness, angles, props, and light editing, you can create photos that truly show the beauty of your work. These small changes can help your products look more appealing and professional to your buyers. Give these tips a try and see how they work for you. Have you tried any of these steps already? Share your thoughts or your own photo tips in the comments, we’d love to hear from you.
Read Next: 5 Best Canon Cameras to Boost Your Photography Adventure