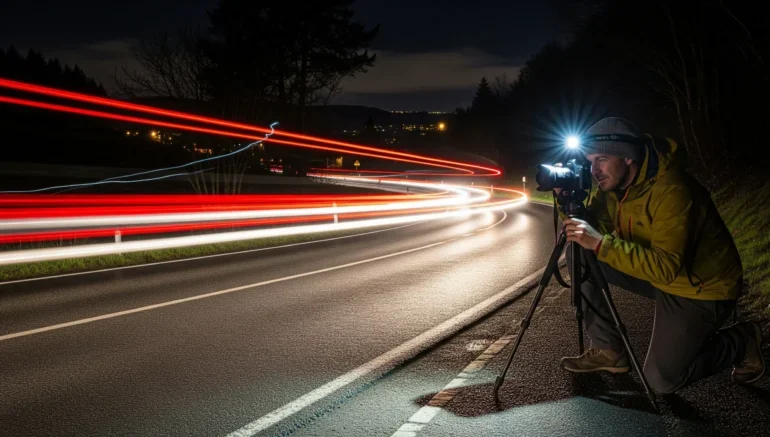
7 Easy Shutter Tricks to Improve Your Shots
Shutter speed is one of the most important settings in photography, and with easy shutter tricks, it decides how long your camera’s sensor is open to light, which can either freeze the action or create motion blur. Many beginners overlook it, but once you understand how it works, you’ll see a big improvement in your shots. If you’re taking a moving car, a jumping pet, or a child playing, the right shutter speed will help you keep those moments sharp and in focus.
The good news? You don’t have to be a pro to get it right. These 7 shutter speed tricks are designed to be easy and practical, even if you’re just starting out in photography. We’ll walk you through what to watch for, how to set your camera, and how to avoid the most common mistakes. With these simple tips, you’ll feel more confident behind the lens and start getting the sharp, attractive photos you want with no stress and no guesswork.
Here are the 7 Easy Shutter Speed Tricks to Improve Your Photography
Use the Right Shutter Speed to Take Motion Clearly
Choosing the right shutter speed depends on what you’re taking a photo of. A fast-moving subject, like a person running or a car passing by, needs a quicker shutter speed to avoid blurs. In photography, if you’re taking a picture of a still object or a calm scene, a slower shutter speed may work just fine. It’s all about knowing how much motion is in the shot and how much light is available. The more motion there is, the faster your shutter speed should be.
To help you decide which shutter speed to use, here are some simple tips:
- Great for sports, wildlife, or anything that moves quickly.
- Good for people walking, pets, or kids playing.
- Works well for still scenes or slow-moving subjects.
- Use with care and a tripod, ideal for low light or artistic blur.
- Don’t be afraid to test what works best for the scene.
Use a Tripod to Keep Shots Steady at Slow Shutter Speeds
 Using a tripod is one of the simplest ways to get sharper photos, especially when using slower shutter speeds. Even the smallest hand movement can cause blurs in photography, and using a tripod helps prevent that from happening. It keeps your camera still while you focus on framing the shot. This is helpful not only in low-light situations but also when shooting landscapes, portraits, or anything that requires careful composition. A tripod gives you balance and peace of mind, knowing your camera won’t shake while you shoot.
If you’re new to using a tripod, here are a few helpful tips:
- It’s easier to carry and still gives solid support.
- Make sure all legs are balanced to avoid tipping.
- This avoids shaking the camera when pressing the shutter button.
- Start with thicker bottom sections for better balance.
- It helps you stay ready for any shot, even in changing light.
Use ISO to Keep Shots Sharp in Tough Lighting
Image stabilization is a helpful feature that reduces blur caused by small movements when you hold your camera. Many modern photography cameras and lenses have this built in, and turning it on can make a big difference, especially when shooting without a tripod. It’s most useful in low light, zoom shots, or when practicing photography. Even a slight handshake can make your photos soft or blurry, and stabilization helps correct that. However, it’s not a replacement for steady hands, but it does give you a better chance of getting a clear shot.
Here are some tips for using image stabilization effectively:
- It helps reduce blur caused by hand movement.
- Keeping it on may cause a slight blur on a steady surface.
- Some lenses have a button; others are controlled in-camera.
- It can help you shoot at 1/30 or slower and still get a sharp image.
- It’s easy to forget it’s off when you need it the most.
Use Burst Mode for Sharp Shots of Fast-moving Subjects
 Burst mode is a camera setting that lets you take several photos quickly, one after another, by holding down the shutter button. This is very helpful when you’re trying to photograph something in motion, like a running child, a flying bird, or a fast-moving car. Since movement can be unpredictable, burst mode gives you more chances to get at least one sharp and well-timed shot. It’s a smart photography trick to improve your chances without needing perfect timing. Even if some shots turn out blurry, one or two are likely to come out just right.
Here are a few tips when using burst mode:
- Great for sports, pets, events, or any fast movement.
- Even in burst mode, handshakes can affect image conditions.
- Pre-focus on your subject, if possible, to save time.
- Burst mode can fill up your card quickly.
- Don’t keep every shot; choose the sharpest and most natural ones.
Speed, Lighting, and Clarity Boost Shot Quality
Good lighting plays a big role in how sharp your photos turn out. When there’s enough light, your camera can use a faster shutter speed, which helps avoid blur. In dark or low-light settings, your camera may slow down the shutter to let in more light, but this can lead to soft or shaky photography shots. That’s why it’s important to find or create proper lighting when doing photography. Natural light, like sunlight during the day, is one of the best and easiest light sources to use.
Here are a few simple lighting tips to help sharpen your shutter speed shots:
- Use daylight whenever possible, especially in the morning or late afternoon.
- Make sure your subject faces the light source to stay clear and sharp.
- They help bounce light onto your subject and reduce shadows.
- Lamps or LED panels can help add intensity where needed.
- If light is limited, tweak other settings to support a faster shutter speed.
Hold your Camera Right for Speed and Sharpness
 How you hold your camera effects how sharp your photos will be. If your grip is loose or unsteady, even the slightest hand movement can cause blur, especially in photography when using slower shutter speeds or zoom lenses. Learning to hold your camera the right way helps you keep it steady and increases your chances of taking clearer shots. It may seem like a small thing, but it makes a big difference in everyday shooting. Practicing this simple habit can lead to much better results over time.
Here are a few easy tips to hold your camera properly:
- Keep your right hand on the grip and your left hand under the lens for support.
- Bring your arms close to your body for better support.
- This gives you a solid base and better balance.
- If available, use it to reduce body movement.
- Don’t jab or shake the camera when taking a photo.
Test Shutter Speeds and Check your Shots to Learn
One of the best ways to improve your shutter speed shots is by testing different settings and reviewing your results. Every scene is different, and what works in one situation might not work in another. By taking multiple photography shots with different shutter speeds, you can see which settings give you the sharpest photo. Don’t be afraid to make mistakes; that’s how you learn what works best for you. Over time, you’ll start to recognize the right settings just by looking at the scene.
To make your practice more effective, try these tips:
- Record what settings you used for each shot.
- Check the sharpness and small details to spot blur.
- See how different shutter speeds affect sharpness.
- Test your skills in both radiant and low light.
- Most cameras show the shutter speed used in each shot.
Conclusion
Sharing your shutter speed shots in photography doesn’t have to be complicated if you follow a few simple habits, use the right tools, and stay patient with yourself. These photography tips can guide you toward better, clearer photos no matter what level you’re at. If you’re shooting fast action or quiet moments, applying what you’ve learned here can make every photo count. Keep practicing, review your results, and don’t be afraid to try new things. You’ll see your progress in every sharper, steadier shot you take.
Read Next: 5 Professional Headshot Tips to Improve Your Image


