
How to Achieve a Perfect White Product Photos on White Setup
Taking clean and professional white product photos can seem tricky, especially when you’re working with a white background. The fear of your product blending into the backdrop or looking flat is real. But don’t worry! With a few simple techniques, you can make your white products stand out beautifully, even in an all-white setup. If you’re shooting for an online store, a portfolio, or social media, clear and sharp images will always make a big difference. Great white product photos on white background can turn views into clicks and clicks into sales.
This guide will show you how to achieve perfect white product photos without needing fancy gear or advanced skills. You’ll learn how to control lighting, position your product, and set up your background the right way. It’s all about small steps that lead to big results. Even if you’re a beginner, you’ll find these tips easy to follow and apply. Let’s make your white products pop with clean, bright photos that look like they were done by a pro.
Why White Product Photos Matter
 White product photos on white background may look simply, but they play a big role in how people see and trust your product. A clean white background removes distractions, helping the customer focus only on the item you’re selling. It gives a neat and professional look that feels high quality, even if you’re using basic tools. Many online marketplaces, like Amazon and Shopify, prefer or require white backgrounds for consistency and clarity.
A clear white photo helps your product stand out in search results and makes it easier for shoppers to decide. High quality photos also create a better shopping experience. People can’t touch or test your product online, so images do most of the talking. If your photos are dark, blurry, or messy, buyers might scroll past without even clicking. On the other hand, a crisp, bright photo builds trust and gives your product a real chance to shine.
Here are a few quick reasons:
- They create a clean, high-end feel
- They match well with most website themes
- They reduce visual clutter and focus attention
- They build trust and help boost conversions
- They’re preferred by many online selling platforms
Getting Started with the Right Setup
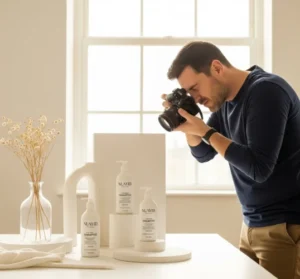
Before you start taking white product photos, it’s important to set up your space the right way. You don’t need an expensive studio to get great results, just a few simple tools and a clean area with good lighting. Start by finding a spot near a large window or under bright, even lighting. Make sure the surface is flat and clean, and your background is smooth and white (like a sheet of poster board or a roll of white paper). The goal is to keep everything distraction-free, so your product stands out.
 Planning your setup in advance saves time and makes your photos more consistent. It also helps avoid editing problems later, like fixing shadows or uneven backgrounds. If you’re shooting small items like jewelry or larger products like shoes, keeping things simple works best. Try using natural light first and only add lamps or lightboxes if needed.
Here are a few tips to get started smoothly:
- Choose a bright spot with soft, even light
- Use a white background like poster board or foam board
- Keep your product and camera steady (use a tripod if possible)
- Clear the space of anything that doesn’t belong in the shot
- Test a few shots before starting your full shoot
Lighting That Makes Your Product Stand Out
Lighting is one of the most important parts of taking great white product photos. Without the right light, your images can look dull, flat, or full of shadows. Natural light is a great place to start, shoot near a window during the day when the light is soft, like in the morning or late afternoon. If the light is too harsh, you can soften it by hanging a thin white curtain or piece of fabric. Good lighting helps your product look clean and sharp against the white background.
 If natural light isn’t available or consistent, you can use artificial lighting like LED lamps or ring lights. The key is to avoid mixing different light types, as that can affect the color of your photos. Place your lights evenly on both sides of the product to reduce shadows and create a smooth, balanced look. Even small changes in light direction can make a big difference in how your product appears.
Here are a few lighting tips to keep your setup looking professional:
- Use natural light near a window whenever possible
- Diffuse harsh light with a white curtain or paper
- Avoid overhead lighting that causes strong shadows
- Place two lights at equal angles for even lighting
- Keep the background lighted so it stays bright and white
Setting Up the White Background the Right Way
A clean white background is key to making your white product photos look sharp and professional. It helps remove distractions and gives your product the full spotlight. You don’t need anything fancy, a large sheet of white paper, a poster board, or a foam board can work great. Make sure the background is smooth, without folds, stains, or wrinkles. A curved setup (where the background gently bends behind and under the product) helps avoid visible lines or corners in the photo.
 Lighting your background properly is just as important as lighting your product. If the background looks dull or gray, it can ruin the clean look you’re aiming for. Try placing a small light behind or to the side of the background to keep it bright without washing out your product. Keeping some distance between the product and the background can also help reduce unwanted shadows.
Here are a few quick tips for setting up your background:
- Use a white poster board, foam board, or seamless paper
- Avoid textured or wrinkled backgrounds
- Curve the background to remove harsh lines
- Keep the product a few inches in front of the backdrop
- Light the background separately if it looks too dark
Placing and Positioning Your Product
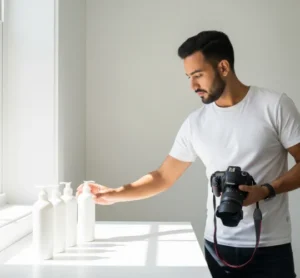
Placing your product in the right spot can make a big difference in how your photos turn out. Start by setting your product in the center of the background, making sure it’s upright, clean, and facing the camera. Avoid placing it too close to the edges or the back wall, this helps reduce unwanted shadows and keeps the photo looking clean. Make sure the product is straight and not tilted unless you want a creative angle. Keep your camera at eye level with the product or slightly above for the best look.
 Positioning also depends on what you’re trying to highlight. If your product has key details like logos, textures, or labels, make sure they’re clearly visible. Take a few test shots from different angles to see what looks best. You can also rotate the product slightly between shots to show different sides.
Here are some helpful tips to guide your placement:
- Center your product with enough space around it
- Keep it steady using stands or supports if needed
- Show the front and key features clearly
- Use consistent angles for a clean photo series
Camera Settings Made Simple
You don’t need a fancy camera to take great white product photos; most smartphones or basic cameras will do the job if used correctly. What matters more is knowing how to adjust the settings for clear, bright, and sharp images. Start by setting your ISO to a low number (like 100 or 200) to avoid grainy photos. Then, adjust the aperture (f-number) to a higher setting like f/8 or f/11, which helps keep the whole product in focus. Finally, use a slower shutter speed to let in more light, especially in low-light conditions but make sure your camera is steady, or use a tripod.
 If you’re using a smartphone, many camera apps allow you to control these settings manually. You can also tap to focus on the product and adjust the exposure by sliding your finger up or down on the screen. Always check your white balance too, it keeps your whites looking true and not too yellow or blue. Avoid using flash, as it can create harsh shadows or reflections.
Here are a few simple tips to get the best results from your camera:
- Use ISO 100–200 for clean, clear photos
- Set aperture to f/8 or higher for sharp focus
- Use a tripod to prevent blurs with slower shutter speeds
- Adjust white balance to keep whites looking natural
- Avoid flash; rely on soft, steady lighting instead
Editing to Polish Your Photos
Even with great setup and lighting, editing is the final step that brings your white product photos to life. It helps fix small flaws, brighten the background, and make your product look clean and professional. You don’t need to be an expert—simple editing apps like Snapseed, Lightroom, or Canva can do the job. Start by adjusting the brightness and contrast to make the white background look truly white. Then, sharpen the image slightly to highlight the product’s details.
The goal of editing is to improve, not to change the look of your product completely. Avoid using heavy filters or changing the color too much, as it may mislead buyers. Focus on cleaning up dust spots, removing shadows, and making the product pop without overdoing it. If you’re editing many photos, save time by applying the same settings or using a preset.
 Here are some helpful editing tips:
- Increase brightness to clean up the white background
- Adjust contrast and sharpness to make details stand out
- Use the crop tool to center and align your product
- Remove unwanted shadows or marks with the healing tool
- Keep the product’s real color and shape intact
Quick Fixes for Common Problems
Even with the right setup, it’s normal to run into small problems when shooting white product photos. One common issue is the product blending into the white background. To fix this, try adjusting your lighting to add soft shadows that help define the edges. You can also place a slight contrast behind or beside the product, like a light gray surface or a soft reflection, to make it stand out more. Another issue is uneven lighting, which can cause parts of the background to look off-white or gray, make sure your lights are evenly placed, and the background is lighted just as well as the product.
Other problems include blurry images, color changes, or harsh shadows. Blurry photos usually happen when the camera moves, use a tripod or steady your hands and avoid zooming in too much. If your whites look too blue or yellow, try adjusting the white balance in your camera or during editing. And for harsh shadows, try diffusing your light with a white cloth or paper.
 Here are a few quick fixes to help you solve these common photo issues:
- Add soft side lighting to separate the product from the background
- Use a tripod to prevent blur and keep your shots consistent
- Adjust white balance to keep colors natural and clean
- Use diffusers to soften harsh or dark shadows
- Retouch background areas that look too dark or uneven
Conclusion
Now that you have these easy tips and tricks, you’re ready to take stunning white product photos that make your items shine. Remember, it’s all about the right setup, good lighting, careful positioning, and a little editing polish. Don’t be afraid to experiment and find what works best for your products. Have you tried any of these tips before, or do you have your own favorite tricks? Share your experiences or questions in the comments below, we’d love to hear from you and help you create perfect white product photos every time.
Read Next: Top Camera for Amazing Photography in 2025