
Unexpected Mistakes During a Studio Photoshoot
Mistakes during a studio photoshoot can happen even with careful planning. From lighting issues to wardrobe mistakes, these unexpected problems can disrupt your session and affect the results. Knowing what to watch out for can help you stay prepared and avoid common setbacks.
By recognizing frequent mistakes during a studio photoshoot and taking simple steps to prevent them, you can keep your workflow organized and stress-free. A few smart adjustments can make a big difference in achieving professional-looking photos.
Mistakes to Watch Out For
Even the most prepared photographers can face unexpected problems during a studio shoot. From lighting errors to overlooked camera settings, these mistakes can affect the quality of your photos. Being aware of common issues can help you spot and fix them before they disrupt your session.
Lighting Blunders
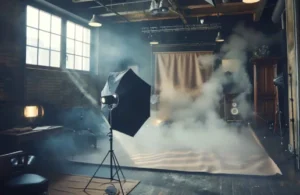 Poor lighting can drastically affect the outcome of your studio photoshoot. Harsh shadows, uneven brightness, or misplaced light sources can make subjects look unflattering or cause unwanted distractions in the background. These issues are common mistakes during a studio photoshoot, often happening when lighting equipment is not positioned correctly or when light modifiers such as diffusers and reflectors are overlooked. For example, placing a light source too close to your subject can create harsh shadows, while too much backlight can make your subject appear too dark. Bright spots on the forehead, nose, or cheeks are also common signs of poorly managed lighting.
To avoid this, test your lighting setup before the shoot. Use diffuses or reflectors to soften strong light and assure even coverage. Position your lights at different angles to see how shadows fall on your subject and adjust accordingly. Taking test shots from various angles can help you identify problem areas and make corrections before starting the actual session. Checking your subject’s position in relation to the light source can also help maintain a balanced look. If you’re unsure about your setup, consider using a light meter to measure brightness levels and adjust accordingly for consistent results.
Wardrobe Woes
 Outfit choices can make or break the visual harmony of a photoshoot. Clothing that clashes with the background, wrinkles that go unnoticed, or fabrics that reflect too much light can all cause problems. Bold patterns, overly bright colors, or shiny materials may distract from your subject and draw attention away from the intended focus. Accessories like jewelry or hats can also create unexpected reflections or shadows that may go unnoticed during the shoot, making them common mistakes during a studio photoshoot.
Plan wardrobe options in advance and consider how they will look under studio lighting. Choosing colors that complement the backdrop and make sure that the garments are clean, pressed, and properly fitting can help avoid these issues. It’s also helpful to have a lint roller and fabric clips on hand for quick fixes. If possible, ask your subject to bring a few outfit options so you can make the best choice once you’ve seen how they look in your studio setup. Taking a few test shots with each outfit can help you identify any issues early on.
Camera Confusion
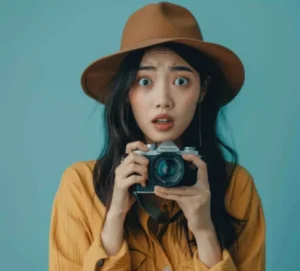 Forgetting to adjust your camera settings can result in poor image quality. Incorrect ISO, shutter speed, or white balance settings may lead to blurry shots, grainy images, or unnatural colors. These mistakes often happen when settings are left unchanged after switching between different environments. For instance, if you previously shot outdoors with a high ISO and forget to lower it for your studio session, your photos may end up looking overly bright or noisy.
To prevent this, make it a habit to review your camera settings before starting the session. Taking a few test shots allows you to spot potential problems early and make the necessary adjustments. Check your ISO for proper brightness control, set your shutter speed according to your subject’s movement, and adjust white balance to match your studio lighting. Using your camera’s custom settings feature can also save you time by allowing you to switch between presets designed for specific shooting conditions.
Posing Pitfalls
 Uncomfortable or awkward poses can make subjects look stiff or unnatural. This often happens when directions are unclear, or when poses don’t suit the subject’s body language, clothing, or the overall theme of the shoot. Nervousness or inexperience can also lead to awkward stances, forced smiles, or uncomfortable posture, which may affect the results.
To guide your subject effectively, demonstrate poses or provide visual references. Encouraging natural movements and relaxed expressions can help them feel more at ease, resulting in better photos. Talking to your subject throughout the session can also boost their confidence and help them loosen up. Simple tips like reminding them to relax their shoulders, shift their weight, or angle their body slightly can make a big difference. Having pose references available on your phone or printed on cards can provide quick ideas during the shoot.
Forgotten Essentials
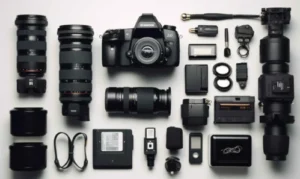 Missing small but important items can disrupt your workflow. Batteries, memory cards, cables, or key props are often overlooked, causing unnecessary delays during the shoot. Sometimes, minor yet important tools like clamps, tape, or cleaning clothes are forgotten, which can limit your ability to fix unexpected issues.
These oversights are especially frustrating when you’re on a tight schedule or working with clients who expect efficiency. Creating a checklist before your session can help you stay organized. Pack your gear carefully and double-check everything before heading to the studio to avoid last-minute surprises. It’s also helpful to keep spare items, such as backup batteries, memory cards, and basic repair tools, in your bag always. Consider organizing your equipment in labeled pouches or compartments to make items easier to find. Taking a few minutes to review your checklist can save you from unnecessary stress and keep your shot running smoothly.
Steps to Avoid Mistakes
Avoiding mistakes during a studio photoshoot starts with proper preparation. By testing your lighting setup, planning wardrobe choices, and double-checking camera settings, you can prevent common issues before they arise. Clear communication and organization are also key, guiding poses effectively and following a checklist can help keep your session smooth and stress-free.
Test Your Lighting
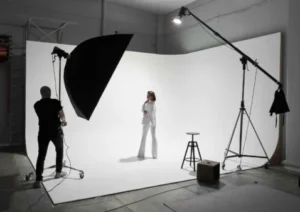 Taking time to test your lighting setup can help you avoid issues like harsh shadows, uneven brightness, or unwanted reflections. Diffusers, reflectors, and softboxes are useful tools for controlling light and achieving a softer, more balanced look. Positioning your lights at the right angle and adjusting their intensity can make a big difference in how your subject appears.
Before your session starts, conduct a series of test shots to identify problem areas. Check for unwanted glare, dark patches, or overly bright spots. Moving your lights slightly or adding modifiers can often fix these issues. Testing your setup early gives you time to adjust without rushing once your subject arrives.
Plan Wardrobe Choices
 Outfit coordination is just as important as camera settings and lighting. Clothes that clash with the background or fail to match the shoot’s theme can create distractions. Bold patterns, bright colors, or reflective fabrics may affect the overall look of your photos.
To avoid these problems, plan wardrobe options in advance. Discuss the shoot’s theme with your subject or client and suggest colors that will complement the background and lighting. Bringing a few outfit options can provide flexibility in case one choice doesn’t work well on camera. Additionally, keeping a lint roller, fabric clips, or wrinkle spray on hand can help fix minor issues during the session.
Check Camera Settings
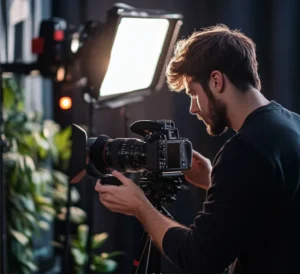 Forgetting to adjust your camera settings can lead to disappointing results. Incorrect ISO, shutter speed, or white balance settings can result in blurry images, poor lighting balance, or unnatural colors. These mistakes are often overlooked when transitioning between different environments.
Before starting the shoot, review all your camera settings to make sure they match your studio setup. Test shots are helpful for confirming exposure, color accuracy, and sharpness. Consider saving custom presets for your typical studio setup to adjust easier in future sessions. Taking a few moments to check these details can prevent frustrating mistakes later.
Guide Poses Clearly
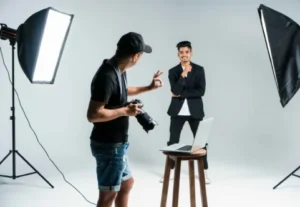 Unclearly posing instructions can leave your subject feeling awkward or unsure of what to do. This often results in stiff body language or uncomfortable expressions that are shown in the final images.
To avoid this, guide your subject by demonstrating poses or showing reference photos. Giving simple instructions like “turn your shoulders slightly” or “relax your hands” can make posing feel more natural. Encouraging your subject to shift their weight or adjust their posture can also improve the overall flow of the shoot. Offering positive feedback along the way can help build their confidence and create a relaxed atmosphere.
Create a Checklist
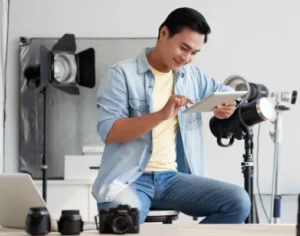 Forgetting small but important items can slow down your session or force you to improvise. Batteries, memory cards, cables, and props are common items that are left behind, often causing unnecessary stress.
Creating a checklist before your shoot can help you stay organized. Write down all your gear, accessories, and backup items, then go through the list as you pack. Having a routine for checking your equipment make sure nothing is overlooked. Keeping backup supplies, like extra batteries and memory cards, in your bag can also save you from unexpected issues.
Conclusion
Mistakes during a studio photoshoot can happen to anyone, but being prepared can make all the difference. By testing your lighting, planning wardrobe choices, checking camera settings, guiding poses clearly, and creating a checklist, you can reduce the chances of unexpected problems. Taking these simple steps helps make sure your session runs smoothly, allowing you to focus more on achieving great results. A little preparation goes a long way in making your photoshoot stress-free and successful.
Read Next: The Basics of Lighting in Studio Photography
