
Beginner’s Guide to Background Removal Service
Tired of cluttered backgrounds distracting from the main subject of your photos? A background removal service can help make your images cleaner, more professional, and ready for any purpose. If you’re a photographer aiming to refine your shots or a small business owner preparing product photos for your website, this process ensures your visuals stand out. It allows you to highlight the subject without unwanted elements taking away attention. By removing distractions, your photos gain a polished and consistent look that’s ideal for marketing, eCommerce, or creative projects.
In this beginner’s guide to background removal, we’ll walk through the basics of what it is and how it works. You’ll learn why removing backgrounds is important in today’s visual-driven world, especially for businesses that rely on product images to attract customers. We’ll also cover how this editing technique can improve branding, create uniformity, and make your photos adaptable across different platforms. With the right approach, background removal can turn ordinary images into professional-quality visuals. If you choose to do it yourself or use professional services, it’s a valuable skill to understand.
What is Background Removal?
 Background removal is the process of isolating the main subject of an image and removing the surrounding background. Moreover, it is the procedure of clipping or masking the image to separate the object from the background. This technique allows you to create clean, professional-looking photos where the subject stands out prominently without any distractions. Using a background removal service can save time and ensure high-quality results, especially for businesses that need multiple images edited consistently.
It is particularly useful for product photography, eCommerce listings, and marketing materials where clarity and focus are necessary. By removing unwanted elements, your photos become more versatile, allowing you to place the subject on different backgrounds or designs. This process also helps maintain a consistent look across a portfolio or website, enhancing overall presentation. If it is for personal projects or professional purposes, background removal is a valuable tool in modern photo editing.
Why is Background Removal Important? 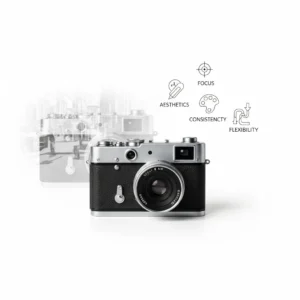
- Improved Focus: Removing cluttered or distracting backgrounds draws attention to the main subject of the photo, even if it’s a person, product, or object.
- Improved Aesthetics: Clean backgrounds can boost the overall visual appeal of your photos, making them more engaging and professional-looking.
- Consistency: Background removal ensures consistency across your images, especially important for e-commerce websites, product catalogs, and marketing materials.
- Flexibility: Once the background is removed, you can easily replace it with a different background or incorporate the subject into various designs and layouts.
Guide to Background Removal Service
How Background Removal Services Work:
- Upload Your Images: Start by uploading the images you want to have edited to the background removal service’s platform. Most services accept a variety of file formats, including JPEG, PNG, and RAW.
- Select Your Editing Preferences: Specify any particular editing preferences you have, such as keeping shadows or preserving certain details. Some services offer customization options to tailor the editing to your specific needs.
- Editing Process: The service’s team of skilled editors will use advanced editing software and techniques to carefully remove the background from your images while maintaining the integrity of the main subject.
- Review and Feedback: Once the editing is complete, you’ll have the opportunity to review the edited images. If there are any adjustments you’d like to make, most services offer revisions until you’re satisfied with the results.
- Download Your Edited Images: Once you’re happy with the edits, you can download the high-resolution edited images directly from the platform. Some services may also offer additional file formats or sizes to suit your needs.
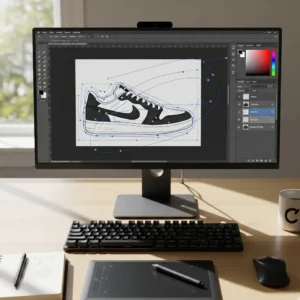
Removing a Background Image using a Photoshop Pen Tool
 Here’s a step-by-step guide:
- Open your image: Launch Adobe Photoshop and open the image you want to edit.
- Select the Pen Tool: You can find the Pen Tool in the toolbar on the left side of the screen. It looks like a fountain pen tip. You can also press “P” on your keyboard to select it quickly.
- Start outlining: Click on the edge of the object you want to keep to set the first anchor point. Then, click and drag to create a curved line if needed. Continue placing anchor points around the object, following its contours closely. For straight lines, just click without dragging.
- Complete the selection: After outlining the entire object, connect the last anchor point to the first one to close the path. You’ll see a small circle next to the pen cursor indicating that the path will close when clicked.
- Refine the selection: Once the path is closed, you’ll have a selection around your object. You might need to refine it for better accuracy. To do this, right-click inside the path and select “Make Selection.” Adjust the feather radius if necessary, then click OK.
- Invert the selection: Typically, you’ll want to remove the background, so invert the selection by going to Select > Inverse.
- Delete the background: With the background selected, hit the Delete key on your keyboard. This will remove the background, leaving only your object.
- Fine-tune as needed: Zoom in and check for any areas where the background might still be visible. Use tools like the Eraser Tool or refine your selection further with the Pen Tool.
- Save your work: Once you’re satisfied with the result, save your image. Consider saving it in a format that supports transparency, such as PNG, to preserve the background removal.
- Finish up: You can further improve your image by adding new backgrounds, adjusting colors, or applying effects as needed.
Practice and patience are key when using the Pen Tool for background removal. It may take some time to get used to, but with practice, you’ll be able to create precise selections efficiently.
Tips for Using Background Removal Services

- Choose the Right Service: Research background removal services to find one that fits your budget, turnaround time, and quality requirements. Look for reviews and examples of their work to ensure they meet your standards.
- Provide Clear Instructions: Be as specific as possible when specifying your editing preferences to ensure the best results. Include any reference images or examples that illustrate the desired outcome.
- Check for Accuracy: Before finalizing your order, double-check that the background removal has been done accurately. There are no noticeable artifacts or imperfections around the subject.
- Experiment with Different Backgrounds: Once the background is removed, experiment with different backgrounds to see what complements your subject best. This is your chance to get creative and improve the visual impact of your photos.
Conclusion
Background removal service offers a convenient and effective way to improve your photos by removing distracting backgrounds and highlighting the main subject. If you’re a photographer, e-commerce seller, or digital marketer, practicing background removal can help you create amazing visuals that captivate your audience. With the tips and guidance provided in this beginner’s guide, you’ll be well on your way to learning the art of background removal and taking your photos to new heights.
Read Next: Best Digital Marketing Strategies for Small Businesses in 2026