In today’s online market, first impressions happen fast, and they usually start with a photo…

The Perfect Guide to Editing Your Graduation Photos
Here’s how to easily edit your graduation photos like a pro! You’ve done it you’ve earned your degree and are ready to celebrate. What better way to remember this achievement than with some amazing graduation photos? Editing your photos to perfection can really make a difference. In this article, we’ll walk you through the steps of editing your graduation photos like a pro. From learning the basics to saving and sharing, we’ll cover everything.
How to Edit Your Photos: The Basics

When editing your graduation photos, start with the basics. Begin by cropping and straightening the image. Cropping helps remove distractions in the background, keeping the focus on important details like your face or graduation outfit. Straightening is important to make sure the background or horizon isn’t tilted, making the photo look clean and well balanced. These simple changes can significantly improve your photo without needing any special editing tools.
After cropping and straightening, adjusting the exposure is important. Exposure controls how light or dark your photo appears. Sometimes, pictures turn out too bright or too dark because of the lighting when they were taken. Adjusting the exposure helps balance the light, making details stand out more. Adjusting the highlights “the bright parts” and shadows “the dark parts” helps reveal hidden details, making the image look active and more natural.
Next, adjusting contrast and brightness is important. Contrast controls the difference between the light and dark areas. Increasing contrast makes your image look standout, while lowering it creates a softer effect. Brightness changes the overall lightness of the photo. If the image is too dark, you can increase the brightness to show more details. But be careful not to go too far, as too much brightness can make the photo lose its details and look ruin.
Choosing the Right Editing App
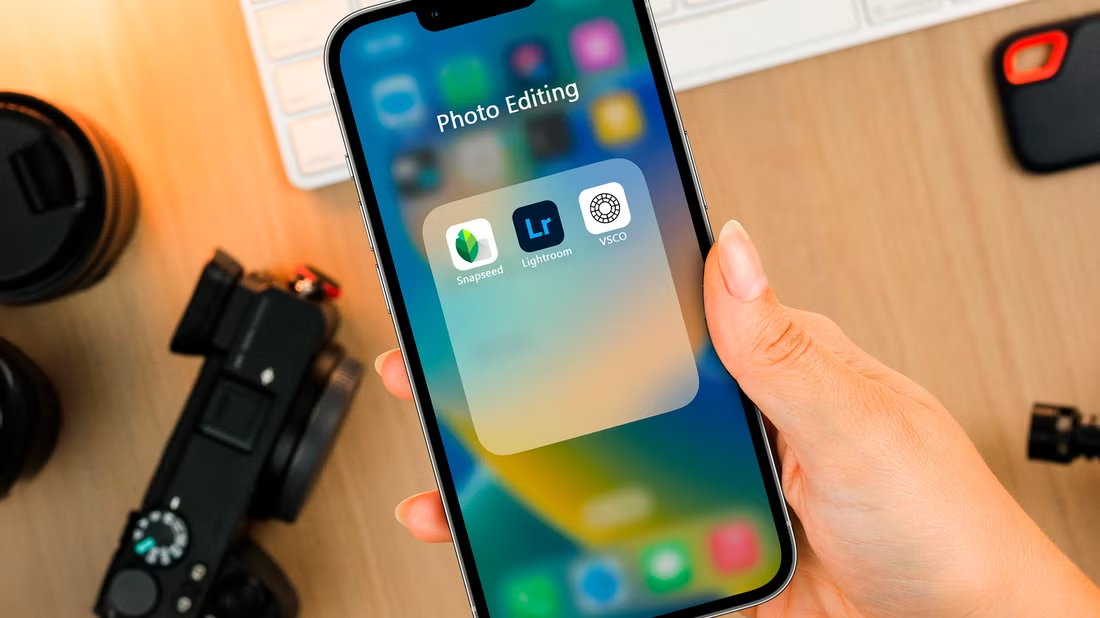
Choosing the right editing app is important for creating beautiful graduation photos. If you’re a beginner or prefer something simple, mobile apps like Snapseed or VSCO are great choices. These apps are free, easy to use, and offer needed tools like cropping, exposure adjustments, and filters. They also let you make simple changes to your photos without needing expert skills or a long learning process.
For those who want more control over their edits, consider using Adobe Lightroom or Photoshop. These programs offer professional level tools like advanced color grading, RAW photo editing, and precise adjustments for shadows and highlights. Lightroom is perfect for beginners but still powerful enough for advanced users, allowing you to create custom presets. Photoshop offers even more complete editing options, such as retouching and removing unwanted elements.
Some apps also offer built in presets, which can save time by applying specific styles or effects with just one click. Lightroom, for example, lets you download or create presets to speed up editing, providing a special look. However, it’s important to learn how to adjust these presets to fit your needs. Customizing them will help your photo look natural and professional while also saving you time.
Fixing Light and Brightness

Fixing the light and brightness is one of the first things to adjust in your graduation photos. Lighting has a big impact on how a photo looks, and sometimes you need to adjust it to get the best outcome. While most photos have a good exposure, it’s rare for a photo to be perfect right from the camera. Adjusting the exposure can help brighten dark areas, like your graduation gown, and make the whole photo look more balanced.
Editing tools let you change the exposure, highlights, shadows, and contrast. Lowering the highlights can prevent parts of the photo, like the sky, from being too bright, while adjusting the shadows can bring out more details in darker areas. You can also brighten the photo if it looks too dark. However, be careful not to make the image too bright, as it can cause you to lose details, especially in the lighter areas.
The goal is to get the right balance. If your graduation ceremony was indoors or in low light, you may want to brighten the photo. But if the photo was taken outdoors in bright sunlight, adjusting the exposure and highlights can help even out the image and stop parts from being too bright. By adjusting the light and brightness, you can make sure your photo looks natural and reflects the true feeling of your graduation day.
Improving Colors 
Colors are important in photo editing, especially for making your graduation photos stand out. One of the first things to adjust is white balance. This helps fix color changes caused by different light sources.
Once you’ve adjusted the white balance, you can adjust the saturation and vibrancy of the photo. Saturation controls how bright or intense the colors look. If you want your gown or other details to stand out, increasing the saturation can help. But be careful not to go too far, as it can make the colors look fake. Vibrancy is another setting that increases the softer colors, like your skin tone or background, without changing the bright areas that are already realistic.
For more detailed editing, you can change specific colors in your photo. Programs like Lightroom and Photoshop allow you to adjust certain colors without changing the rest of the image. For example, you can make the red of your gown brighter without changing the color of the sky or grass. This gives you more control to highlight certain parts of the photo while keeping everything looking balanced and natural. You can also try different color styles, like a warm golden glow or a cooler tone, to give your photo a special look.
Removing Imperfections

Even with careful photography, imperfections like blemishes or unwanted objects can appear in your graduation photos. Thankfully, photo editing tools make it easy to fix these issues. One of the most useful features for this is the healing brush tool. These tools let you click on or drag over blemishes or distractions, and the software will automatically blend them into the surrounding areas, making them disappear.
Sometimes, there are things in the background, like people or objects, that don’t belong in the photo. Many editing tools have features like the clone stamp or content aware tools to remove these distractions. By carefully filling in the areas you removed with matching textures, you can make the distractions disappear smoothly, keeping the focus on you in the picture.
While removing imperfections is important, it’s important to be gentle. Editing too much can make your photo look fake. For example, over smoothing the skin can make it look unreal. Instead, look for a balanced edit, removing blemishes and distractions without making the image feel overly perfected. After editing, zoom in to check the edges of your changes, ensuring everything blends naturally.
Using Filters or Presets

Filters and presets are popular for faster improvement of the look of your graduation photos. Filters are pre designed effects that instantly change the style or mood of your photo. They are helpful when you want to save time or create a specific vibe without manually adjusting each setting. Apps like Instagram, Snapseed, and Lightroom offer a wide range of filters, from vintage to modern looks, allowing you to transform your photo with a single click.
Presets are similar to filters but offer more customization. In programs like Lightroom, presets are groups of settings that adjust multiple aspects of your photo at once, such as exposure, contrast, and color balance. Presets can be a time saver, especially when editing multiple photos, This helps maintain a similar appearance in a set of photos. You can make your own presets or get presets from others, giving you different styles to choose from for editing.
Filters and presets are helpful, but it’s important not to depend on them too much. They can give you a good start, but you should adjust them to fit your photo. For example, if a preset makes your photo look too warm or cold, change the temperature to make it look more natural. Using too many filters can make your photo look fake, so it’s best to balance quick edits with careful adjustments.
Sharpening the Details

Improving the sharpness of the details in your graduation photos is an easy but effective way to make your image more noticeable. Sharpening increases the clarity of fine details, like your face, cap, or gown, making them look more defined and focused. Be careful when using the sharpness tool to improve these areas, giving your photo a clear and smooth appearance.
However, sharpening too much can create unwanted effects, like blurry edges or rough textures, so it’s important to use this tool sparingly. Instead of sharpening the whole image, focus on the parts you want to highlight, like your eyes or detailed areas of your gown. Zoom into the photo to make sure you’re sharpening only the important details.
The resolution of your photo also affects how clear it looks. When working with a high-resolution image, adjusting the clarity can help bring out the details better. But if your photo has low resolution, making it clearer can make it look blurry or pixelated. Always compare your edited image with the original to make sure the changes improve the quality without making it look too rough.
Saving and Sharing Your Graduation Photos

After all the editing, it’s important to save and share your graduation photo properly. Save a high resolution version of your edited image for printing or framing. High resolution images maintain sharpness and stay clear even when enlarged. Most editing programs allow you to export in formats like JPEG or TIFF, with TIFF being the best choice for printing since it preserves quality without compression.
In addition to the high resolution version, it’s useful to save a lower resolution copy for sharing online. Social media sites often reduce the quality of images, so a smaller version helps your photo load faster and look better. Each platform has its own size requirements, so resizing the photo before sharing can prevent cropping or blurry images.
Conclusion
Editing your graduation photos is a great way to keep the memories of this important achievement in your life. By learning the basics like cropping, adjusting exposure, and improving colors, you can improve your photos and make them truly shine. If you’re using a simple mobile app or professional software, the key is to find the right balance between improving your photo and maintaining a natural, realistic look. Removing imperfections, sharpening details, and adding filters or presets can further improve your photos, giving them a polished and professional feel.
Remember, the most important thing is to enjoy the process and have fun with it. Your graduation photos should reflect your special personality and the excitement of the moment. Once you’ve perfected your edits, share your photos with family, friends, and social media to celebrate your achievement. Here’s to your hard work paying off and to the amazing photos that will remind you of this special day for years to come.
Read Next: Fun Graduation Picture Ideas in 2024
Related Posts


Pretty! This has been a really wonderful post. Many thanks for providing these details.