"Get ready to capture the world with these 13 photography YouTube channels! From tips on lighting to drone photography, these experts will transform your skills and inspire your creativity.

How to Edit a Photo: A Step-by-Step Guide
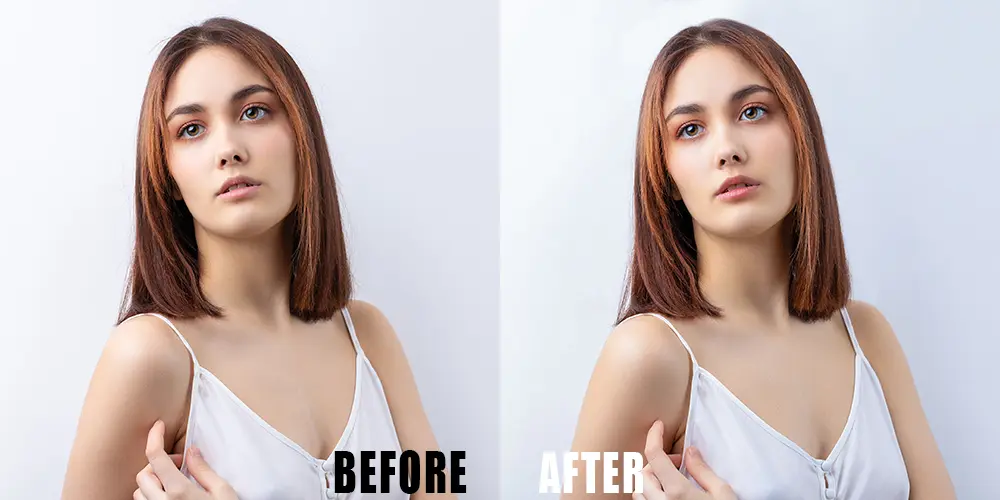
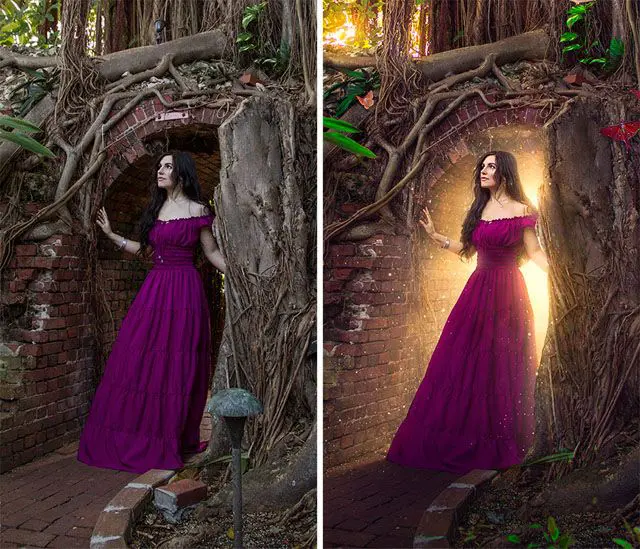
Before we dive into the specifics of the editing process, it’s crucial to grasp the fundamentals of photo editing. Editing means making changes to a picture to make it look better. These changes can be small or big, depending on what’s needed. In photo retouching, you improve your picture by adjusting things like brightness, contrast, colors, and fixing any mistakes.
Whether you’re just starting out with photos or you already know a bit, this guide will show you neat tricks to make your pictures look great. You’ll get the hang of simple things like cropping and adjusting angles, plus using filters and tools to make your photos look great.
Choosing the Right Software

The first step in getting good at photo editing techniques is picking the right software. The market offers a broad spectrum of tools, from user-friendly mobile apps to advanced desktop programs.
You should pick software that matches how good you are at it and what you need to edit. Get to know the buttons and tools in your photo editing software so you can use it better when you’re editing pictures. Picking the right software is really important, whether you’re making small changes or cool edits to get the results you want.
Evaluating Your Needs

Consider the type of photography you do and what edits you typically need to make. If you’re just starting, an intuitive program with basic editing tools might be sufficient. If you want to do fancy edits, use software with lots of cool features and things you can change.
Comparing Software Options

Take time to compare the different features offered by software like Adobe Photoshop, Lightroom, and GIMP. See if it’s easy to use, what tools it has, if it works on your stuff, and if there are people who can help if you get stuck.
Considering Budget

Your budget can significantly influence your choice. While programs like Photoshop require a subscription, others such as GIMP are open-source and free. Decide how much you want to spend on your editing software and if it has the stuff you need for that price.
Understanding File Formats

The file format of your photo can greatly impact the editing process. Before you start editing, it’s important to know that each format saves data differently and has good and bad points.
JPEG vs. PNG vs. RAW
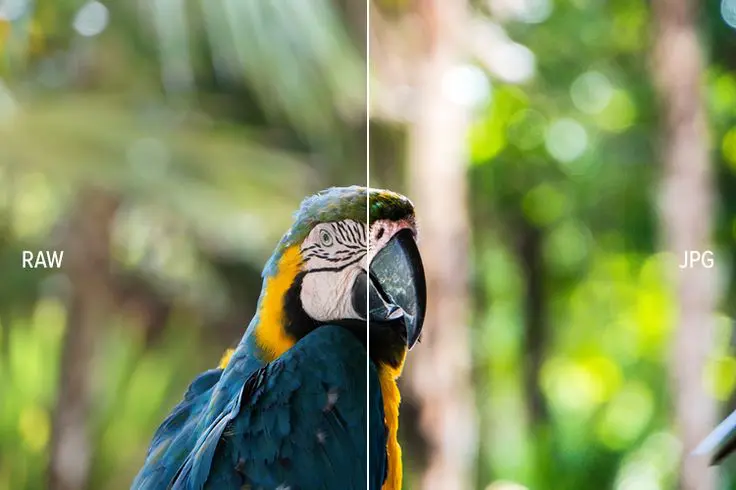
JPEG files are compressed, which makes them small and manageable, but they lose some image quality in the process. PNG files support transparency and are often used for web graphics. RAW files are similar to highly detailed pictures that haven’t been compressed. They’ve got loads of info, so you can tweak them heaps after taking the shot.
Importance of RAW for Editing

For photographers aiming for the highest quality and control, shooting and editing in RAW is essential. RAW files let you tweak your pictures a lot without making them look bad. This is super handy when you need to fix how bright or colorful your photos are.
Managing File Size and Quality

It’s really important to know how different types of files can change your edited photos when you save them.
Imagine if you save a picture as a JPEG, it becomes smaller in size but might not look as clear because of compression. On the other hand, if you save it as a TIFF, it keeps its high quality but takes up more space on your device.
Step-by-Step Guide to Editing a Photo
Step 1: Import Your Photo
Bringing your photo into your editing software is the first move in the editing process. This usually involves navigating the file menu or simply dragging and dropping the image into the program.
Organizing Your Photos
Before importing, ensure your photos are well-organized in folders on your computer or cloud storage. This organization will save you time and help keep track of your original and edited files.
Understanding Import Settings
Certain computer programs let you choose how you want to bring in pictures. You can make all your pictures look the same or change special photo files to a different type. Familiarize yourself with these settings to streamline your workflow.
Backing Up Originals
Always make sure to have a backup of your original images before starting any editing. This keeps your first file safe if something goes wrong while you’re editing, like saving over it or messing it up.
Step 2: Make Basic Adjustments
Basic adjustments are often the starting point for transforming your photo. These changes can really make a difference in how the picture looks. We’re talking about adjusting things like brightness, how dark or light it is, and the colors to get the picture just right.
Adjusting Exposure and Contrast
Use the sliders to correct too dark or overexposed areas, ensuring that the photo has a balanced range of tones. Contrast adjustments can add depth and make the subject stand out.
Fine-Tuning Color Balance
Making sure colors look right is super important for making skin and places look real. Adjust the color sliders to remove unwanted color tints and to enhance the mood of your photo.
Utilizing Histograms
A histogram is a graphical representation of the tonal values in your image. Learn to read histograms to avoid clipping in the shadows or highlights, ensuring a balanced exposure throughout your photo.
Step 3: Crop and Straighten
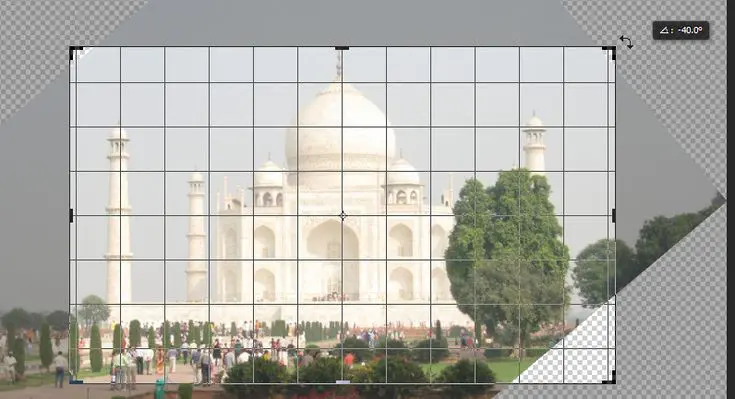
Cropping changes how your photo looks, and straightening fixes any tilt, making it look better.
Composing Through Cropping
Consider the rule of thirds or other arrangement guidelines when cropping to create a more engaging photo. Cropping can also help to remove distractions from the edges of the frame.
The Impact of Aspect Ratio
Remember the aspect ratio when cropping, especially if you want to use the image for a certain platform or print size. Some computer programs let you pick how your pictures look to fit regular paper sizes or social media sites.
Straightening for Balance
Try using the straighten tool to line up horizons or building edges. It can really improve how professional your photo looks.
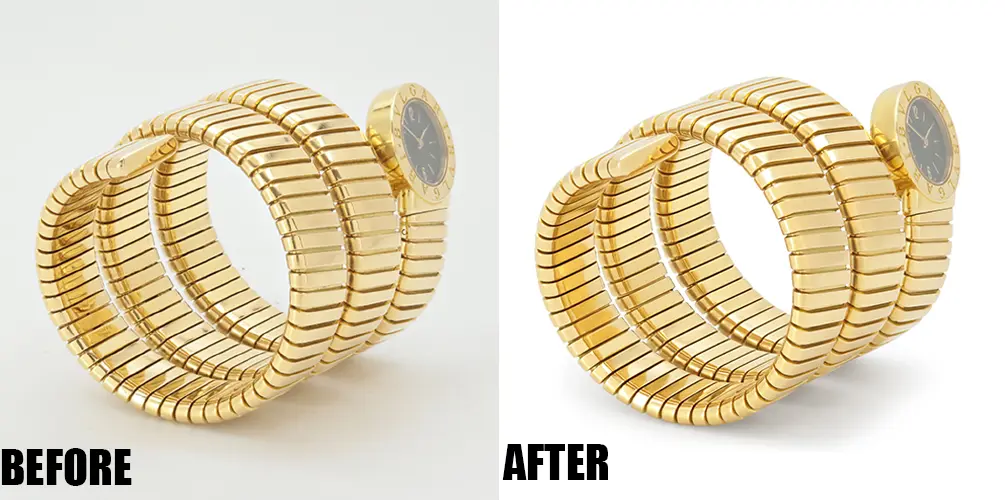
Step 4: Remove Blemishes

Fixing spots or marks can make your photo look better.
Spot Healing and Clone Stamp Tools
Familiarize yourself with tools like the spot healing brush or clone stamp for effective blemish removal. These tools can help you remove spots, dust, or unwanted objects seamlessly.
Being Mindful of Texture
When fixing spots, be careful not to do too much and lose the natural look of your subject, especially in portraits.
Maintaining Realism
Aim for a balance between removing distracting blemishes and maintaining the realness of the scene. The goal is to enhance, not to create an unrealistic portrayal.
Step 5: Adjust Color and White Balance

Changing colors and white balance can fix weird colors and make sure the colors in your photo look right and nice.
White Balance for Accurate Colors
Changing the white balance helps get rid of weird colors caused by different kinds of lights. This helps make sure we’re starting from a balanced place before making any more changes to the colors.
Color Adjustments for Mood
Color adjustments can enhance the overall mood of your photo. Warmer tones can create a cozy feel, while cooler tones might evoke a sense of calm or melancholy.
Saturation vs. Vibrance
Understand saturation: it makes all colors stronger. Vibrance, on the other hand, brightens dull colors while keeping skin tones natural. Use these tools to add pop to your photo without too much color it.
Step 6: Enhance Details
Bringing out the finer details can make your photo more captivating. Tools like sharpening can highlight textures and emphasize important features.
Sharpening Techniques
Discover various ways to sharpen images, like using unsharp mask or smart sharpen. Learn how to use them correctly so you don’t make the picture look weird or messy.
Detail Enhancement for Different Subjects
Change how you make things better depending on what you’re working on. Sharpen landscapes a little, but be careful with portraits to avoid highlighting blemishes.
Balancing Sharpness with Noise
Be cautious of increasing noise when sharpening. Some editing programs have tools to reduce noise, but it’s tricky to keep things clear without making them look grainy.
Step 7: Add Filters or Effects

Filters and effects can add an artistic flair or help convey a specific style. They can range from subtle enhancements to dramatic transformations.
Exploring Preset Filters
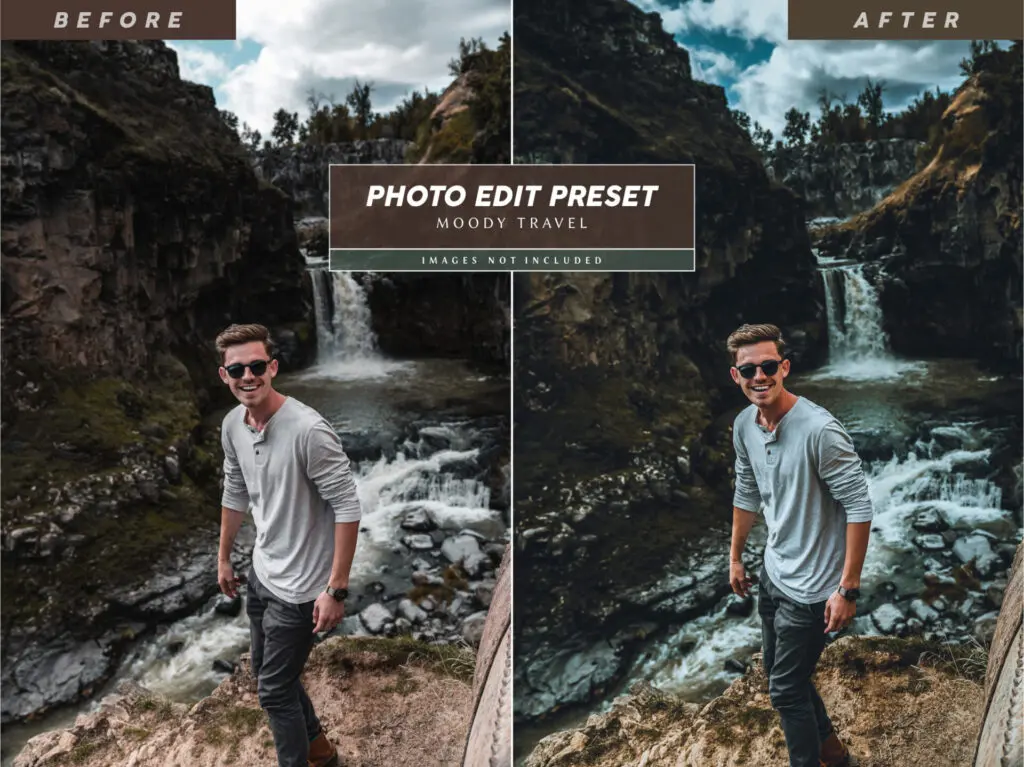
Most editing software offers a variety of preset filters. Explore these to quickly apply different looks to your photos, which can then be adjusted to your taste.
Customizing Effects

Learn to customize effects or even create your own for a unique look. This can involve adjusting layer blending modes, adding textures, or playing with color grading.
Layering Multiple Effects
For more complex edits, consider layering multiple effects. This can make your photo look better, but don’t change it too much.
Step 8: Save Your Edited Photo

When you’re done with your photo, save it in a way that works for what you want to do with it, like printing or putting it online.
Choosing the Right File Format
Pick a file format that gives a good mix of quality and ease of use. TIFF keeps everything and is good for saving, while JPEG is smaller and better for putting online.
Understanding Compression Options
If you’re saving as a JPEG, understand the trade-offs between file size and image quality. Making files smaller by compressing them more can make the pictures look not as good.
Saving for Different Mediums
Consider the medium where your photo will be displayed. Save with better quality for printing, and make it load quickly for the web without losing too much detail.
Archiving Your Work
Keep one version of your work as it is and another with all the different parts saved separately if your program can do that. This allows you to revisit and adjust your edits in the future without starting from scratch.
Tips for Effective Photo Editing
Making good edits to photos involves using technical skills and being creative. Here are some advanced tips to refine your editing process further:
Edit a copy of your original photo

Always work on a duplicate of your original photo to preserve the untouched file. This helps you go back to the beginning if you make big changes and need to start over.
Non-Destructive Editing
Try changing things without messing up the original, like using layers or smart tools. This method lets you make changes that you can undo without changing the original picture.
Versioning Your Edits

Create and save different versions of your edits. This can come in handy when you want to compare different ways of editing or if you need to give clients a few choices.
Use layers

Layers are a cool tool in lots of photo apps that let you have a ton of control when you’re editing pictures. You can use adjustments and effects bit by bit and choose which ones you want.
Organizing Layers

Make sure your layers are tidy by giving them names that make sense and grouping the ones that go together. This will make your workflow more efficient, especially on complex edits.
Masking Techniques
Learn to use layer masks to apply edits to specific parts of your photo. You can change masks whenever you need, so you can fix things without having to start all over again
Take breaks

Editing can take a lot of work and might make your eyes tired. It can also make you feel tired from making too many choices. It’s important to take breaks often to keep your mind fresh when you’re working.
The Importance of Fresh Eyes

Stepping away from your work can provide new insights when you return. You might notice things you missed before or come up with new ideas for your edits.
Avoiding Over-Editing
Taking breaks can stop you from editing too much. This can happen if you look at the picture for too long and forget what you’re trying to do.
Experiment with different tools and techniques
There’s no single correct method for editing a photo. Try different tools and techniques to find what works best for you and the picture you’re working on.
Learning Through Tutorials

Take advantage of the vast array of tutorials available online to learn new editing techniques. This can open up new possibilities and improve your skill set.
Practicing on Varied Subjects

Practice editing photos with different subjects, lighting conditions, and compositions. This will help you become more versatile and adaptable in your editing approach.
Creativity in Constraints

Limiting how you edit can help you get more creative. Try using just a few tools or effects and see what you can do with them.
Conclusion
Mastering photo editing can elevate your photography from good to exceptional. This complete guide has shown you the basic steps and some extra tricks to make your editing better.
Remember to be patient, experiment extensively, and most importantly, enjoy the creative process. With practice and persistence, you’ll be able to bring your photographic vision to life. Feel free to make changes!
Related Posts