
Phone Techniques Jewelry Photos
Using modern phone techniques jewelry photos can result in professional-grade images without the need for a bulky DSLR. Since mobile sensors have improved, the secret to a great shot lies in how you manage light and stability at a close range.
Follow these methods to improve your mobile photography:
1. Stability for Phone Jewelry Photos
Shaky hands are the main cause of blurry close-up images. Even a small vibration ruins the fine details of a gemstone or a polished metal surface.
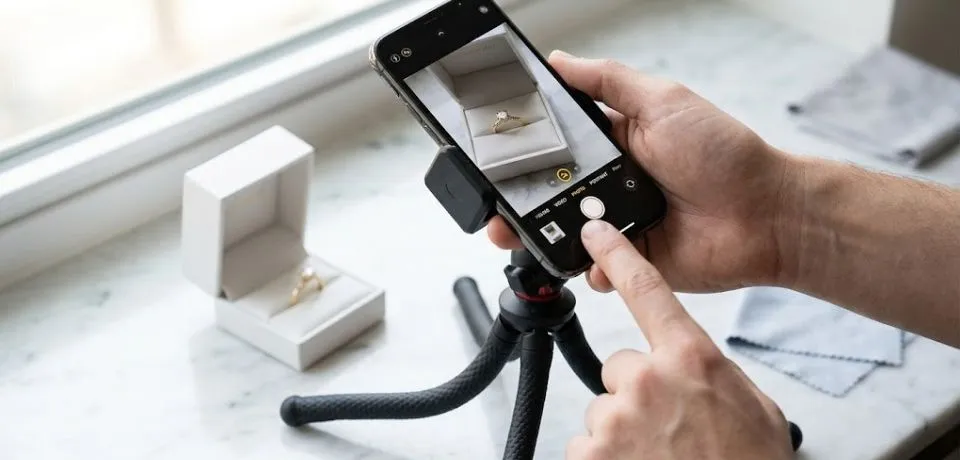
- Mini Tripod: Use a small tabletop tripod with a phone mount to keep the device perfectly still.
- Timer Method: Set a 2-second or 10-second timer before the shutter fires. This prevents the movement of your finger on the screen from shaking the lens.
- Voice Control: Enable voice commands (like saying “cheese” or “shoot”) to trigger the shutter hands-free.
2. Lighting Techniques for Jewelry Photos
Direct flash is a mistake because it creates harsh glares on shiny surfaces. Instead, focus on soft, indirect light sources to show off the metal.
- Window Light: Natural light from a window is a great tool. Use a thin white curtain or a piece of paper to soften the rays.
- Paper Cone Method: Wrap a sheet of white paper into a cone shape around your phone lens and the jewelry. This creates a DIY light tent that removes distracting room reflections.
- Reflectors: Use a small piece of white foam board or a silver card to bounce light back into the dark side of a ring or pendant.
3. Focus and Depth for Beautiful Photos
Phones often struggle with focusing on very small objects. Manual control is necessary to show the intricate parts of the piece.
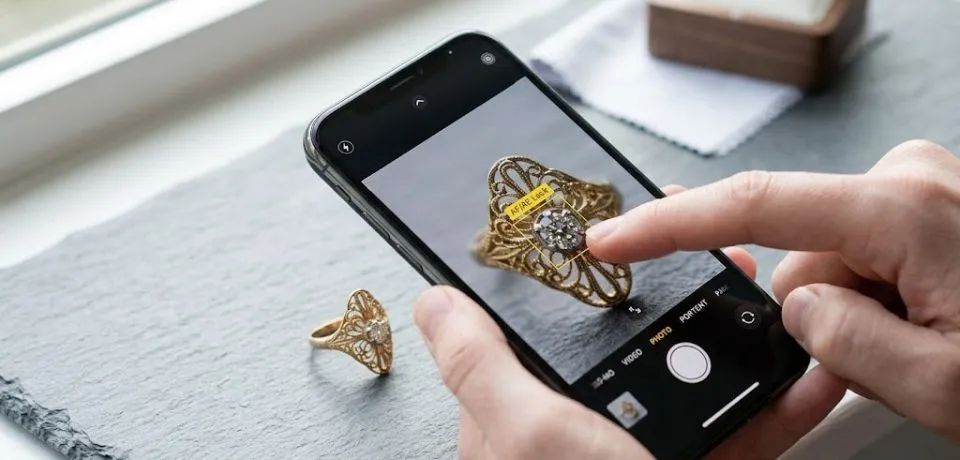
- Locking Focus: Tap and hold the screen where the jewelry is located until the focus lock appears. This prevents the phone from hunting for a different focal point.
- Exposure Slider: Once the focus is locked, slide your finger up or down to adjust the light level manually. This helps avoid “blown out” white spots on gold or silver.
- Macro Mode: If your phone has a dedicated macro lens, it will usually switch automatically when you get close. If not, stay about 10cm away and use the 2x zoom to avoid distorting the shape of the jewelry.
4. Setting the Scene with Phone Techniques Jewelry Photos
The background sets the mood for your brand. A Modern Tropical Minimalist look can make a simple piece of jewelry feel more expensive.
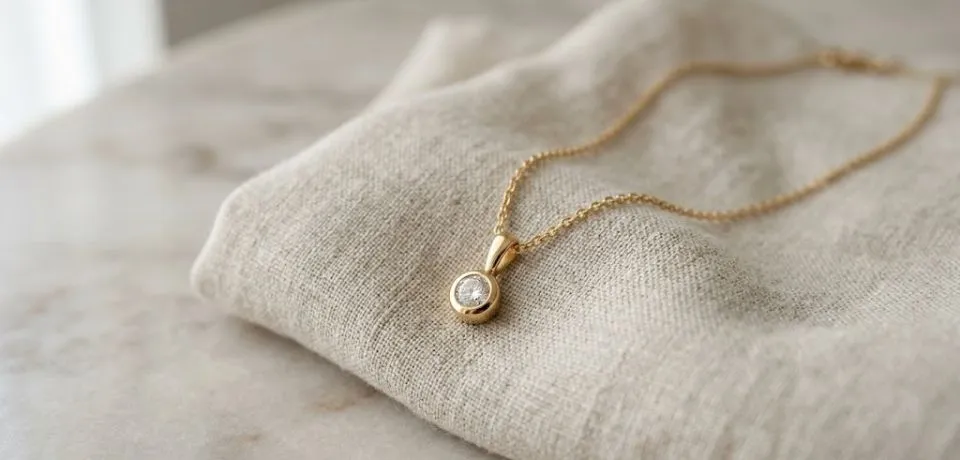
- Natural Textures: Use slate, wood, or even a piece of linen as a backdrop to add a high-end feel.
- Cleaning: Use a microfiber cloth to remove every fingerprint before you start. On a phone screen, oily smudges on a ring look obvious.
- Editing Apps: Use tools like Lightroom Mobile or Photoshop Express to fix the white balance and adjust the contrast for a cleaner look.
Conclusion
Producing professional jewelry photos with a phone, focusing on stability and light control. Using a mini tripod and a timer or voice commands prevents the blur caused by touching the screen. Soften harsh glares by using window light or a DIY paper cone to act as a diffuser. For the best clarity, lock your focus manually and use the exposure slider to prevent gold or silver from looking overexposed. Finally, set the scene with natural textures like wood or slate and use a microfiber cloth to remove every fingerprint before shooting.
High-end results come from stability and light management, not just the camera hardware. Even the most advanced phone sensor cannot compensate for a shaky hand or a harsh, direct flash.
Set up a tabletop tripod and use your phone’s built-in timer to produce sharper, glare-free jewelry images today.
Read Next: Jewelry Brands That Define Timeless Luxury