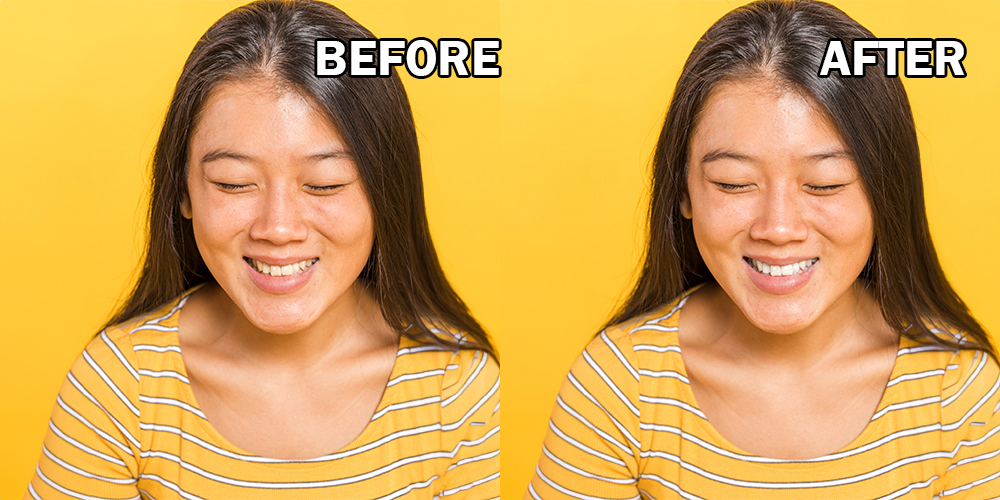
Teeth Whitening
Whitening teeth in Photoshop refers to the process of transforming teeth from yellowish to a whiter shade using a brush and the appropriate color palette tools in Photoshop. The colors chosen for this purpose will depend on one’s personal preferences and desired results.
This process may be done by a dentist or by the user themselves at home with the help of online tutorials from YouTube or similar platforms. Photoshop is a very powerful tool for creative professionals. However, it can be used for more than just design and photography.
Steps for Teeth Whitening in Photoshop
-
Open up a photo or image you want to retouch
Start by opening the image in Photoshop that you want to whiten the teeth in. This is the photo you’ll be editing. -
Create a new layer
To avoid altering the original image, create a new layer where you will do the whitening. This layer will allow for non-destructive editing. Go to the Layers panel and click the “New Layer” icon. -
Select ‘whiten all’ tool
Choose the Brush Tool or use the Dodge Tool (set to “Midtones” or “Highlights” depending on the photo’s lighting) to begin whitening. The Dodge tool is commonly used to lighten specific areas, such as the teeth. -
Pick an area of your photo that needs to be retouched
Zoom into the image and carefully select the teeth areas you want to whiten. Avoid the gums and lips to prevent accidental whitening of areas that should remain natural. -
Whiten all areas
Gently paint over the teeth using the Dodge Tool or the Brush Tool. If you’re using the Brush Tool, reduce the opacity and flow to ensure the effect is subtle and builds up gradually. -
Select ‘layer mask’
Click on the “Add Layer Mask” button in the Layers panel to create a mask. This allows you to adjust the whitening effect precisely, hiding or revealing areas where necessary. -
Create a selection
Use the Lasso Tool or the Quick Selection Tool to make a selection around the teeth. This ensures only the teeth are affected, and not the surrounding skin or areas. -
Fill selection with white
With the selection still active, go to the Layer Mask and fill the selection with white. This will make the whitening effect visible only within the selected area, while keeping the rest of the image untouched. -
Add new layer
Add another new layer above the previous layer to continue working with a clean workspace, allowing further adjustments or refinements. -
Add new layer mask
Create a new layer mask on the second layer to allow for more precise edits. This will help you make any final adjustments to the teeth without affecting other areas of the image.
Best Teeth Whitening Method in Photo Editing
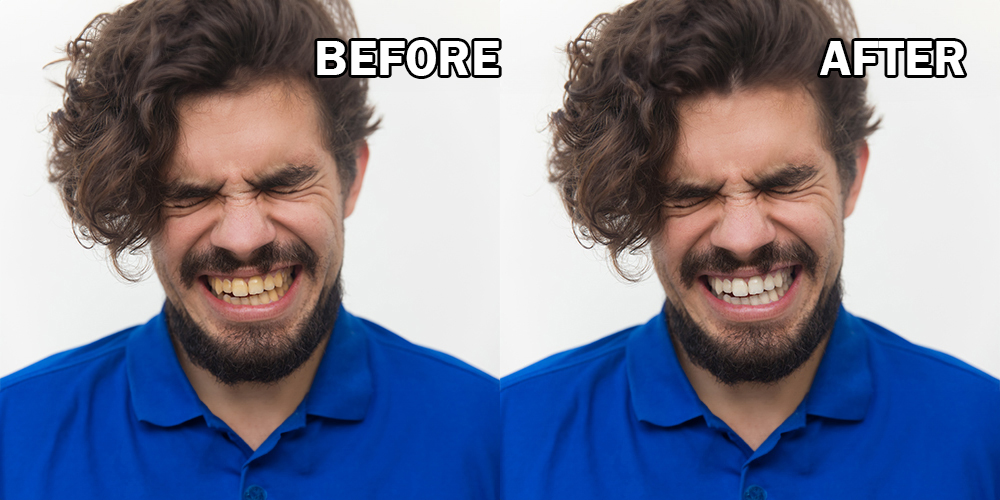
Whitening teeth in a photograph can be done using various methods, and professional photographers typically rely on techniques like adjustment layers, the Dodge tool, and airbrushing. Adjustment layers, such as the Hue/Saturation adjustment, are commonly used in Photoshop to target and lighten the yellow or orange tones in the teeth, resulting in a natural whitening effect. The Dodge tool is another popular option, where you can gradually lighten specific areas of the teeth for a subtle, controlled result.
Airbrushing is often used to smooth out the surface of the teeth, eliminating imperfections and giving them a polished look. However, it’s important not to overdo it, as too much airbrushing can make the teeth appear unnatural. By combining or using these methods individually, photographers can create a whiter and more vibrant smile while maintaining a natural appearance in the photo.
How our Service Works?

Benefits of having a Professional Photo Retoucher
1.Time Efficiency: Hiring an expert photo retouching service saves time, allowing you to focus on other aspects of your business or creative work.
2. Consistent Quality: Professionals ensure consistent and high-quality results across all edited images, maintaining a cohesive visual style.
3. Customization: Photo retouching experts provide a tailored approach, addressing specific requirements and preferences for each project.
4. Cost-Effective Solutions: Despite initial costs, hiring a photo retouching service expert can be cost-effective in the long run, as it saves time and ensures superior results.
5. Enhanced Visual Appeal: Professional retouching enhances the visual appeal of images, making them stand out and leave a lasting impression.