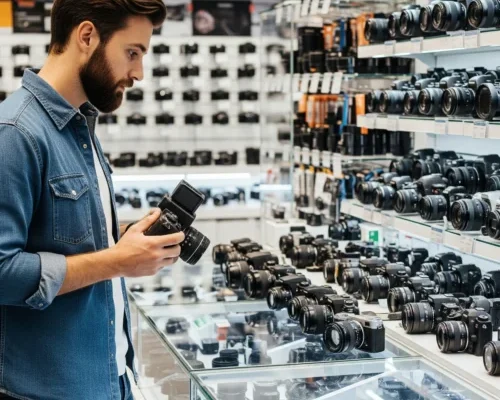
Finding your dream camera can be tricky with so many models and features out there…
The Ultimate Guide To Packshot Photography
When you look around, it’s easy to see the dramatic effects of technological advancement on the entire world. Digital marketing strategies have evolved significantly due to these technological changes. One such strategy that has gained prominence is packshot photography. This technique is essential for showcasing products in a visually appealing manner to attract potential customers. Learn how to capture professional-looking packshot images in this guide, and elevate your product presentation to new heights.
What is Packshot Photography?
Packshot photography is a technique used to take high-quality photos of products for marketing and advertising. This type of photography helps showcase products clearly and attractively, making them more appealing to potential buyers. With the rise of online shopping, having great product photos has become more important than ever.
Packshot photography involves careful lighting, positioning, and editing to highlight a product’s best features. In this guide, you’ll learn how to take professional-looking packshot photos to boost your product’s appeal. Packshot photography isn’t just about taking a picture of a product; it’s an art that involves meticulous attention to detail. Let’s break down what makes packshot photography a crucial asset for businesses and how it can impact consumer behavior.
Equipment needed
Similar to other advertising techniques and strategies, packshot photography requires precise equipment, space, and lighting. It isn’t a simple point-and-shoot event; it demands careful planning and setup. Packshot photographers must secure the right tools, such as high-quality cameras, tripods, and appropriate lighting equipment.
Additionally, they need a suitable space that allows for proper staging and positioning of the products. Proper lighting is crucial to highlight the product’s best features and ensure it looks attractive and professional. By mastering these elements, packshot photographers can create images that make products fly off the online shopping shelves.
The following are the necessary equipment to shoot packshot images:
Camera
For beginners, smartphones can be a great tool for photography, as their cameras have improved significantly over the years. In fact, some smartphones can capture better shots than professional cameras. With the right lighting and background, your smartphone can produce excellent results.

However, if you prefer to use a professional camera, a DSLR is the ideal choice. It offers more control and flexibility, but it’s important to learn the dos and don’ts of using such a camera to achieve the best results.
Background
Utilizing the right background is crucial as it can streamline the entire editing process. The safest and most recommended background for product photography is a plain white one. This type of background is easier to remove during the editing or polishing phase of photo processing. The good news is that you can improvise with a plain white background.

You can use a large, thick white paper or a simple white cloth. Alternatively, you can create your own lightbox or light tent using a plastic or wooden storage container with a removable lid and a piece of white craft paper. With these simple tools, you can achieve professional-looking product photos at home.
Lighting
Both natural and studio lighting offer advantages in photography, but understanding how they function is key. Natural light is ideal for those with budget constraints, as it’s easier to manage and can save time compared to setting up studio lights.
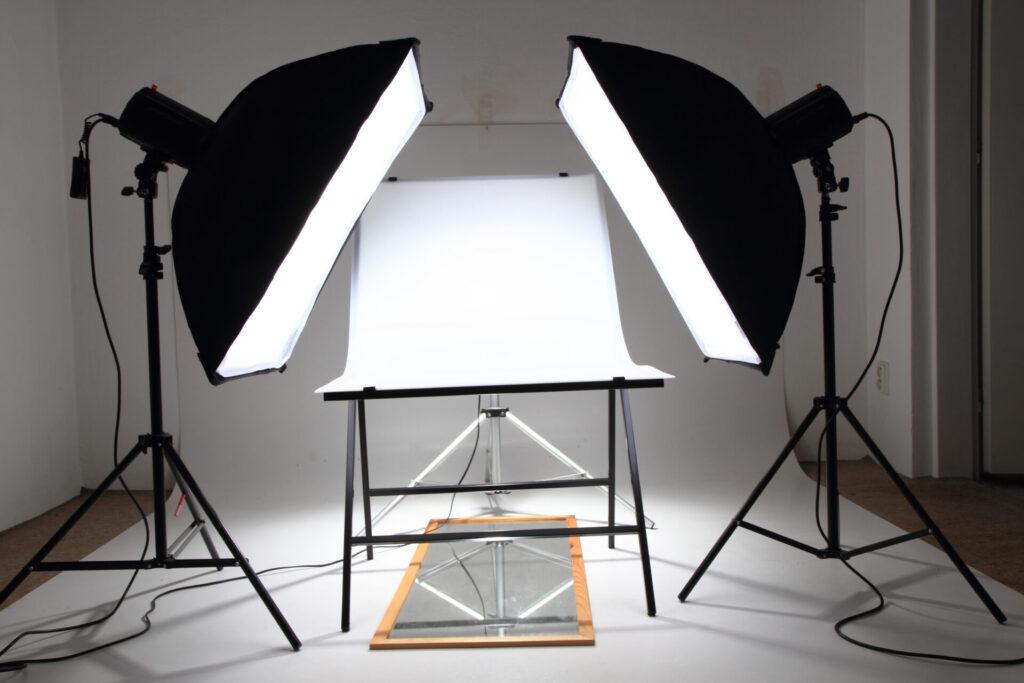
However, if budget allows, investing in studio lights is beneficial, requiring at least two softbox setups to effectively control shadows and harness artificial lighting’s full potential. With the right knowledge and equipment, mastering both lighting options can enhance your photography skills and produce stunning results.
Tripod
A tripod greatly simplifies the shooting process, offering consistency, focus, and stability essential for clear images. Without one, photos risk being blurry due to camera shake. Investing in a quality tripod, if feasible, ensures years of reliable use.
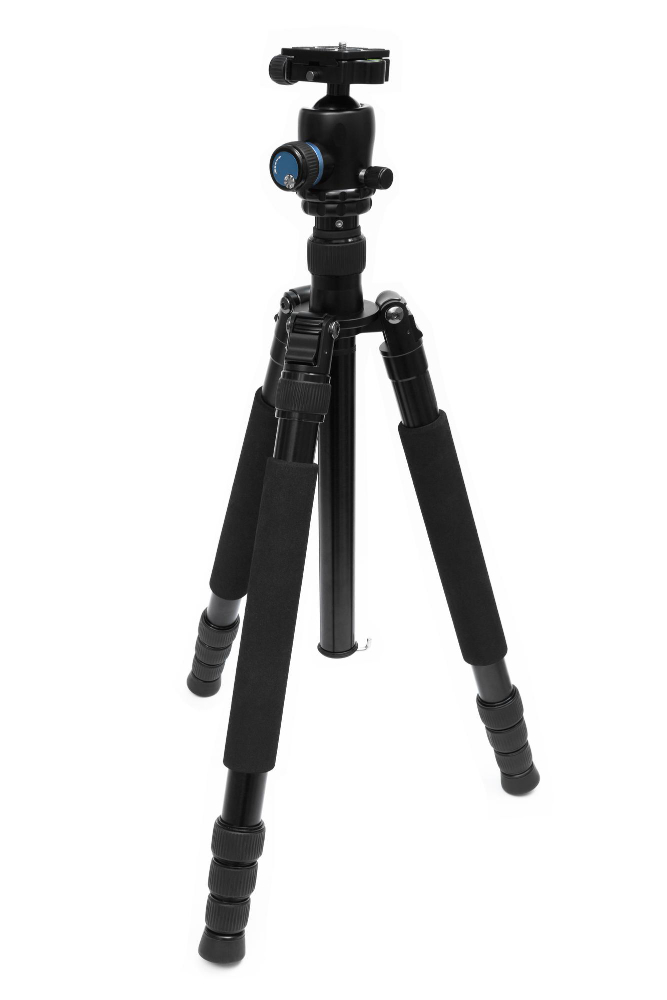
Alternatively, if budget constraints arise, improvising with items like books or a high stool can suffice to stabilize your camera. Regardless, having a stable support like a tripod is crucial for achieving sharp and crisp packshot images.
Postprocessing Software
Capturing a satisfactory raw image of the product is just the beginning of your job; the real work lies in post-processing. Retouching your images is crucial for achieving a polished, clean look that attracts customers. However, for beginners, post-processing can be daunting, as it involves tasks like background removal and color correction, which are time-consuming.

Luckily, there are numerous free photo editing applications available, including popular ones like Adobe Photoshop and Lightroom. These tools offer a range of features to help streamline the retouching process and enhance your product images effectively. With practice and experimentation, mastering these editing tools can significantly elevate the quality of your packshot photography.
Tips and Techniques
We’ve collected several tips and techniques formulated to help packshot photographers who are still starting out.
Shoot Varied Images
Don’t limit yourself to just one image per product. Consider the experience of customers in a merchandise store: they examine products closely, from every angle, and even try them on. You want to recreate this immersive experience through your images.
When taking packshots, don’t settle for just one shot. Take multiple shots to give yourself options. Sometimes, the initial shot may seem satisfactory, but you might find the fifth shot even more appealing. By capturing a variety of images, you ensure that you have the best possible representation of your product to engage and entice potential customers.
Ensure the Clarity of the Label
In packshot photography, it’s essential to ensure that product labels are clearly readable. After all, the purpose of packshots is to showcase products accurately. If labels appear unclear or blurry, the purpose of the packshot is defeated.
To highlight specific labels or noteworthy areas for your clients, consider using silhouettes or close-up shots. These techniques can draw attention to important details and ensure that your product images effectively communicate key information to potential customers.
Resize Your Image for the Website
Optimizing packshot photos involves resizing their height and width to fit inside the HTML container on a website. When viewing an image online, it’s actually displayed within an HTML container. For instance, if the container is a square of 648px and the photo inside is 1500px, the image will be displayed at 648px, but it still loads at 1500px, potentially slowing down page loading time.
To prevent slow loading times and ensure a smooth user experience, it’s crucial to resize photos according to the HTML container size. By doing so, you can avoid losing customers due to long loading times caused by oversized images on your website.
Editing Packshot Images
Editing is the final step in creating stunning packshot images. It allows you to refine your photos and address any issues that may have arisen during the shoot. Let’s explore the key editing techniques that can elevate the quality of your packshot photography.

Crop and Straighten
Cropping can dramatically alter the composition of your image, drawing the viewer’s attention to the most important elements of the product. It’s essential to consider the rule of thirds and other compositional guidelines when cropping your images.
Ensuring Alignment
Straightening your images is vital to create a professional look. Use the straighten tool in your editing software to align your product correctly, ensuring it doesn’t appear tilted or skewed.
Consistency Across Images
Consistency in cropping and alignment is critical when presenting a series of packshot images. It helps maintain a cohesive look and makes it easier for customers to compare products.
Adjust Brightness and Contrast
Adjusting brightness and contrast can help your product pop and catch the viewer’s eye. However, it’s important to find the right balance to maintain a natural look without overexposing highlights or losing detail in the shadows.
Using Histograms and Levels
Utilize histograms and levels in your editing software to make precise adjustments to the tonal range of your images. This can help ensure that you retain detail across the entire brightness spectrum of your packshot.
The Role of Curves
Curves are a powerful tool for fine-tuning brightness and contrast. They allow for more nuanced adjustments by targeting specific tonal areas, which can enhance the overall impact of your packshot.
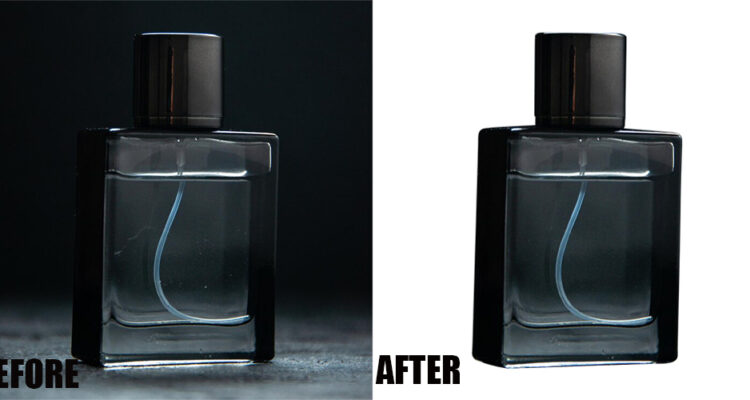
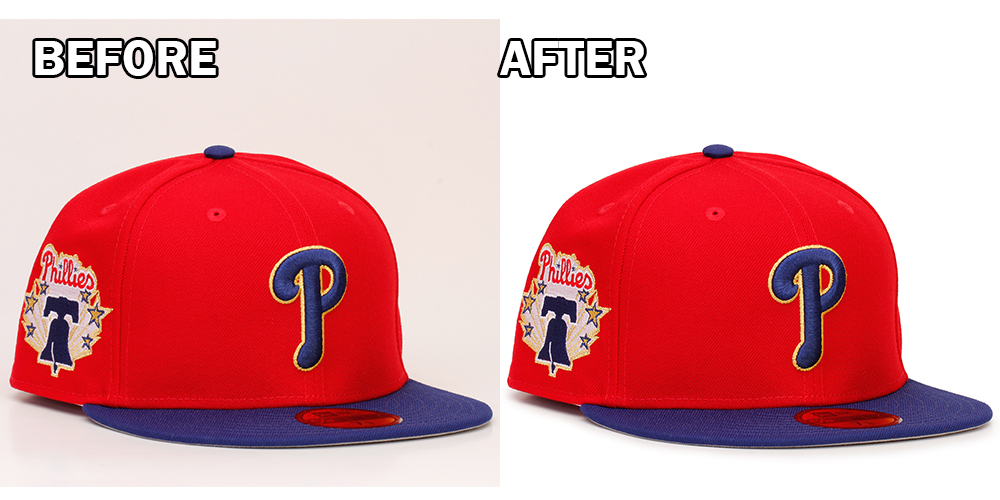
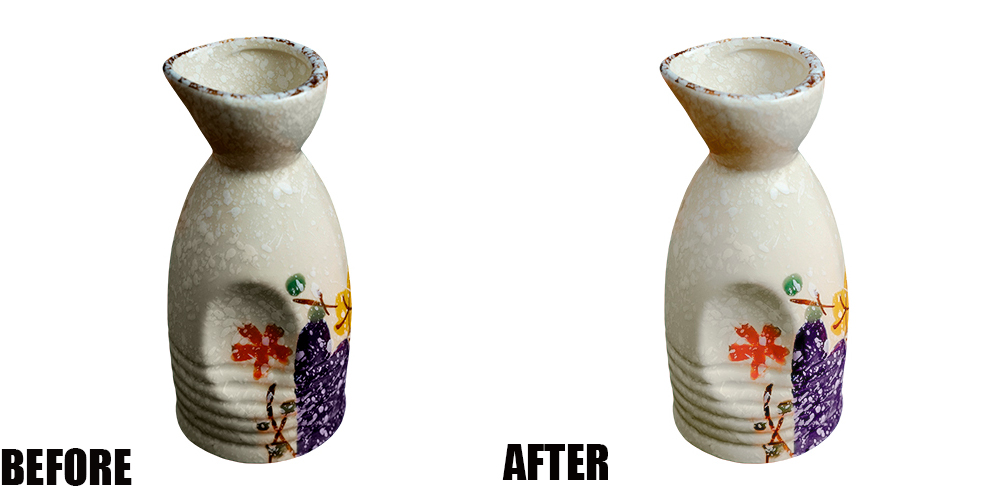
Remove Background
There are several techniques for removing backgrounds, such as using a background eraser tool or creating a clipping path. Choose the method that works best for the complexity of your product and the desired level of precision. For versatility in using your packshots across different media, consider creating images with a transparent background. This allows you to place your product on any backdrop without the need for additional editing.
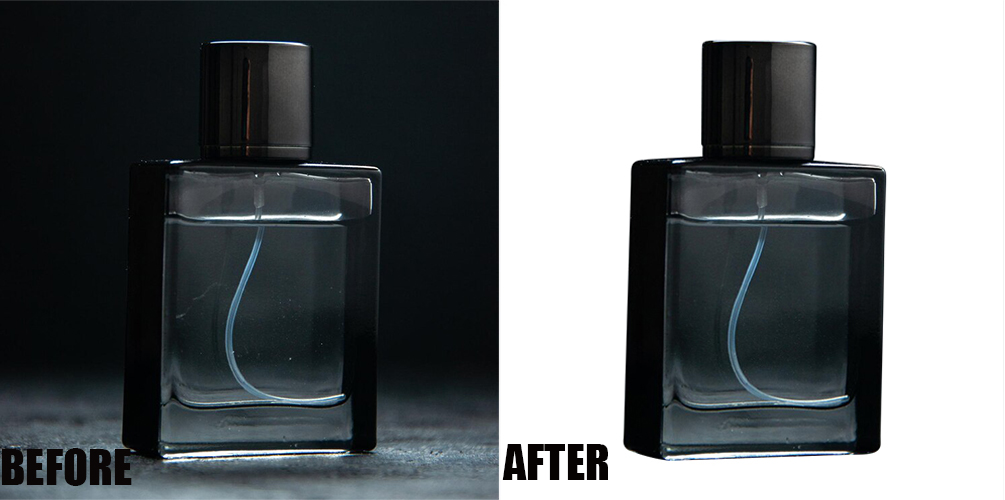
When removing the background, pay careful attention to the edges of your product. Preserve fine details and avoid a “cut-out” look by using feathering or refining edge tools in your editing software.
Color Correction
Accurate color representation is crucial in packshot photography. Customers rely on images to gauge the product’s true color, so it’s essential to correct any discrepancies that occur during the shooting process. Use tools like white balance adjustment, color balance, and selective color to correct and enhance the colors in your packshot images. These adjustments can help you achieve a more accurate and vibrant representation of your product.
Color casts can occur due to lighting conditions or reflections from surrounding objects. Identify and neutralize unwanted color casts to ensure that your product colors are consistent and true to life.
Add Shadows and Reflections
Adding shadows and reflections can give your packshots a sense of depth and realism. This can make the product appear more tangible and visually appealing to potential customers. Shadows can be added during the shooting process or in post-processing. When adding shadows in editing, consider the light source direction and intensity to create a natural-looking shadow that complements the product. Reflections can enhance the luxurious feel of a product, especially for items like jewelry or glassware. Use editing techniques to create subtle reflections that add dimension without overpowering the product itself.
Conclusion
Taking pictures of products is super important when you want to show them to people and get them interested in buying. If you want your product photos to be really good, you need to use the right techniques, tools, and editing tricks. It’s all about trying out different things and seeing what works best for your products. So, don’t be afraid to play around with different angles, lights, and editing styles until you find the perfect look. Remember, getting really good at product photography takes time and practice, so keep experimenting and learning as you go. The more you try new things, the better you’ll get at taking awesome product photos that make your business stand out.
Related Posts