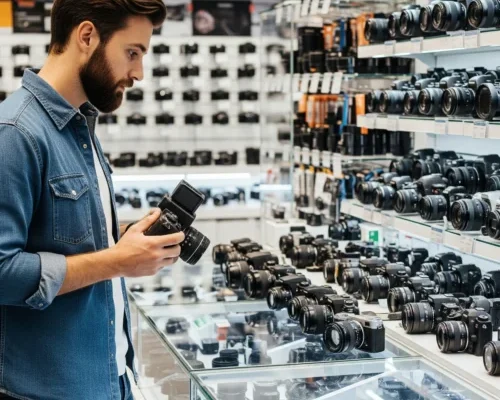
Finding your dream camera can be tricky with so many models and features out there…

Master Camera Modes for Stunning Shots
Mastering camera modes is essential for any photographer who wants to take their skills to the next level. Camera modes allow you to control the various settings of your camera, giving you the ability to create stunning shots that capture your vision. In this article, we will explore the different camera modes and provide tips on how to use them effectively.
Understanding Camera Modes: A Beginner’s Guide
Camera modes can be overwhelming for beginners, especially with the numerous options available.
Knowing the basics of each camera mode helps you use your camera better and get the results you want. The three main modes are Aperture Priority, Shutter Priority, and Manual.
When to use it: Start with Aperture Priority mode when you want to control the depth of field (area in focus). This mode is ideal for portraits, landscapes, and street photography. Use Shutter Priority mode when you want to freeze motion or blur time. This mode is perfect for capturing fast-moving subjects, such as sports or wildlife photography. Manual mode is great for creative shots that require precise control over both aperture and shutter speed. Practice these modes to understand the relationship between aperture, shutter speed, and ISO.
Additional Tips
- Experiment with different camera modes to understand their effects on your photos.
- Start with Aperture Priority mode and gradually move to Shutter Priority and Manual mode as you gain more experience.
- Practice, practice, practice! The more you practice, the more comfortable you will become with each camera mode.
Aperture Priority Mode: Control Over Depth of Field
Aperture Priority mode allows you to control the aperture (f-stop) while the camera adjusts the shutter speed. This mode is ideal for portraits, landscapes, and street photography. When using Aperture Priority mode, you can adjust the aperture to control the depth of field, which can help you achieve a professional-looking photo.
Benefits: Aperture Priority mode offers more control over the depth of field compared to automatic mode. You can create a shallow depth of field by using a low f-stop (f/2.8) or a deep depth of field by using a high f-stop (f/16). This mode is also great for capturing a specific area in focus while blurring the background.
When to use it: Use Aperture Priority mode when you want to control the depth of field. This mode is ideal for portraits, landscapes, and street photography. For example, use a low f-stop (f/2.8) to blur the background and make your subject stand out in a portrait shot.
Additional Tips
- Experiment with different f-stops to achieve the desired depth of field.
- Use a low f-stop (f/2.8) for portraits and a high f-stop (f/16) for landscapes.
- Consider using a prime lens for a shallower depth of field.
Shutter Priority Mode: Freezing Motion and Blurring Time
Shutter Priority mode allows you to control the shutter speed while the camera adjusts the aperture. This mode is ideal for capturing fast-moving subjects, such as sports or wildlife photography. When using Shutter Priority mode, you can adjust the shutter speed to freeze motion or blur time, which can help you capture unique and memorable photos.
Benefits: Shutter Priority mode offers more control over the shutter speed compared to automatic mode. You can use a fast shutter speed to freeze motion or a slow shutter speed to blur time. This mode is also great for capturing a sense of movement in your photos.
When to use it: Use Shutter Priority mode when you want to freeze motion or blur time. This mode is ideal for capturing fast-moving subjects, such as sports or wildlife photography. For example, use a fast shutter speed (1/8000th of a second) to freeze a bird in flight or a slow shutter speed (1/15th of a second) to blur the movement of a waterfall.
Additional Tips
- Experiment with different shutter speeds to achieve the desired effect.
- Use a fast shutter speed (1/8000th of a second) for capturing fast-moving subjects and a slow shutter speed (1/15th of a second) for creating a sense of movement.
- Consider using a lens with image stabilization to reduce camera shake and blur.
Manual Mode: Total Control Over Your Camera’s Settings
Manual mode gives you complete control over both aperture and shutter speed. This mode is ideal for creative shots that require precise control over both settings. When using Manual mode, you can adjust the aperture and shutter speed to achieve the desired effect, whether it’s a shallow depth of field or a blurred sense of movement.
Benefits: Manual mode offers total control over your camera’s settings, allowing you to achieve unique and creative photos. You can experiment with different aperture and shutter speed combinations to achieve the desired effect.
When to use it: Use Manual mode when you want total control over your camera’s settings. This mode is ideal for creative shots that require precise control over both aperture and shutter speed. For example, use Manual mode to create a shallow depth of field and a blurred sense of movement in a nighttime cityscape shot.
Additional Tips
- Experiment with different aperture and shutter speed combinations to achieve the desired effect.
- Start with a base aperture and shutter speed and adjust from there.
- Practice, practice, practice! Manual mode takes time and practice to master.
Program Mode: A Versatile Setting for Everyday Photography
Program Mode is a versatile setting that allows you to capture everyday photos without worrying about camera settings. This mode is ideal for point-and-shoot photography, such as capturing casual moments with friends and family.
Benefits: Program Mode is a convenient setting that allows you to capture photos without worrying about camera settings. The camera will automatically adjust the aperture and shutter speed to achieve the best possible result.
When to use it: Use Program Mode when you want to capture everyday photos without worrying about camera settings. This mode is ideal for point-and-shoot photography, such as capturing casual moments with friends and family.
Additional Tips
- Experiment with different camera angles and compositions to add creativity to your photos.
- Pay attention to lighting and try to capture the best possible light for your shots.
- Practice, practice, practice! The more you practice, the more comfortable you will become with Program Mode.
Aperture and Shutter Priority: Balancing Depth and Motion
Balancing depth and motion is key to creating stunning photos. Aperture and Shutter Priority modes can help you achieve this balance by allowing you to control the depth of field and shutter speed.
Benefits: Aperture and Shutter Priority modes can help you balance depth and motion by allowing you to control the depth of field and shutter speed. This mode is ideal for capturing fast-moving subjects and creating a sense of movement.
When to use it: Use Aperture and Shutter Priority modes when you want to balance depth and motion. This mode is ideal for capturing fast-moving subjects, such as sports or wildlife photography.
Additional Tips
- Experiment with different aperture and shutter speed combinations to achieve the desired effect.
- Pay attention to lighting and try to capture the best possible light for your shots.
- Practice, practice, practice! The more you practice, the more comfortable you will become with Aperture and Shutter Priority modes.
Overcoming Common Challenges in Master Camera Modes
Mastering camera modes can be challenging, especially for beginner photographers. Here are some common challenges and tips on how to overcome them:
- Overexposure: Make sure to check your camera’s exposure settings and adjust them accordingly.
- Underexposure: Increase the ISO or use a fill light to brighten up the scene.
- Motion blur: Use a fast shutter speed or image stabilization to reduce camera shake.
- Lack of creativity: Experiment with different camera modes and settings to add creativity to your photos.
Additional Tips
- Practice, practice, practice! The more you practice, the more comfortable you will become with camera modes.
- Experiment with different camera settings and modes to find what works best for you.
- Pay attention to lighting and try to capture the best possible light for your shots.
Tips and Tricks for Mastering Camera Modes and Improving Your Photos
Here are some additional tips and tricks to help you master camera modes and improve your photos:
- Experiment with different camera settings and modes to find what works best for you.
- Pay attention to lighting and try to capture the best possible light for your shots.
- Practice, practice, practice! The more you practice, the more comfortable you will become with camera modes.
- Consult your camera’s manual for specific settings and modes.
- Take online courses or workshops to learn more about camera modes and photography techniques.
Mastering camera modes is a crucial step in improving your photography skills. By understanding the different camera modes and practicing with them, you can create stunning photos that capture your vision. Remember to experiment with different settings and modes, pay attention to lighting, and practice, practice, practice! With time and practice, you will become a master of camera modes and be able to take your photography to the next level.
Conclusion
In conclusion, mastering camera modes is key to improving your photography skills. By learning how to use Aperture Priority, Shutter Priority, Manual, and Program modes, you can capture stunning images that reflect your vision. Remember to practice often, experiment with different settings, and pay attention to lighting. With time and effort, you’ll gain confidence and take your photography to new heights.
Read Next: 7 Simple Tricks to Boost Your Online Sales in Social Media


